The existing limitation in .NET Core 3.1 does not allow the ActiveReports Integrated Designer to be used for designing Code-based Section Reports in WinForms applications in Visual Studio.
As workaround, you need to use Visual Studio's option to link report files from .NET Core project in the .NET Framework project, and use the .NET Framework WinForms Designer.
The steps to enable design-time report creation in .NET Core project for Code-Based Section reports are as follows:
-
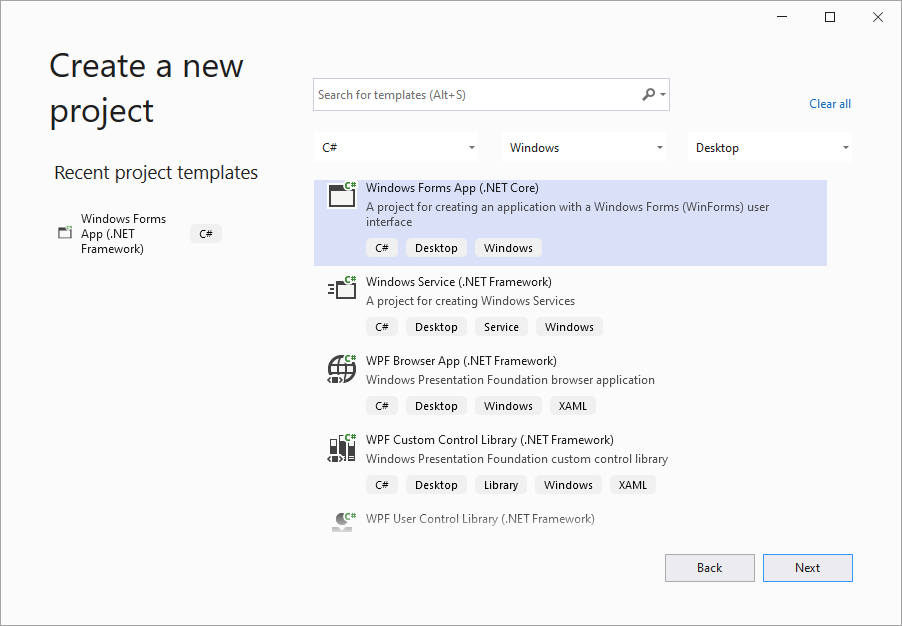
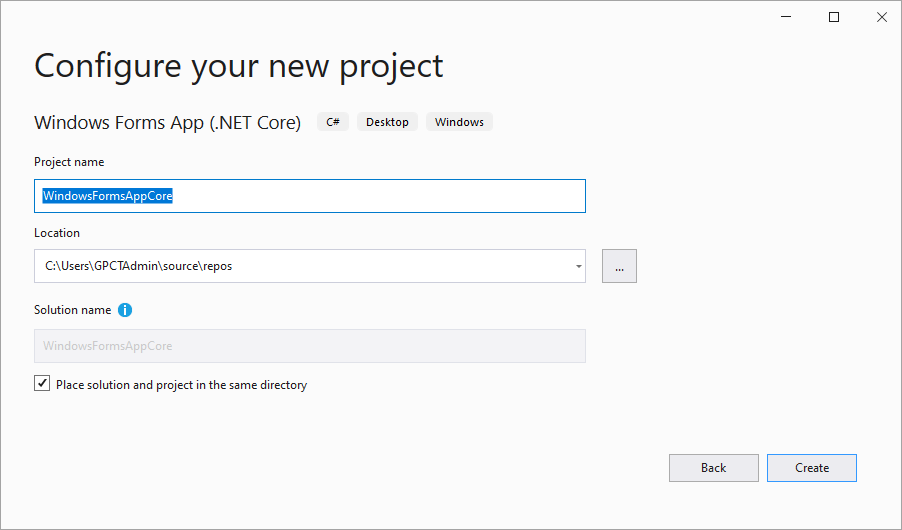
Create a new Windows Forms .NET Core project.
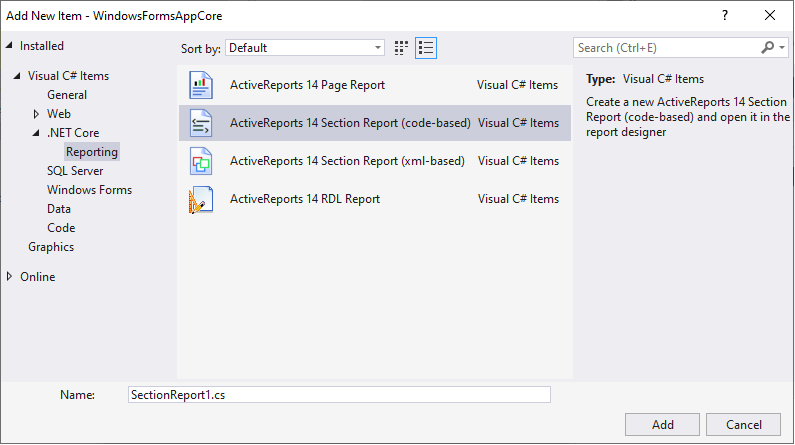
- Add the code-based section report item to the .NET Core project. To do so, right-click the project and go to Add > New Item.
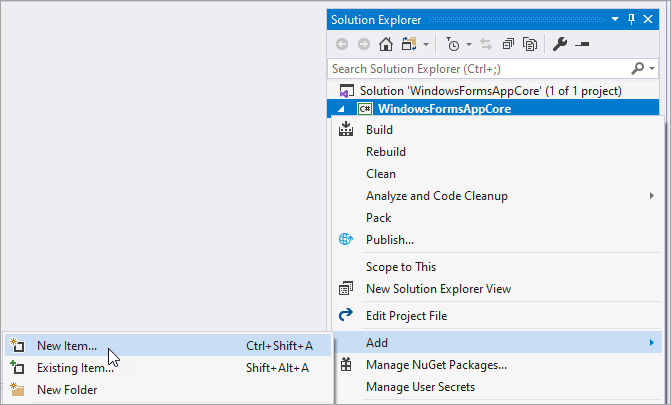
- Select ActiveReports 14 Section Report (code-based) report item. All the required dependencies will be installed automatically.
-
Add a new .NET Framework project using built-in Section Report (code-based) template.
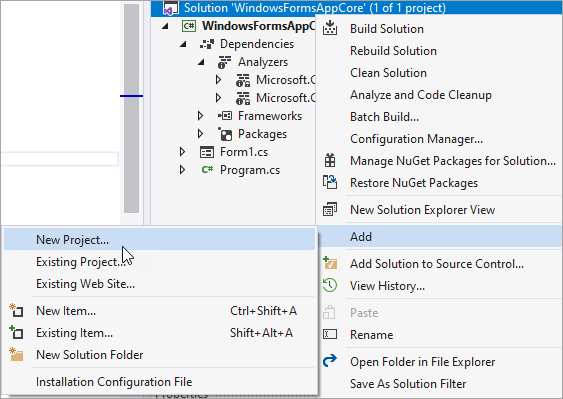
- In the Solution Explorer, right-click the solution node and go to Add > New Project.
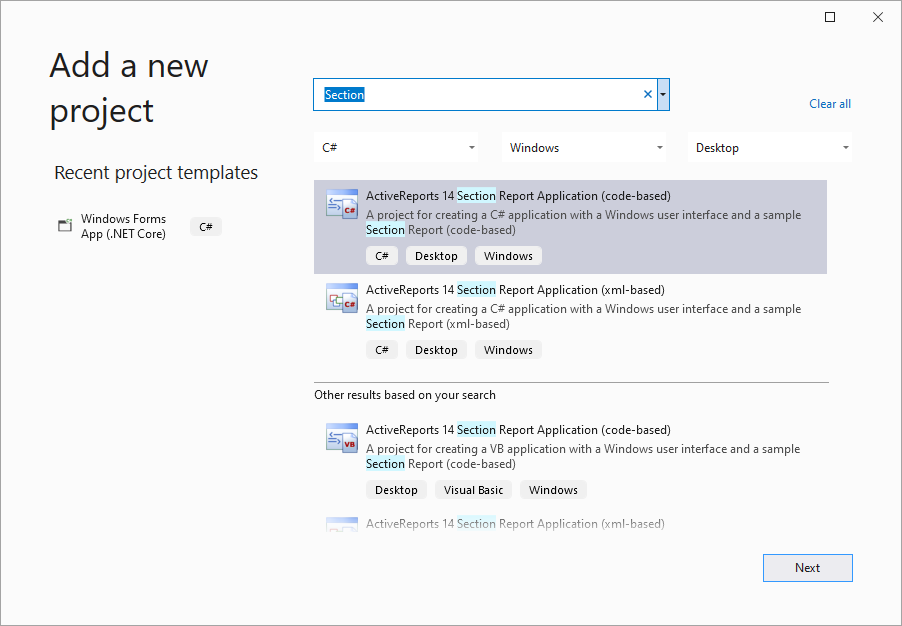
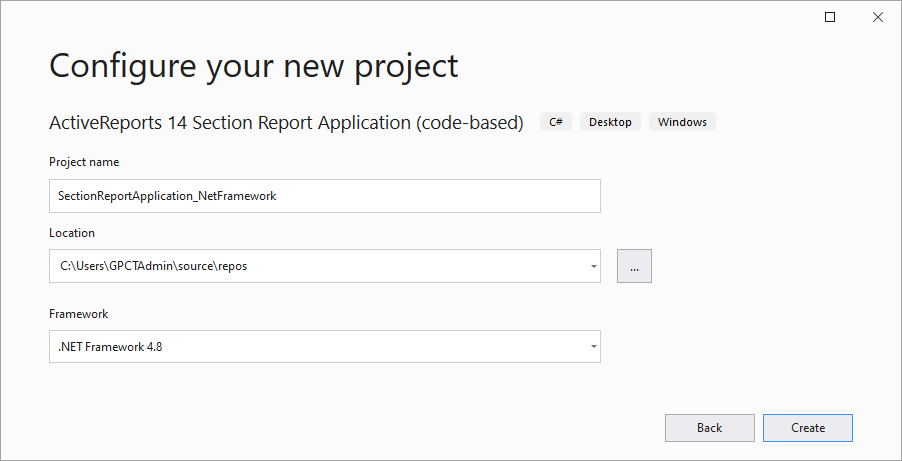
- Select ActiveReports 14 Section Report Application (code-based) template and configure the project for the target .NET Framework version.
- In the Solution Explorer, right-click the solution node and go to Add > New Project.
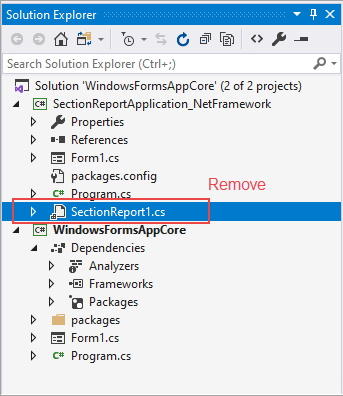
- Remove the code-based report (SectionReport1.cs) from the .NET Framework project, which was added automatically in the previous step.
-
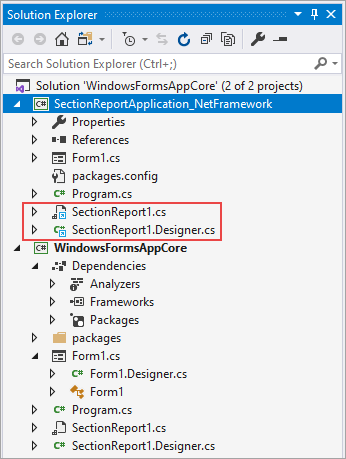
Add report from the .NET Core project to the .NET Framework project as link.
- In the Solution Explorer, right-click the .NET Framework project, go to Add > Add Existing Item.
- Navigate to the .NET Core project and select report files: 'SectionReport1.cs', 'SectionReport.Designer1.cs', and 'SectionReport1.resx'.
- Select Add As Link option to add the report files as link.

-
Update the .csproj file of the .NET Framework project.
You need to add the dependency information in the .csproj file of the .NET Framework project. The instruction to do so are as follows:
- In the Solution Explorer, right, right-click the .NET Framework project node and select Edit Project File.
- In the .csproj file that opens, find the line
<Compile Include="..\WindowsFormsAppCore\SectionReport1.Designer.cs">
and insert
<DependentUpon>SectionReport1.cs</DependentUpon>as follows:
<Compile Include="..\WindowsFormsAppCore\SectionReport1.Designer.cs">
      <Link>SectionReport1.Designer.cs</Link>
      <DependentUpon>SectionReport1.cs</DependentUpon>
</Compile>
Note: If you do not find the .csproj file, you will need to first unload the project:
1. In the Solution Explorer, right-click the .NET Framework project node and select Unload Project.
2. Again, right-click the project, select Edit projectname.csproj, and modify the project file as described before.
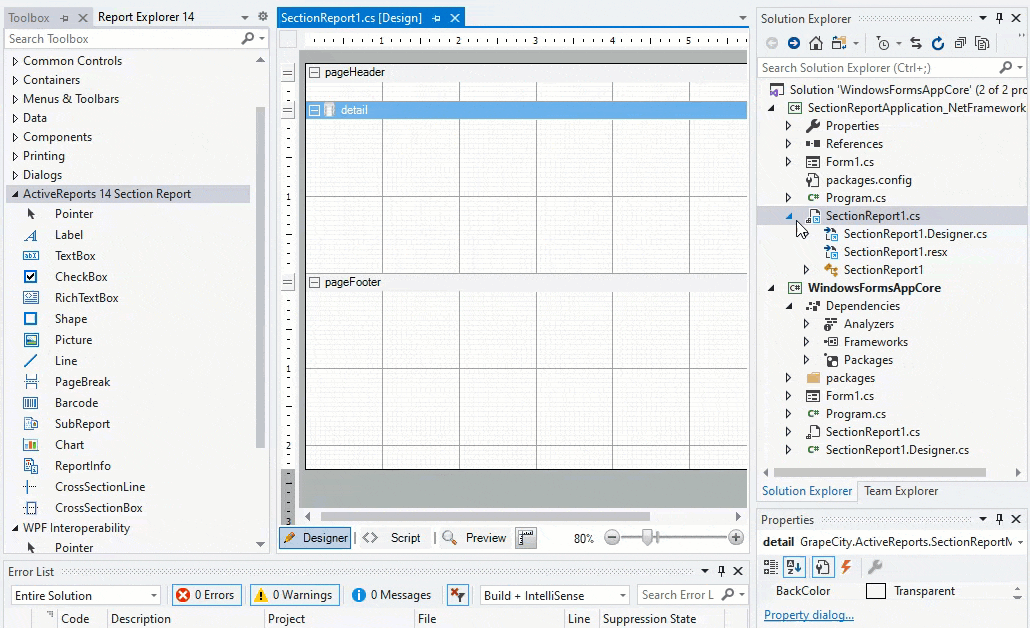
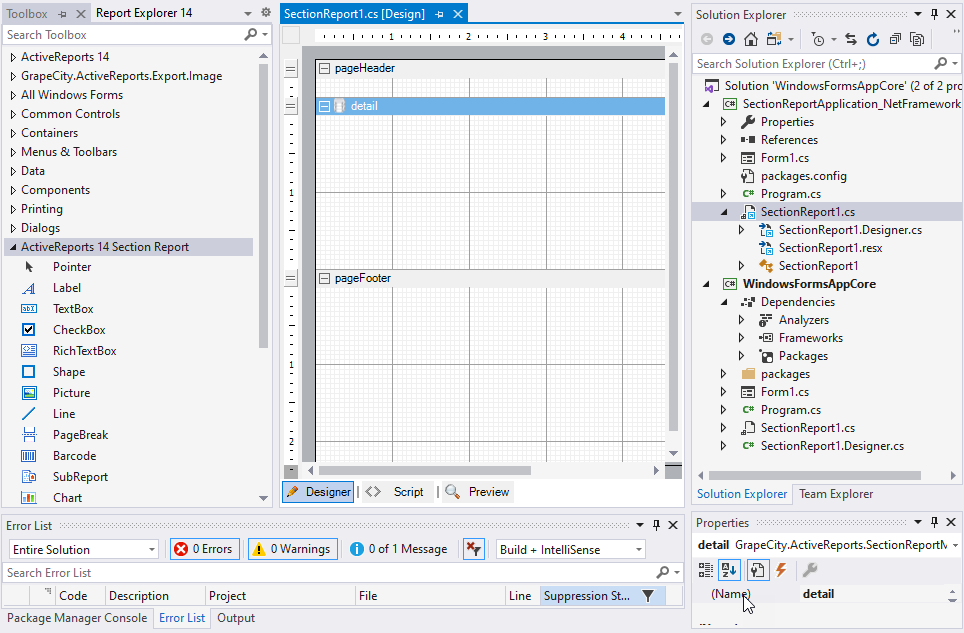
- Double-click the linked SectionReport1.cs (in .Net Framework project) to open the ActiveReports Integrated Designer for the report.
- Now design the report. The following gif shows how the modification of a report in .NET Framework project leads to modification of the report in the .NET Core project.