The following procedures illustrate how to create a drill-through link to another report containing details about the linked item.
The walkthrough is split into the following activities:
- Creating a main report
- Connecting the main report to a data source and adding a dataset
- Adding controls to the main report to contain data
- Creating a detail report
- Connecting the detail report to a data source
- Adding a dataset with a parameter
- Creating a dataset to populate the parameter values
- Adding a report parameter
- Adding controls to the detail report to contain data
- Adding a drill-through link in the main report
- Viewing the report
- This walkthrough uses tables from the Reels database. The Reels.mdb file can be downloaded from GitHub: ..\Samples14\Data\Reels.mdb.
- Although this walkthrough uses Page reports, you can also implement this using RDL reports.
When you complete this walkthrough you get a layout that looks similar to the following at run time.
Run-Time Layout (main report)

Drill-through report at design time
Run-Time Layout (detail report)
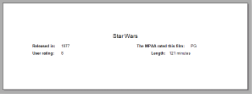
Drill-through report at run time
To create the main report
- Create a new Visual Studio project.
- From the Visual Studio Project menu, select Add New Item.
- In the Add New Item dialog that appears, select ActiveReports 14 Page Report and in the Name field, rename the file as MainReport.rdlx.
- Click the Add button to open a new page report in the designer.
To connect the main report to a data source and add a dataset
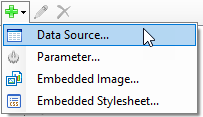
- In the Report Explorer, right-click the Data Sources node and select the Add Data Source option or select Data Source from the Add button.
- In the Report Data Source Dialog that appears, select the General page and in the Name field, enter a name like MainReportData.
- On this page, create a connection to the Reels database. See Connect to a Data Source for information on connecting to a data source.
- In the Report Explorer, right-click the data source node and select the Add Data Set option.
- In the DataSet Dialog that appears, select the General page and enter the name of the dataset as Movie. This name appears as a child node to the data source icon in the Report Explorer.
- On the Query page of this dialog, in the Query field enter the following SQL query.
SQL Query Copy CodeSELECT * FROM Movie ORDER BY MovieID ASC
- Click the Validate DataSet icon at the top right hand corner above the Query box to validate the query.

- Click OK to close the dialog. Your data set and queried fields appear as nodes in the Report Explorer.
To create a layout for the main report
- In the Visual Studio toolbox, go to the ActiveReports 14 Page Report tab and drag a TextBox control onto the design surface.
- Select the TextBox control and go to the Properties window to set the following properties.
Property Name Property Value Location 0.75in, 0.125in Font Normal, Arial, 18pt, Bold Size 5in, 0.5in TextAlign Center Value MOVIES INFORMATION - From the Visual Studio toolbox, drag a Table data region and place it on the design surface.
- Select the Table and go to the Properties window to set the following properties.
Property Name Property Value Location 0in, 1.125in FixedSize (only for Page reports) 6.5in, 7in BorderStyle Solid RepeatHeaderOnNewPage True Size 6.5in, 0.75in - In the Table data region, place your mouse over the cells of the table details row to display the field selection adorner.
-
Click the adorner to show a list of available fields from the DataSet and add the following fields to the cells of the table details row.
This automatically places an expression in the details row and simultaneously places a static label in the header row of the same column.Cell Field Left Cell MovieID Middle Cell Title Right Cell YearReleased Tip: You can also directly drag fields from the Report Explorer onto the textbox cells of the Table data region. - Select the following table rows and go to the Properties window to set their properties.
Table Header
Property Name Property Value BorderStyle Solid Font Normal, Arial, 12pt, Bold TextAlign Center Table Details
Property Name Property Value BorderStyle Solid Font Normal, Arial, 10pt, Bold TextAlign Center
To create the detail report
- From the Visual Studio Project menu, select Add New Item.
- In the Add New Item dialog that appears, select ActiveReports 14 Page Report and in the Name field, rename the file as MovieDetails.rdlx.
- Click the Add button to open a new page report in the designer.
To connect the detail report to a data source
- In the Report Explorer, right-click the Data Sources node and select the Add Data Source option or select Data Source from the Add button.
- In the Report Data Source Dialog that appears, select the General page and in the Name field, enter a name like ReportData.
- On this page, create a connection to the Reels database. See Connect to a Data Source for information on connecting to a data source.
To add a dataset to populate the parameter values
- In the Report Explorer, right-click the data source node and select the Add Data Set option.
- In the DataSet Dialog that appears, select the General page and enter the name of the dataset as MovieTitles. This name appears as a child node to the data source icon in the Report Explorer.
- On the Query page of this dialog, in the Query field enter the following SQL query.
SQL Query Copy CodeSELECT MovieID, Title FROM Movie ORDER BY Title ASC
- Click the Validate DataSet icon at the top right hand corner above the Query box to validate the query.

- Click OK to close the dialog. Your data set and queried fields appear as nodes in the Report Explorer.
To add a parameter to the report
- In the Report Explorer, select the Parameters node.
- Right-click the node and select Add Parameter to open the Report - Parameters dialog.
- Set properties in the following fields below the parameters list.
In the General tab:
- Name: MovieID
- DataType: Integer
In the Available Values tab select From query:
- DataSet: MovieTitles
- Value: MovieID
- Label: Title
- Click OK to close the dialog and add the parameter to the collection. This parameter appears under the Parameters node in the Report Explorer.
To add a dataset with a parameter
- In the Report Explorer, right-click the data source node and select the Add Data Set option.
- In the DataSet Dialog that appears, select the General page and enter the name of the dataset as MovieInfo. This name appears as a child node to the data source icon in the Report Explorer.
- On the Parameters page under Parameter Name enter MovieID.
- Under Value enter
=Parameters!MovieID.Value - On the Query page of this dialog, in the Query field enter the following SQL query.
SQL Query Copy CodeSelect * from MovieCastInformation - Click the Validate DataSet icon at the top right hand corner above the Query box to validate the query.
- Click OK to close the dialog. Your data set and queried fields appear as nodes in the Report Explorer.
- In an Page report, set the Dataset name in the FixedPage dialog > General tab to MovieInfo. For more information, see Fixed Page Dialog.
To create a layout for the detail report
- Click the gray area below the design surface to select the report.
- Go to the Properties window, expand the PageSize property and set the Width to 8.5in and Height to 3in.
- From the toolbox, drag a List control onto the design surface and in the Properties window, set the following properties:
Property Name Property Value DataSetName MovieInfo Location 0in, 0in Name MovieList Size 6.5in, 1in FixedSize (only for Page reports) 6.5in, 1in - With the List control selected, at the bottom of the Properties Window, select the Property dialog command.
- In the List dialog that appears, on the Detail Grouping page, set the Group on: Expression to
=Fields!MovieID.Value. - Click OK to close the dialog.
- From the Report Explorer, go to the MovieInfo dataset and drag the following five fields onto the MovieList data region. In the properties window, set their properties as indicated.
Title
Property Name Property Value Name MovieTitle Location 0in, 0in Size 6.5in, 0.375in TextAlign Center FontSize 14pt YearReleased
Property Name Property Value Name YearReleased Location 1in, 0.375in Size 0.75in, 0.25in TextAlign Left MPAA
Property Name Property Value Name MPAA Location 6in, 0.375in Size 0.5in, 0.25in UserRating
Property Name Property Value Name UserRating Location 1in, 0.625in Size 0.25in, 0.25in TextAlign Left Length
Property Name Property Value Name Length Location 4.75in, 0.625in Size 1.75in, 0.25in TextAlign Left Value =Fields!Length.Value & " minutes" Note: When you drag and drop fields from a dataset in the Report Explorer onto the design surface, these fields are automatically converted to Textbox controls that you can modify by setting the control properties in the Properties Window. - From the Report Explorer, drag four TextBox controls onto the MovieList data region and in the properties window, set their properties as indicated.
TextBox1
Property Name Property Value Location 0in, 0.375in Size 1in, 0.25in Name ReleaseLabel Value Released in: FontWeight Bold TextBox2
Property Name Property Value Location 3.625in, 0.375in Size 1.875in, 0.25in Name MPAALabel Value The MPAA rated this film: FontWeight Bold TextBox3
Property Name Property Value Location 0in, 0.625in Size 1in, 0.25in Name UserRatingLabel Value User rating: FontWeight Bold TextBox4
Property Name Property Value Location 4.125in, 0.625in Size 0.625in, 0.25in Name LengthLabel Value Length: FontWeight Bold
To add a drill-through link to the main report
- Switch to the Designer with the MainReport.rdlx.
- On the design surface, select the cell containing the Title field inside the table details row and at the bottom of the Properties Window, click the Property dialog command.
- In the Textbox dialog that appears, go to the Navigation page.
- Under Action, select Jump to report and set the report name MovieDetails.rdlx.
- Under Jump to report set the Name of the parameter to MovieID.
Caution: The parameter name must exactly match the parameter in the target report.
- Set the Value to
=Fields!MovieID.Value. - Click OK to close the dialog.
To view the report
Open the report in the Viewer. See Windows Forms Viewer for further information.