Deploy on Google Cloud using a Windows Environment
In This Topic
In this tutorial we will be deploying our JSViewer_MVC sample on Google Cloud platform using Google Compute Engine environment. The approach we are using to deploy the application is to create a VM Instance and then publish the application using Web Server (IIS).
Setup Google Cloud
- Sign in or create a new account on Google Cloud Platform.
- Go to the Project Selector in the Google Cloud Console and create a new Project.
Here we are naming the project as JSViewer MVC.
- Make sure that billing is enabled for your Cloud project. Learn how to check if billing is enabled on a project.
- From Console, go to the API Library and enable the 'Compute Engine API'.
Setup Visual Studio
- Open Visual Studio 2019.
- Go to Extensions > Manage Extensions.
- Search online and install Google Cloud Tools for Visual Studio.
Note: At the moment the Google Cloud Tools for Visual Studio is only supported for Visual Studio 2017 and Visual Studio 2019 which is why we will be using Visual Studio 2019.
Setup your application
- Download the JSViewer_MVC sample from our WebSamples18 GitHub repository.
- Open the application in Visual Studio and build and run the application.
- Remove the Reports folder containing links the reports from the project since we will be embedding the reports in the application.
- Now add a new folder and name it 'Reports'.
- Add all the files from JSViewerReports in the Reports folder and set the Build Action as 'Embedded Resource'.
- Run the application.
Create and configure a Compute Engine instance
- Navigate to Google Cloud Console from another browser tab or window, to https://console.cloud.google.com.
- In the Google Cloud console, go to the ASP.NET Framework Cloud Marketplace page.
- Click Launch.
- Leave the settings set to their default values and click Deploy.
Wait for the Compute Engine instance to deploy. It usually takes about 5 minutes to deploy.
- Once finished, go to Compute Engine from the menu on the top left and select VM Instances. A new virtual machine should be added in the VM Instances list.
- Open the External IP in a new browser tab. You should also see the default IIS website served from the instance.
- Now we will create a Windows user and password to access the VM Instance in Visual Studio.
- Click on RDP >Set Windows password, then make note of the username.
- Copy the new Windows password and save it somewhere secure.
- Click Close.
Deploy the application
Now that we have configured our Compute Engine Instance, we are ready to deploy our application.
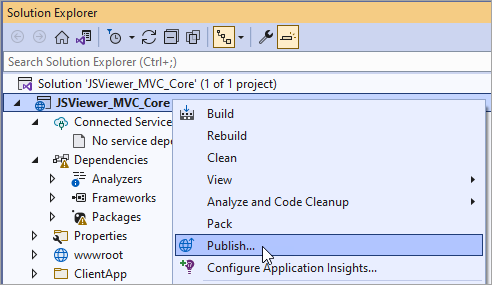
- In Visual Studio, go to Solution Explorer, right-click on your project and select Publish in the context menu.
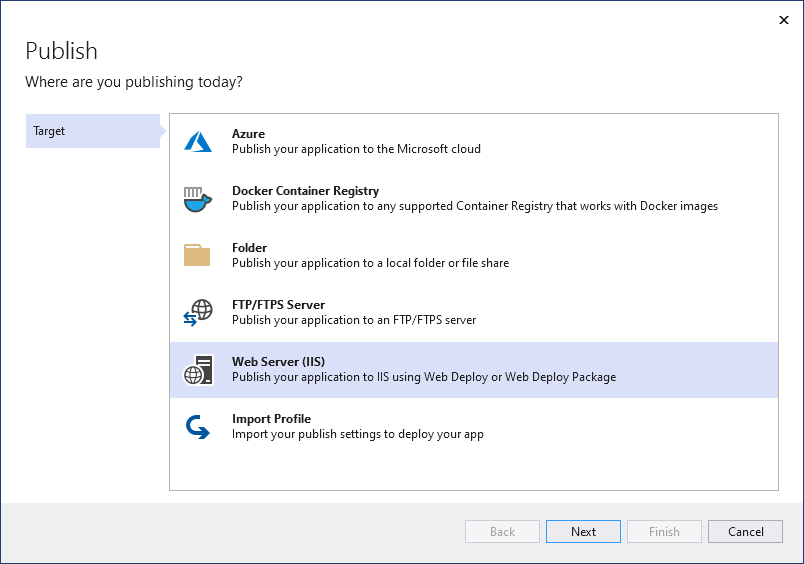
- Click on Web Server (IIS).
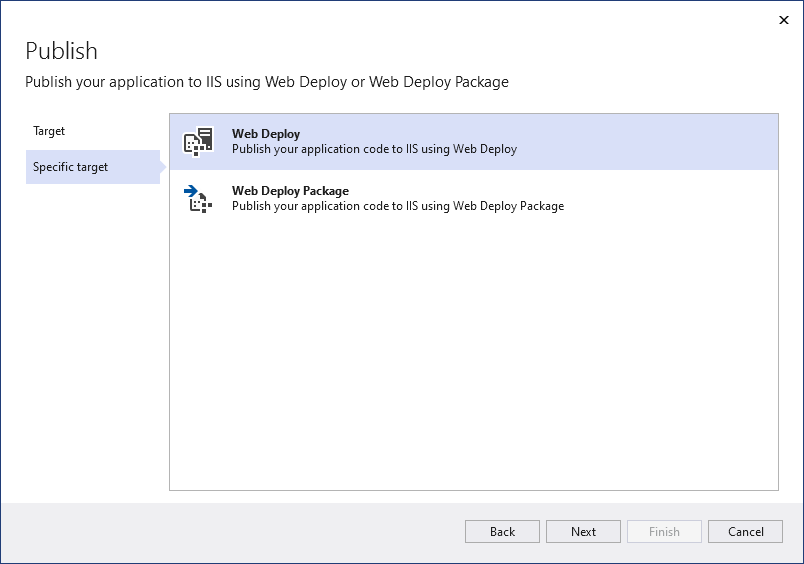
- Select Web Deploy.
- Configure the Web Server with the following details.
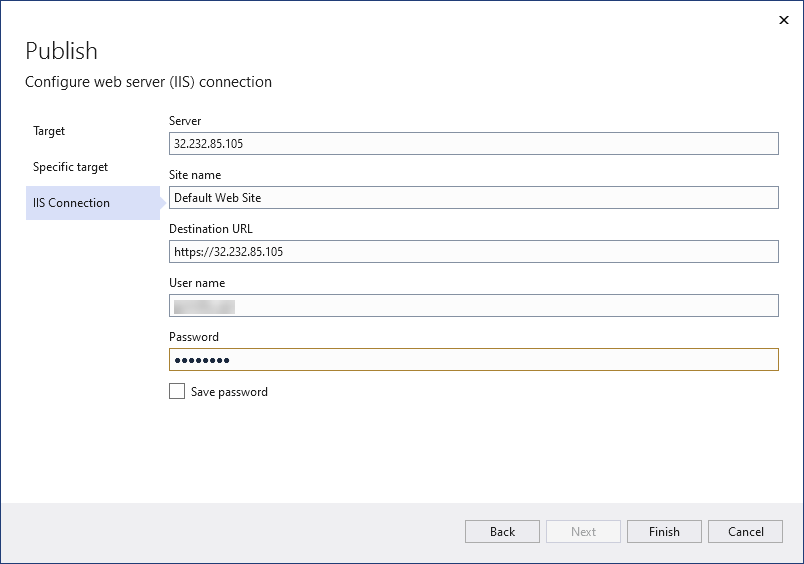
| Server |
The external IP address of your Compute Engine instance. This address can be found on the VM instances page in the Cloud Console. |
| Site Name |
Default Web Site
Note: The site name you provide here must match the name that appears in IIS Manager on your Compute Engine instance. |
| Username |
The username of the Windows user account you created on your Compute Engine instance. |
| Password |
The password of the Windows user account you created on your Compute Engine instance. |
| Destination URL |
http://... . The destination URL is the address where your page will be accessible after it is deployed. |
- Click Validate Connection.
Because the Microsoft IIS installation in your deployment uses a self-signed certificate by default, you will see a Certificate Error during the validation process. Check the box to Save this certificate for future sessions of Visual Studio, and click Accept to accept the certificate.
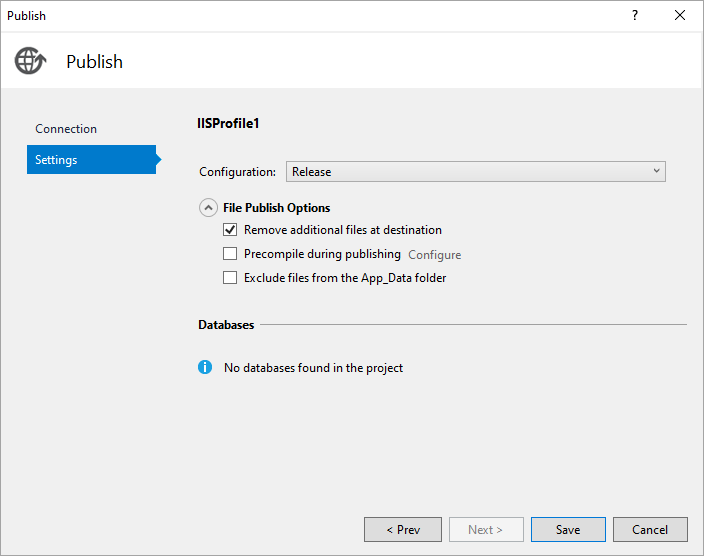
- If your configuration is valid, click Settings. Click File Publish Options, and check Remove additional files at destination. This is important for later steps when you publish new web sites to the same Compute Engine instance.
- Click Publish to deploy the application.
Clean Up
To avoid incurring charges, you can delete the instances or simply stop them, although keep in mind that stopped instances can still incur costs related to storage.
You can also delete your Cloud project to stop billing for all the resources used within that project.
- In the Cloud console, go to the Manage resources page.
- In the project list, select the project that you want to delete, and then click Delete.
- In the dialog, type the project ID, and then click Shut down to delete the project.