In a Page report and RDLX report, you can set grouping to organize data in your reports. The most common grouping scenario is to create groups by fields or expressions in a data region.
Depending on the data region you select, you can group data in one of the following ways:
In a Page report, you can group your data on the fixed page. A group set on the fixed page, applies to the entire report including the controls within the report. Therefore, once you set grouping here, you may decide not to group individual data regions. See Page Report topic for more information on properties available for grouping data.
Use the following steps to understand how to apply grouping on a fixed page. These steps assume that you have already added a Page report template, connected it to a data source and created a dataset.
=Fields!YearReleased.Value.
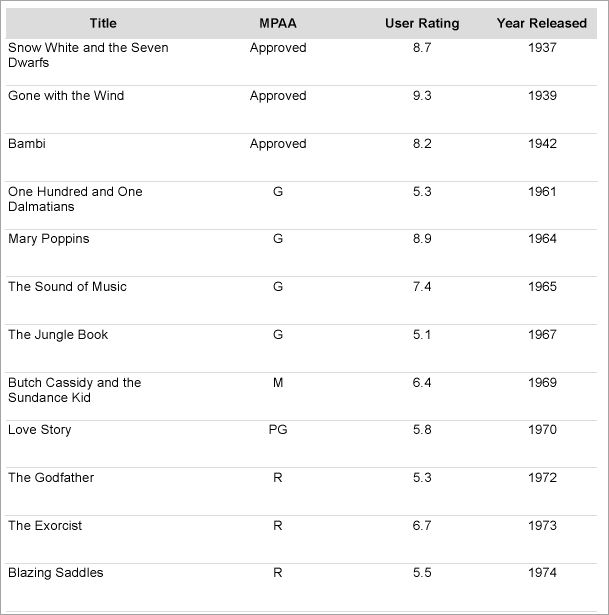
Detail grouping is available in the List and Table data regions. It is useful when you do not want to repeat values within the details. When you set detail grouping, the value repeats for each distinct result of the grouping expression instead of each row of data.
For example, in Table topic, if you do not set detail grouping, you see each year as many times as there are movies from that year.
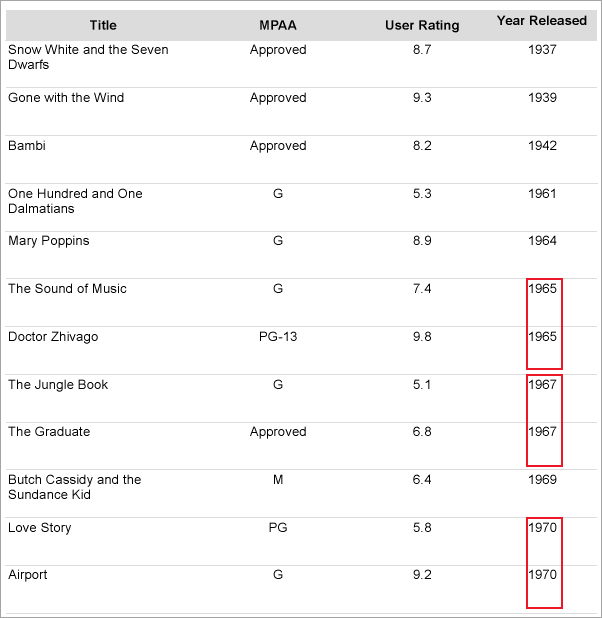
If you set detail grouping to =Fields!YearReleased.Value, each year appears only once.
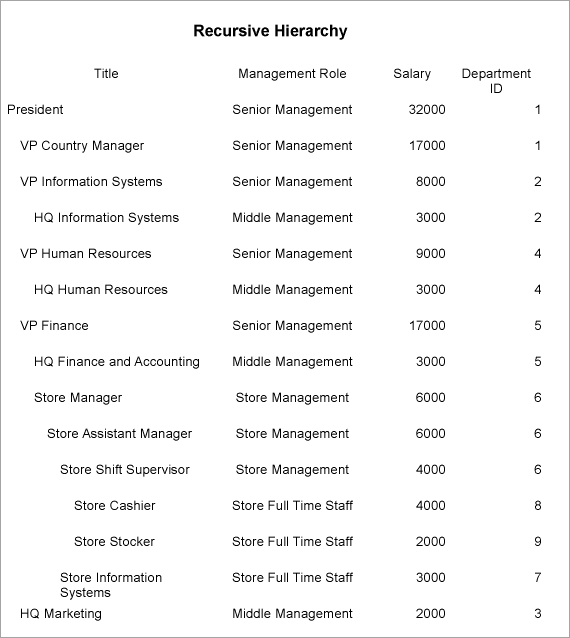
If you want to display parent-child relationships in your data, you can create a recursive hierarchy. To do this, you need a unique ID field for the child group and an ID field for the parent group.
For example, if you have pulled data from the Reels database using the following SQL query:
| SQL Query |
Copy Code
|
|---|---|
| SELECT EmployeePosition.*, Employee.*, Employee_1.PositionID AS ManagerPosition FROM Employee AS Employee_1 RIGHT JOIN (EmployeePosition INNER JOIN Employee ON EmployeePosition.PositionID = Employee.PositionID) ON Employee_1.EmployeeID = Employee.ManagementID; | |
You can set Detail Grouping in a Table data region using the =Fields.Item("EmployeePosition.PositionID").Value field, and the =Fields!ManagerPosition.Value field as the parent group to display parent-child relationships in your data. To view the hierarchy level, add another column in the table and add expression =Level().
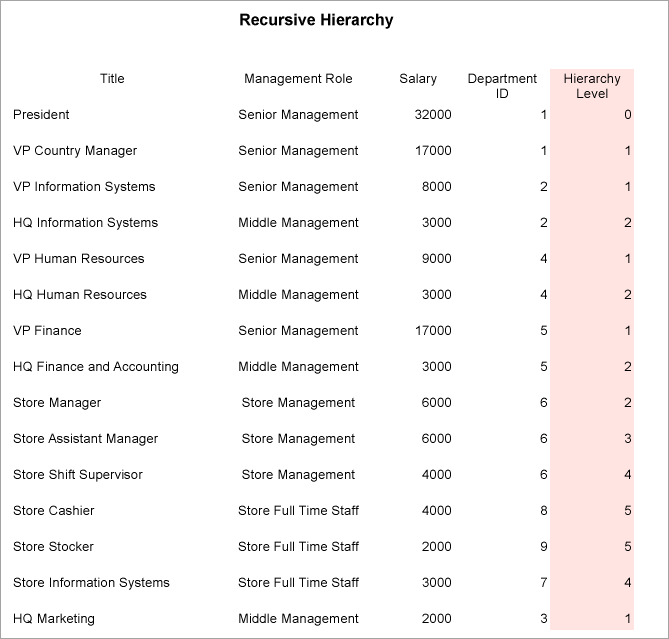
To better visualize data in a recursive hierarchy, you can use the Level function, which indents text and further clarifies the relationships between parent and child data. To do this, you set an expression in the Padding - Left property of the text box you want to indent.
For example, in a Table data region, for the recursive hierarchy example above, you can set the following expression in the Padding - Left property of the text box that contains the 'Title' to indent values according to levels:
=Convert.ToString(2 + (Level()*10)) & "pt"