Create MVC Apps Faster with Control Wizard
 Most of the time, when we begin writing our MVC app, we start writing CRUD operations. These CRUD operations are then wired into some views or component like FlexGrid, which then manage data binding internally. Most of the time, this process is so mechanical and repetitive that you may wish that there was a tool to do this automatically for your controls.
This is where the ComponentOne (C1) Scaffolder comes into play. You can learn more about the scaffolder control wizard in this video demo.
With the ComponentOne scaffolder, you can do a lot more than just traditional data binding. Visual Studio has an inbuilt scaffolder wizard, but it is limited to generate views with only basic HTML support.
Control Wizard Extension
In order to provide developers with a better development experience, we have updated our Control Wizard extension. This will allow you to add and modify ComponentOne controls in your project without writing a single line of code.
The following are the key features of this Visual Studio add-on:
Automatically adds resources and references for ComponentOne controls when a project is created with Visual Studio project template
Changes Web.config with updated entries
In ASP.NET Core applications, it gives a message to add a license using GrapeCity License Manager
In ASP.NET Framework licenses.licx entries are added/updated
Supports most of the ComponentOne MVC controls, including OLAP, Tab, and Dashboard Layout
Updates ComponentOne Controls without writing code
Data Binding support with EF 6, EF Core Models, OData and Remote Data Binding
Supports .NET Framework and .NET Core
Supports C# and VB projects
Supports Razor Pages
To follow along in this tutorial, you'll need to have ComponentOne MVC Edition 2019v1 installed.
How to use the Control Wizard
Let’s start by creating a blank ASP.NET MVC Framework application in Visual Studio 2017. You can start with an MVC Page Core application as well. For our example, let’s try to create a grid bounded to an Entity Framework Model, with features like adding a row, deleting a row, allowing filter and paging.
Assuming that your application has EF Model generated inside it. Open a view and right-click on it.
A context menu would open.
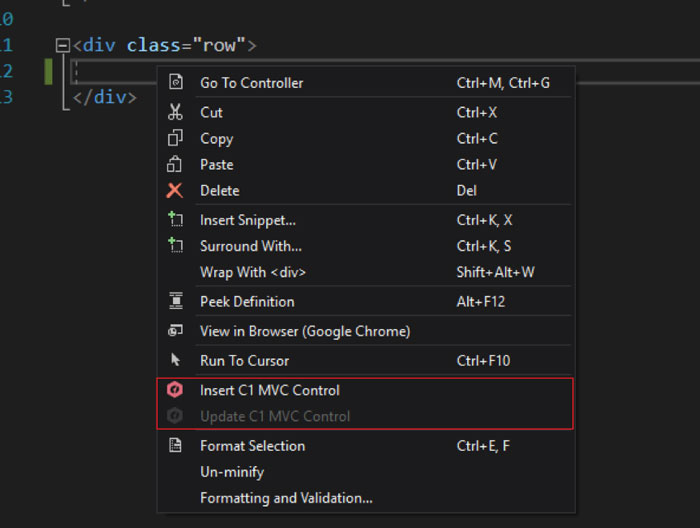
This context menu contains two options:
Insert C1 MVC Control and Update C1 MVC Control.
Since your current cursor is not pointing to a C1 Control option, ‘Update C1 MVC Control’ is disabled. Clicking on ‘Insert’ would display a C1 MVC Scaffolder wizard. You can choose any of the numerous C1 MVC controls provided by us.
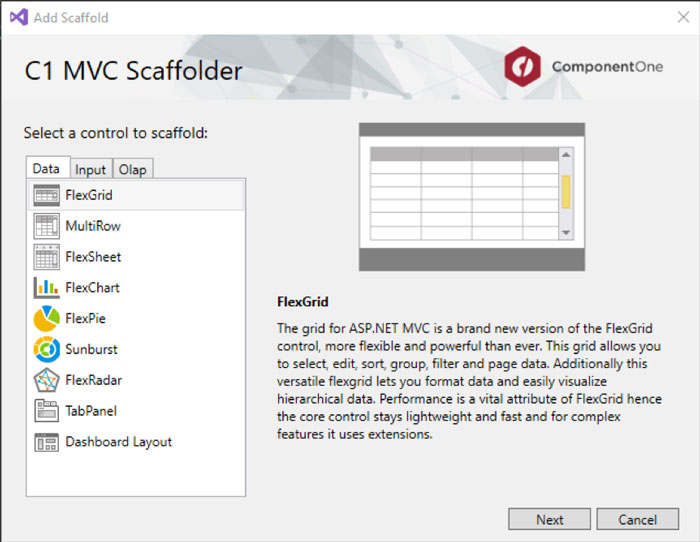
For this walkthrough, we'll be selecting FlexGrid. FlexGrid has numerous properties that are categorized into different groups (like Editing and Grouping).

You can bind FlexGrid with either Collection View or OData. Collection View supports binding grid with Entity Framework. To bind EF 6 data models with FlexGrid, we'll select “Collection View” as Binding Source, and check the ‘In Bound Mode’ checkbox in Data Bindings section. This will then enable Model/Data Context and Read Action and fill these fields like I have done below:
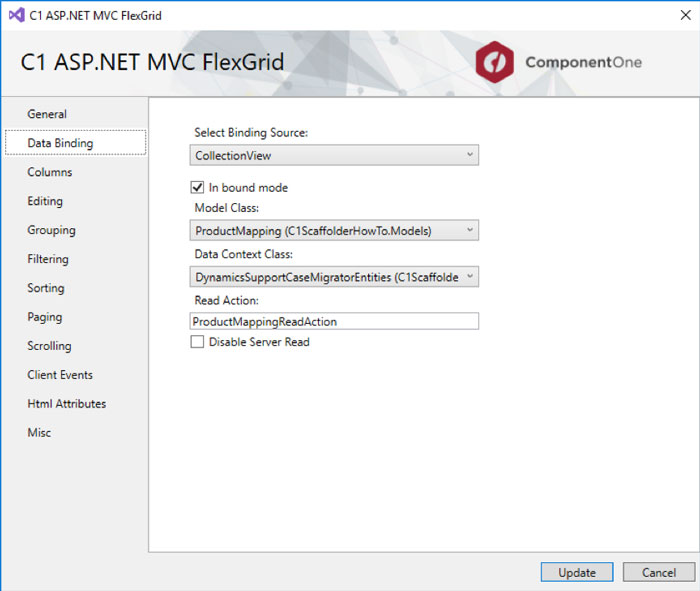
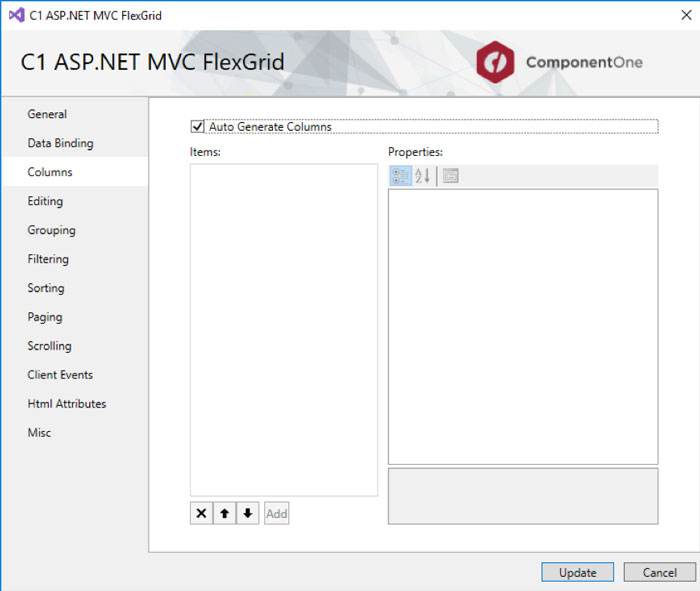
Once you have set the binding with Collection View, you will see that ‘Columns’ section is now filled with Items from your model. You can modify your column’s properties over here.
Alternatively, to bind OData with FlexGrid, first we'll select “OData Collection View” as Binding Source and fill the relevant fields like below:
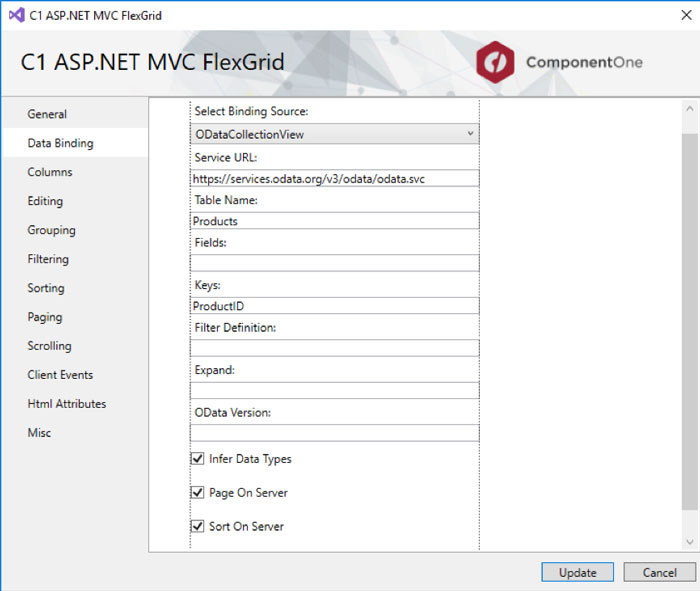
Once you have set the binding you should check “Auto generate column” to fill the columns.
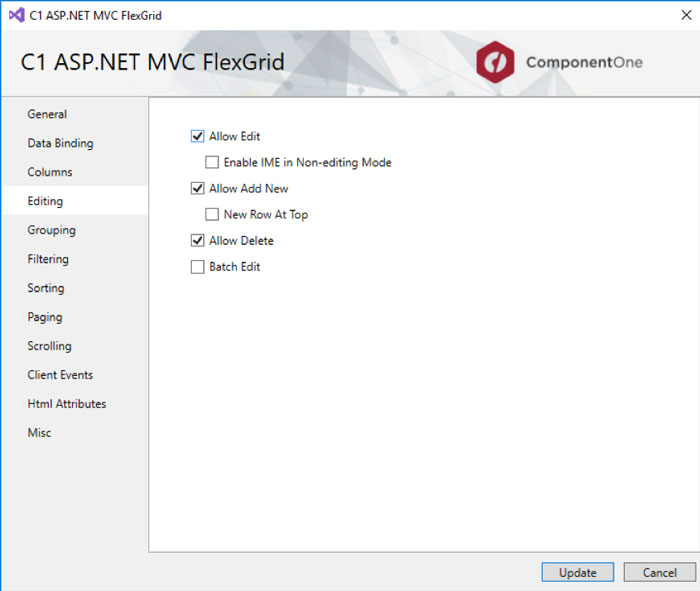
We'll then move to the ‘Editing’ section where we'll enable editing/adding new row/deleting a row with three simple clicks.
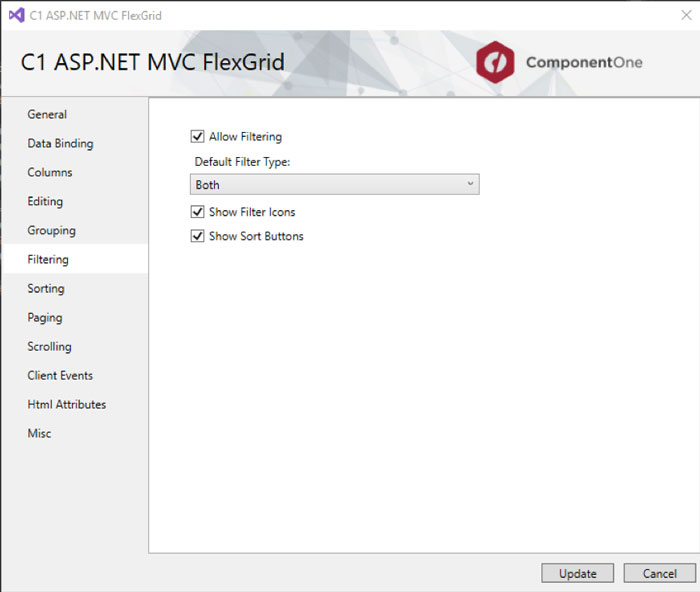
The next step is to allow filtering, which is in the ‘Filtering’ section:
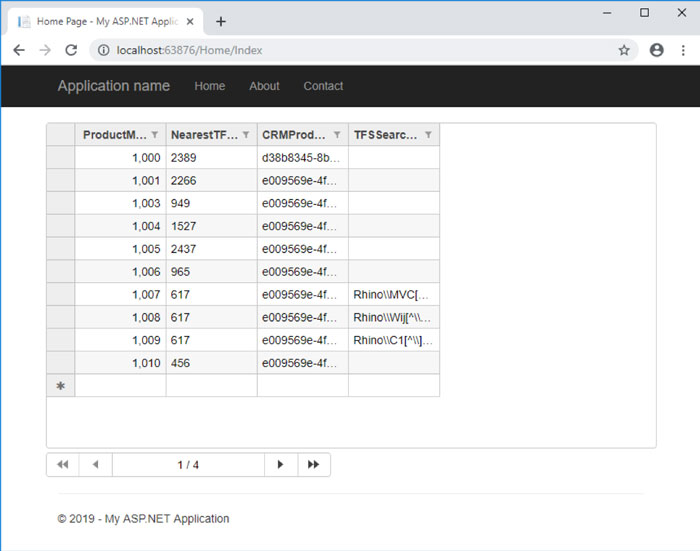
The final step for us is to allow paging. With a Paging section, I can allow paging, decide what page size should be, and what page index we want show by default. By enabling paging, we are also adding a page navigator below the grid.
When we run this program, you can see how accessible this grid is without having to write a single line of code.
We haven’t added any reference to C1 builds in our project, the wizard adds the required resources automatically.
You can see the amount of code you have just added to your project without actually writing it.
1. Resources 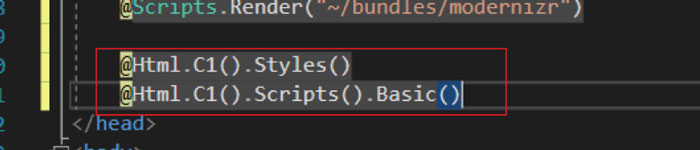
2. Web Config 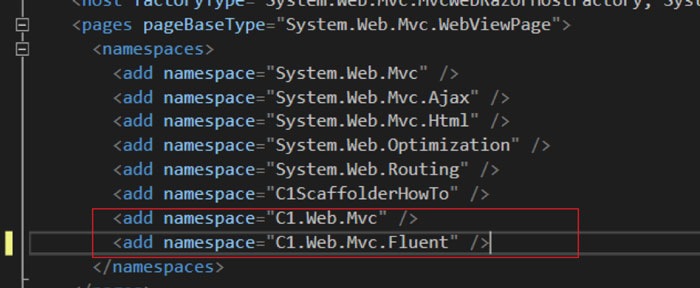
3. Controller 
4. View 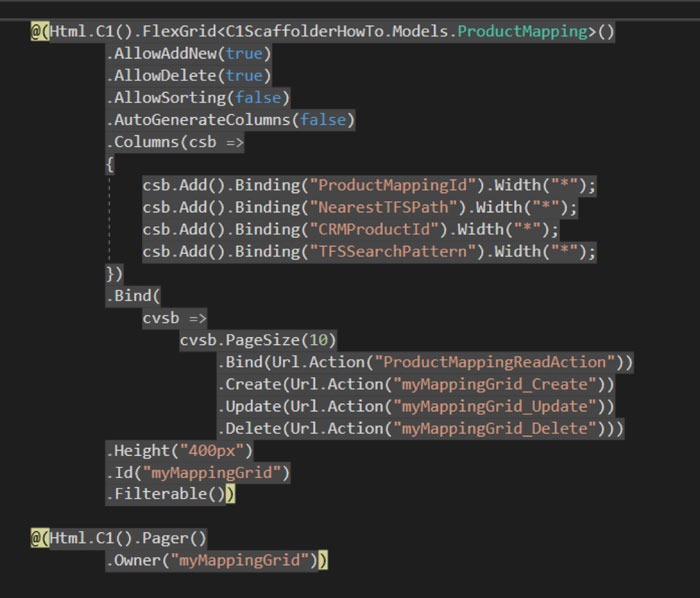
5. Licensing & DLL reference 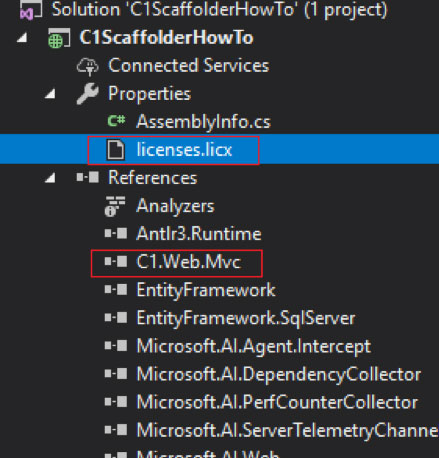
Wait, this isn’t all of it. In this grid, notice that that the columns are not filling the grid? I must have not set that size property of columns initially.
So, what can I do now? In almost every other scaffolder, scaffolding is supported only to generate new views. With C1 Scaffolder, you can also edit an existing control. To do this, all you have to do is to right-click on your syntax and select Update C1 MVC Control. The scaffolder will open again with all the existing properties set for the grid.
Now I can change the width property of every column to ‘*’ so that all the columns are resized. Now when I run my application, the columns are now filling the grid.
The Control Wizard's Future
For razor pages, we haven’t added support to update C1 controls yet. We are planning to provide this by the next release. In this release, all features are supported for ASP.NET MVC Framework and Core MVC applications.
If you have any questions, comments or issues related to this tutorial, please leave in the comments below.

Nilay Vishwakarma