How to Create a Bill of Sale Form Using WinForms InputPanel
InputPanel is a popular WinForms component that functions as a full-featured data-entry form. Multiple input components are managed by InputPanel, which controls their design, layout, appearance, and behavior to create a powerful data input application.
All C1InputPanel input components have a common set of styles, properties, methods, and events that make programming tasks easier and more consistent. This simple setup combined with low maintenance helps increase productivity.
The InputPanel control provides an InputGridPanel component that you can use to place child controls in the form of rows and columns. It automatically arranges dependent components not to overlap or are skewed when resizing.
A grid with rows and columns can contain any form elements and looks like cells of different sizes and can also be merged. You can learn more about the InputGridPanel from the documentation here.
To demonstrate how to utilize the InputGridPanel in the application, let's take the use case to create a bill of sales of any product with seller's and buyer's details. It also showcases how you can put validation on the input fields with the help of certain events.
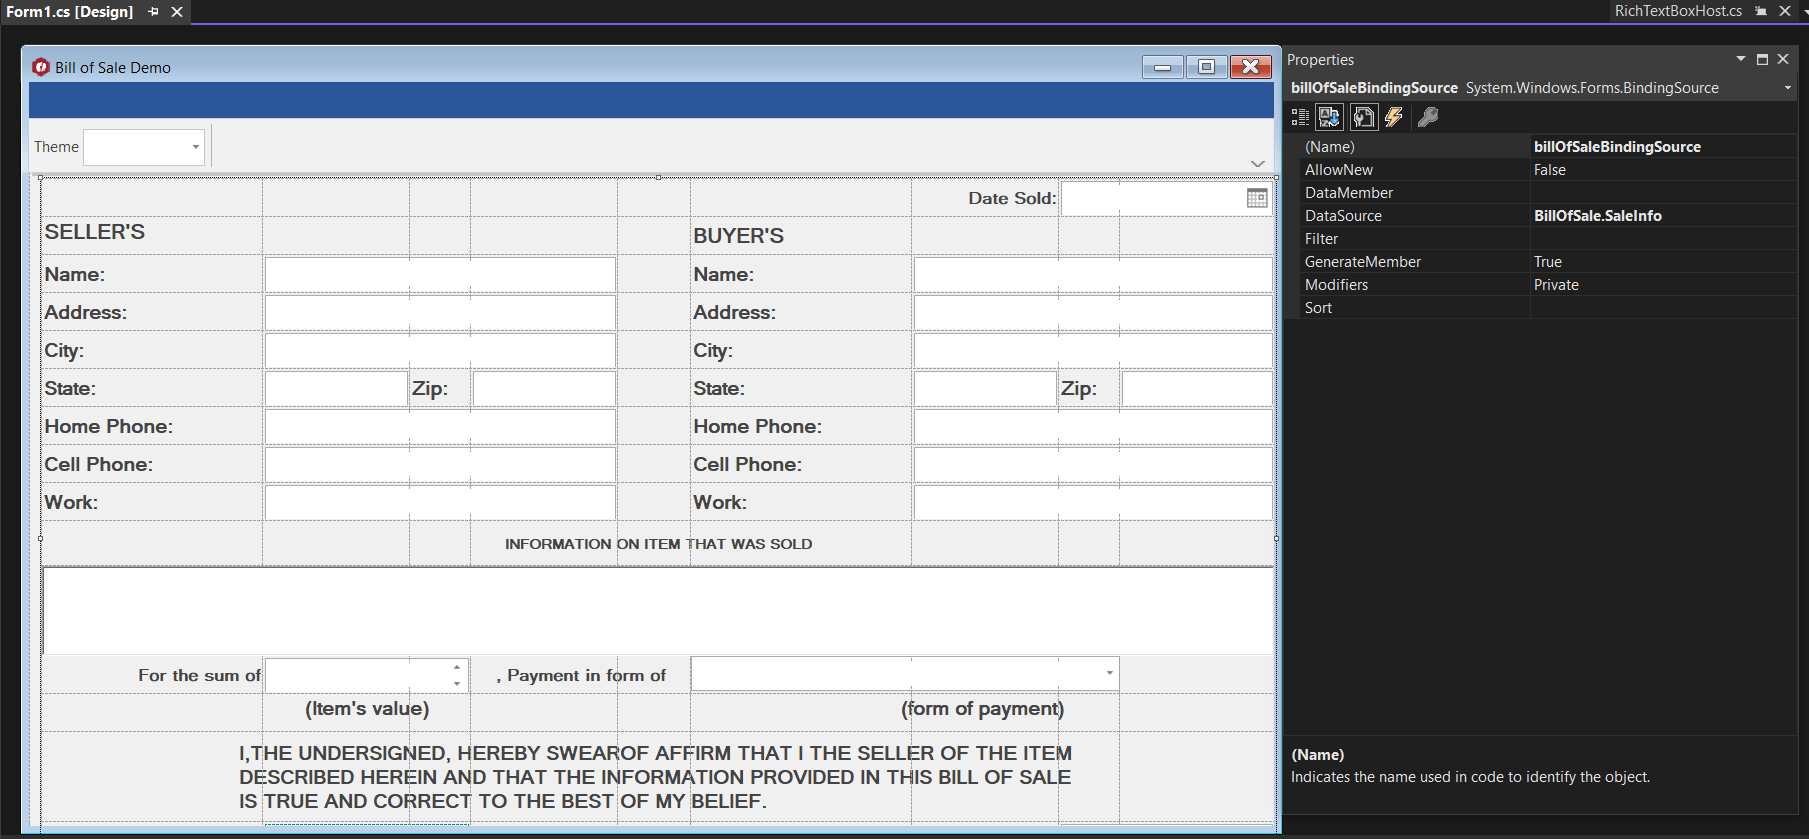
At the end of the implementation, you will see the final output form that consists of both the buyer and seller data with product information as below:

To implement the use case, the blog has been divided into three significant steps as below:
- Create a Layout using the Windows Form Designer
- Bind the C1InputPanel controls to Data Source
- Add validations to the input components
Create a Layout Using the Windows Form Designer
ComponentOne C1InputPanel is a Windows Forms-based control. To use the C1InputPanel control, you must first create a Windows Forms application and design your sales form using the InputGridPanel Element Collection option in the designer as follows:
1. Create a New WindowsForms Application and Add the InputPanel Control
If you have installed the ComponentOne WinForms suite in your system, you must see the C1InputPanel control in your toolbox, and you can drag-drop the C1InputPanel control from the Visual Studio Toolbox to your window form.
If the ComponentOne product is not installed in your system, then you need to add the following package from the NuGet Package Manager to get the control in your toolbox.

2. Add the InputGridPanel Layout
To add the InputGridPanel component to the C1InputPanel control, use the Add New Item option under the Smart button menu on the right top side of the control.
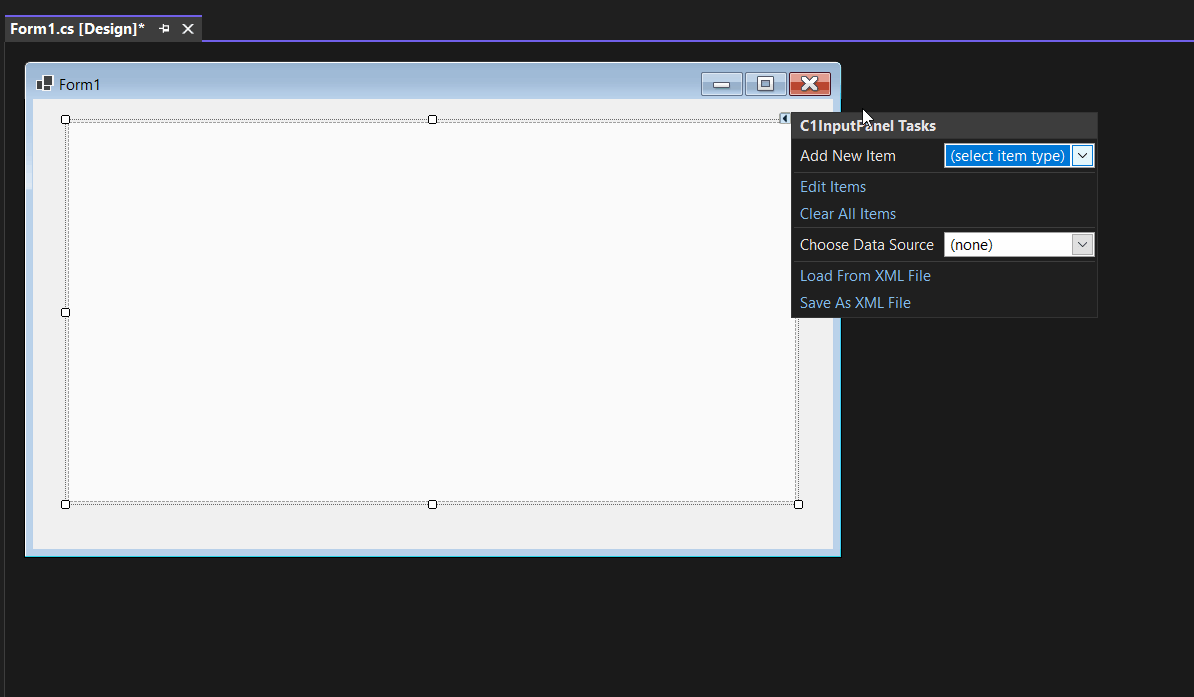
You can also open the C1InputPanel Item Collection Editor by clicking the ellipses on the Items property of C1InputPanel from the Property window.
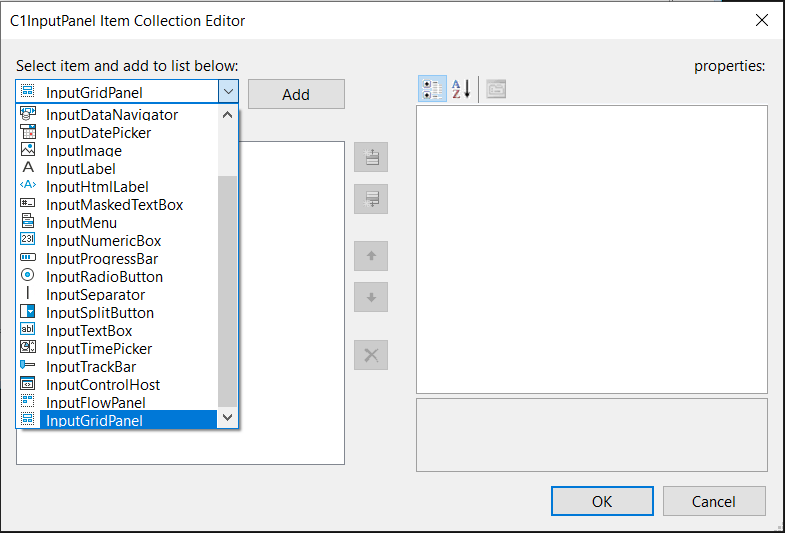
3. Add Items to the InputGridPanel Layout
The next step is to add the items to your InputGridPanel layout to input the data through the Item Collection Editor at design time. You can use this Collection Editor to add, remove, or edit elements in the InputGridPanel layout.
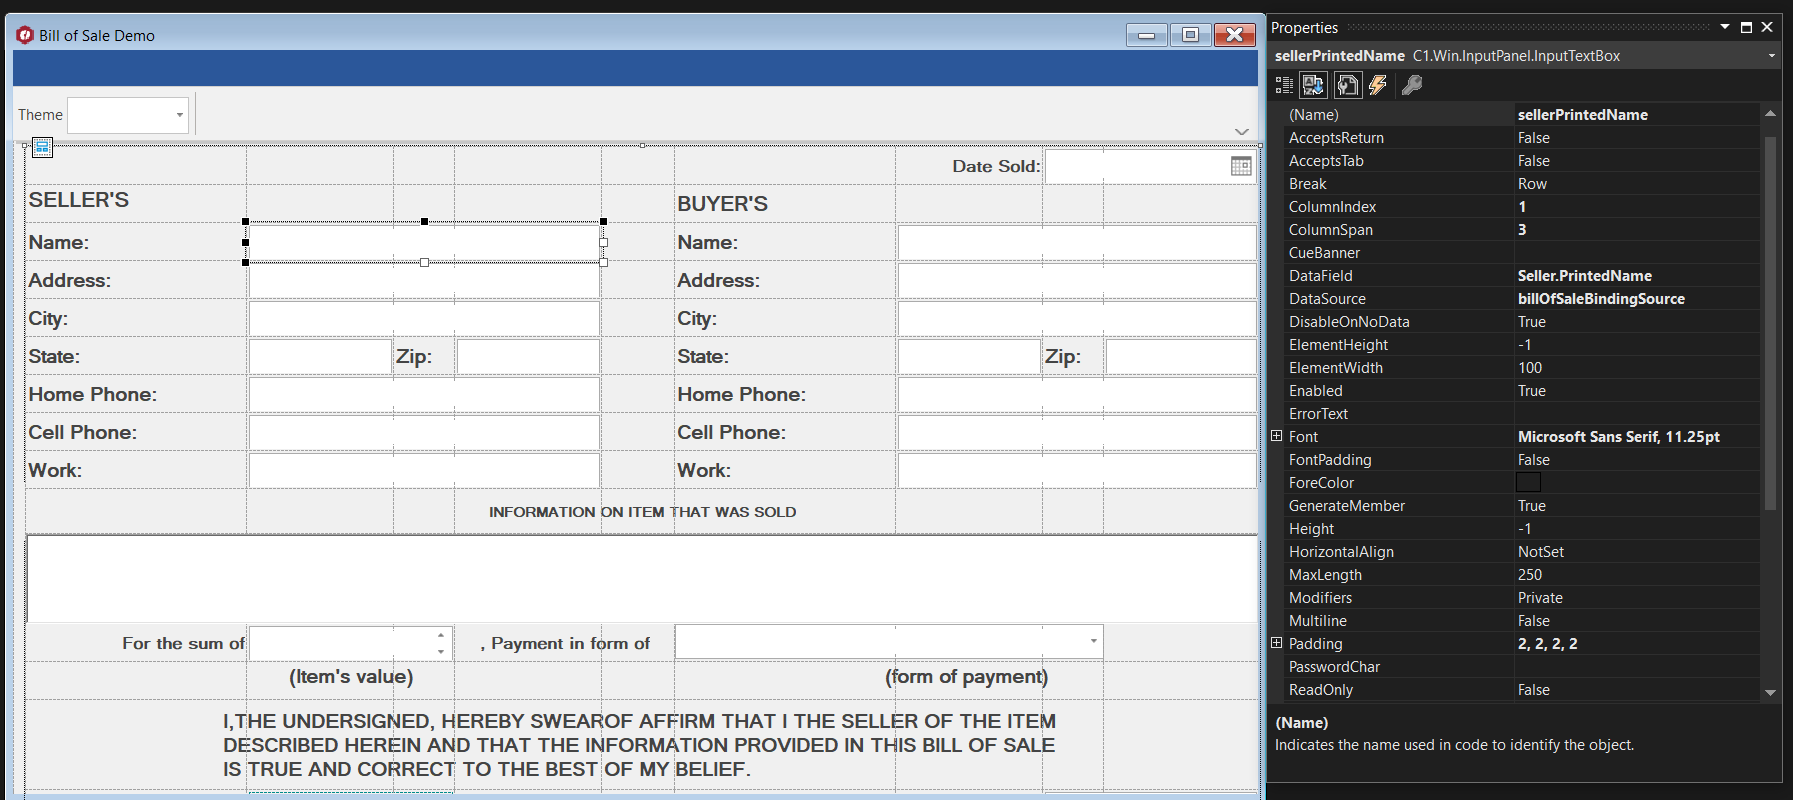
To launch the InputGridPanel Item Collection Editor, select the InputGridPanel layout on the form and click the ellipsis next to Elements in the Properties window.

You can see the following GIF to see how you can design the Seller section by setting the ColumnIndex, ColumnSpan, RowIndex,and RowSpan properties accordingly. Similarly, you can do it for the Buyer section.
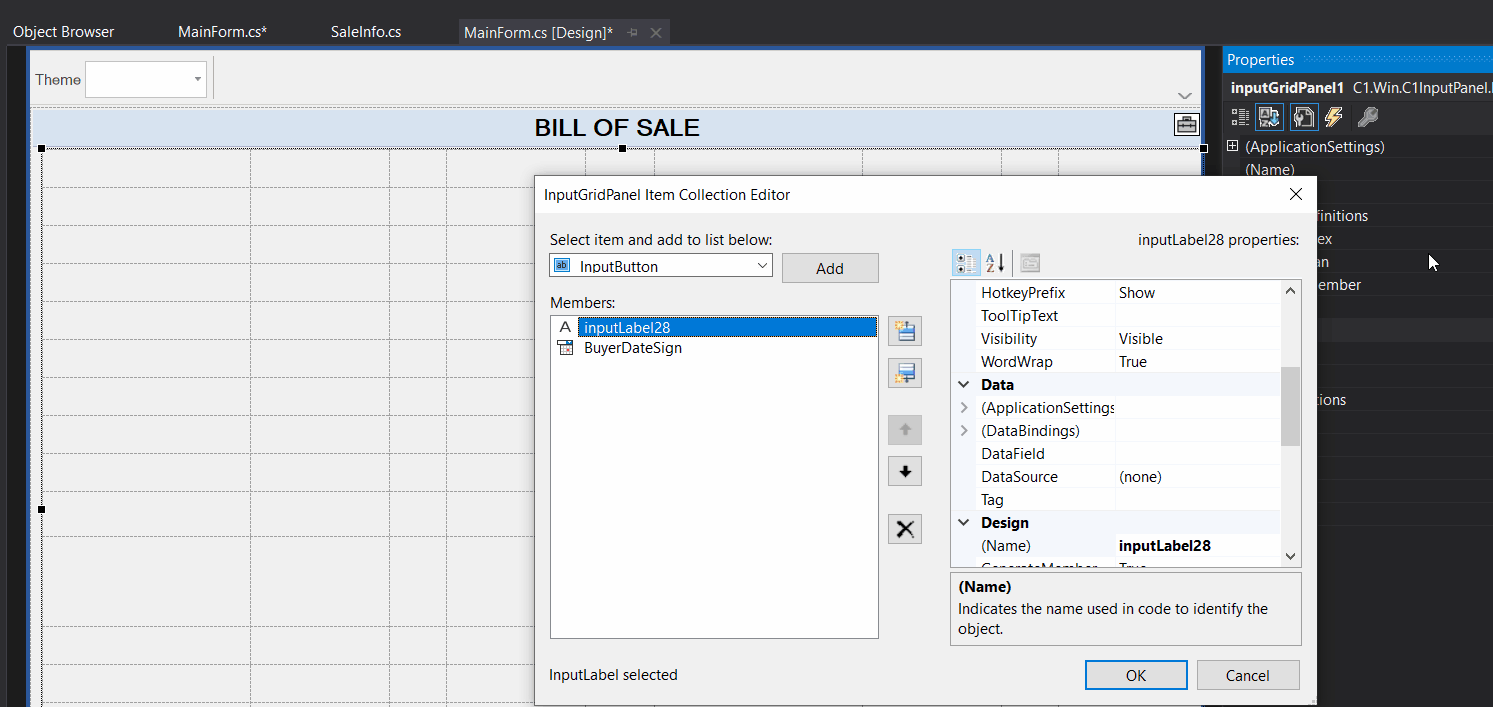
For the Information section, you can refer to the image:

Bind the C1InputPanel Controls to Data Source
By now, we've added various components to the InputGridPanel, and we also need to bind data to each component as per the requirement. This can be done at design time from a data source or programmatically. In this demo, we will be implementing it programmatically as follows:
1. Create a Custom Class to Struct the Data**
Create a SaleInfo class and Transactor struct to bind input control with the appropriate properties. The data file looks like following:
class SaleInfo
{
public DateTime DateSold { get; set; }
public Transactor Seller { get; set; }
public Transactor Buyer { get; set; }
public string ItemsInfo { get; set; }
public int ItemsValue { get; set; }
public string FormOfPayment { get; set; }
public SaleInfo(DateTime dateS, Transactor s, Transactor b, string itemsInfo, int itemsValue, string formPayment)
{
DateSold = dateS;
Seller = s;
Buyer = b;
ItemsInfo = itemsInfo;
ItemsValue = itemsValue;
FormOfPayment = formPayment;
}

}
struct Transactor
{
public string PrintedName { get; set; }
public string Address { get; set; }
public string City { get; set; }
public string State { get; set; }
public string Zip { get; set; }
public string HomePhone { get; set; }
public string CellPhone { get; set; }
public string Work { get; set; }
public DateTime DateSign { get; set; }
public Image Signature { get; set; }

pulic Transactor(string printName, string adress, string city, string state, string zip,string homePhone, string cellPhone, string work, DateTime dateSign, Image sign)
 {

            PrintedName = printName;
            Address = adress;
            City = city;
            State = state;
            Zip = zip;
            HomePhone = homePhone;
            CellPhone = cellPhone;
            Work = work;
            DateSign = dateSign;
            Signature = sign;
        }
}
2. Add the BindingSource Component to Load the Data
Add a BindingSource component on the window form using VS toolbox and set its DataSource property to SaleInfo class.
3. Assign BindingSource as DataSource
Set the BindingSource as the DataSource of each input control and assign the appropriate value to the DataField property.
4. Load the Data via BindingList
We have bound each input control to the data source, so now it's time to create and fill the data in the control. We need to create a BindingList of SalesInfo class and add the Seller and Buyer data into it using the Transactor struct. Finally, assign the added element of the BindingList as the data source of our BindingSource component.
Image sellerSign = Image.FromFile(@"..\..\Alic.png");
Image buyerSign = Image.FromFile(@"..\..\Bob.png");

BindingList<SaleInfo> datalist = new BindingList<SaleInfo>();
Transactor t1 = new Transactor("Alice Smit", "566 Swick Hill Street", "Metairie", "Louisiana", "700001", "2452194", "9999888812", "Hubspot Pvt Ltd", new DateTime(2021,11,6),sellerSign);
Transactor t2 = new Transactor("Bob Bill", "4236 Benedum Drive", "Slate Hill", "New York", "100973", "239457", "9999888102", "SalesLoft Pvt Ltd", new DateTime(2021,11,2),buyerSign);
datalist.Add(new SaleInfo(new DateTime(2021,11,6), t1, t2, "This Canon Camera gives you the freedom to explore different ways to shoot subjects. It packs a multitude of shooting options which you can incorporate in still images to create art that embodies the exact mood and vision you are going for. Don’t worry about the lighting conditions of a place because this camera’s large-sized sensor is designed to capture picture-perfect shots even in a dimly lit environment. Thanks to its Wi-Fi connectivity and NFC paring options, sharing photos is as simple as it gets.",
                300, "cash"));
billOfSaleBindingSource.DataSource = datalist[0];
sellerSignature.Image = t1.Signature;
buyerSignature.Image = t2.Signature;
Note: To learn more about binding C1InputPanel with data at design time, refer to the DataBinding topic.
Add Validations to the Input Components
In this step, we will validate using Validating and KeyDown events of C1InputPanel controls to ensure that the user enters the valid input otherwise prevents going to the other input field until they fill the valid entry.
//Validation on String Input
sellerPrintedName.Validating += stringValidating;
sellerAddress.Validating += stringValidating;
sellerCity.Validating += stringValidating;
sellerState.Validating += stringValidating;
sellerWork.Validating += stringValidating;
buyerPrintedName.Validating += stringValidating;
buyerAddress.Validating += stringValidating;
buyerCity.Validating += stringValidating;
buyerState.Validating += stringValidating;
buyerWork.Validating += stringValidating;


//Validation on Home Phone
sellerHomePhone.KeyDown += OnHomePhoneKeyDown;
buyerHomePhone.KeyDown += OnHomePhoneKeyDown;
sellerHomePhone.Validating += OnHomePhoneValidating;
buyerHomePhone.Validating += OnHomePhoneValidating;

//Validation on Cell Phone
sellerCellPhone.KeyDown += OnCellPhoneKeyDown;
buyerCellPhone.KeyDown += OnCellPhoneKeyDown;
sellerCellPhone.Validating += OnCellPhoneValidating;
buyerCellPhone.Validating += OnCellPhoneValidating;

//validation on Zip Code
sellerZip.KeyDown += OnZipKeyDown;
buyerZip.KeyDown += OnZipKeyDown;
sellerZip.Validating += OnZipValidating;
buyerZip.Validating += OnZipValidating;

//validation on Item Description
itemsInfo.Validating += OnItemsInfoValidating;

//upload Image
sellerSignature.Click += OnSignatureClick;
buyerSignature.Click +=  OnSignatureClick;


private void OnSignatureClick(object sender, EventArgs e)
{
InputImage control = sender as InputImage;
// open file dialog
OpenFileDialog open = new OpenFileDialog();
// image filters
open.Filter = "Image Files(*.jpg; *.jpeg; *.gif; *.bmp)|*.jpg; *.jpeg; *.gif; *.bmp";
if (open.ShowDialog() == DialogResult.OK)
{
// display image in picture box
control.Image = new Bitmap(open.FileName);
}
}

private void OnItemsInfoValidating(object sender, CancelEventArgs e)
{
RichTextBoxHost control = sender as RichTextBoxHost;
if (String.IsNullOrWhiteSpace(control.Text))
{
control.ErrorText = Properties.Resources.ItemDescription;
e.Cancel = true;
}
else
{
control.ErrorText = string.Empty;
}
}

private void OnZipValidating(object sender, CancelEventArgs e)
{
InputTextBox control = sender as InputTextBox;
if (String.IsNullOrWhiteSpace(control.Text) || control.Text.Length != 6)
{
control.ErrorText = Properties.Resources.Zip;
e.Cancel = true;
}
else
{
control.ErrorText = string.Empty;
}
}

private void OnZipKeyDown(object sender, KeyEventArgs e)
{
InputTextBox control = sender as InputTextBox;
if ((e.KeyValue >= 48 && e.KeyValue <= 57) || e.KeyValue == 8 || e.KeyCode == Keys.Delete || e.KeyCode == Keys.Left || e.KeyCode == Keys.Right)
{
if (control.Text.Length == 6)
{
if ((e.KeyValue >= 48 && e.KeyValue <= 57))
e.SuppressKeyPress = true;
}
}
else
{
e.SuppressKeyPress = true;
}
}

private void OnCellPhoneValidating(object sender, CancelEventArgs e)
{
InputTextBox control = sender as InputTextBox;
if (String.IsNullOrWhiteSpace(control.Text) || control.Text.Length != 10)
{
control.ErrorText = Properties.Resources.CellPhone;
e.Cancel = true;
}
else
{
control.ErrorText = string.Empty;
}
}

private void OnCellPhoneKeyDown(object sender, KeyEventArgs e)
{
InputTextBox control = sender as InputTextBox;
if ((e.KeyValue >= 48 && e.KeyValue <= 57) || e.KeyValue == 8 || e.KeyCode == Keys.Delete || e.KeyCode == Keys.Left || e.KeyCode == Keys.Right)
{
if (control.Text.Length == 10)
{
if ((e.KeyValue >= 48 && e.KeyValue <= 57))
e.SuppressKeyPress = true;
}
}
else
{
e.SuppressKeyPress = true;
}
}

private void OnHomePhoneKeyDown(object sender, KeyEventArgs e)
{
InputTextBox control = sender as InputTextBox;
if ((e.KeyValue >=48 && e.KeyValue <= 57) || e.KeyValue== 8 || e.KeyCode== Keys.Delete ||e.KeyCode ==Keys.Left ||e.KeyCode==Keys.Right)
{
if (control.Text.Length == 7)
{
if ((e.KeyValue >= 48 && e.KeyValue <= 57))
e.SuppressKeyPress = true;
}
}
else
{
e.SuppressKeyPress = true;
}
}

private void OnHomePhoneValidating(object sender, CancelEventArgs e)
{
InputTextBox control = sender as InputTextBox;
if (String.IsNullOrWhiteSpace(control.Text) || control.Text.Length !=7)
{
control.ErrorText = Properties.Resources.HomePhone;
e.Cancel = true;
}
else
{
control.ErrorText = string.Empty;
}
}

private void stringValidating(object sender, CancelEventArgs e)
{
InputTextBox control = sender as InputTextBox;
if (String.IsNullOrWhiteSpace(control.Text))
{
control.ErrorText = Properties.Resources.EmptyValue;
e.Cancel = true;
}
else
{
control.ErrorText = string.Empty;
}
}
To have a colorful UI, we have added the option to apply the different Office2016 themes to the application via C1ThemeController. The following code snippet implements how to change the theme at runtime:
private void InitThemes()
{
var themes = C1ThemeController.GetThemes().Where(x => x.Contains("Office2016"));
foreach (var theme in themes)
cmbTheme.Items.Add(theme);

cmbTheme.SelectedIndex = 1;
}

private void cmbTheme_SelectedIndexChanged(object sender, EventArgs e)
{
c1ThemeController1.Theme = cmbTheme.SelectedItem.Text;
}
Note: You can learn more about C1ThemeController from the documentation here.
The final output form that consists of both the buyer and seller data with product information looks is shown below:

If you have the C1 WinForms suite installed, the sample can be found in the following place on your system.
For .NET 6.0 controls: C:\Users\UserName\Documents\ComponentOne Samples\WinForms\v6.0\InputPanel\CS\InputPanelExplorer
For .NET 4.5.2 controls: C:\Users\UserName\Documents\ComponentOne Samples\WinForms\v4.5.2\InputPanel\CS\BillOfSale
You can also download it from the Github links:
For .NET 6.0 controls | For .NET 4.5.2 controls
Please feel free to try it out and leave your feedback or questions in the comments section. Happy Coding!
Related Blogs
Try Our .NET UI Components & Datagrid
Getting Started With ComponentOne

Prabhat Sharma