How to Integrate the ActiveReports Server Web Designer in an MVC App
In ActiveReports 11 Server SP2, we introduced a pure HTML5/JavaScript based Web Designer that allowed end-users to design and modify ad-hoc reports with more ease and flexibility. The new designer added the ability to work with RDL Reports and Page Reports as well. It replaced the existing Flash based designer, improving performance and making it better suited for modern browser technology.
In another article, we discuss using Page/RDL Reports and why you may want to migrate from a Section report.
Customers using ActiveReports Server have always been able to embed the Flash-based Web Designer into their web applications to provide easy to use self-service reporting capability to their end- users. With ActiveReports 12 Server SP1, we've added this capability to the new HTML5/JavaScript based Web Designer as well. Customers have used ASP.NET, ASP.NET MVC, and pure HTML web pages to embed the report designer into their web applications.
This article talks about how to go about embedding the new HTML5/JavaScript based Web Designer in your MVC applications.
Step 1: Setting up the MVC Application
If you already have created an MVC application, you can beging the integration process.
To integrate the Web Designer in an MVC application, we need the Report Designer, File-View, and the Report Viewer components. These are separate components and we need to add the required css and js files for the Report Designer, the File-View, and the Report Viewer under the Content, and Scripts folders in the application respectively.
CSS – designer.css, fileview.css and viewer.css
JS – designer.js, fileview.js, viewer.js and baseServerApi.js
In addition to these, we also need to add the folders: icons, logos, and vendors for the icons and logos being used in the Web Designer, in the root folder of the application.
These files and folders can be found in the installed ActiveReports Server directory - C:\
The folders should look like these after this step:
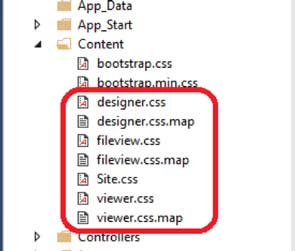
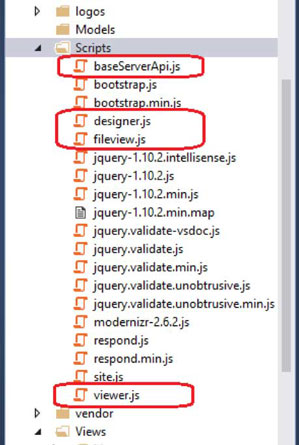
If you do not wish to use the default File-View or the default Viewer, you may omit their respective js and css files - fileview.css, viewer.css, fileview.js, and viewer.js.
Step 2: Set Up Web Report Designer and Authentication
Once the files and folders have been added, we’ll add another JavaScript file and name it: site.js (if it doesn’t already exist). The site.js is where we’ll place all the code to perform login, authenticate a user, and display the Designer upon successful login. This is also where we'll add code to store the AuthToken in a cookie.
The module baseServerApi.js exports baseServerApi object that contains login() and checkAuthToken() functions which return Promise-like objects. These functions can be used to perform authentication before the Designer is rendered.
- Most web applications have some or the other form of authentication process implemented. ActiveReports Server also requires the users to login to gain access to the Report Portal or Designer. Since your users would have already logged in to your application, it would be annoying for them to login again when they choose to open the Web Designer. The ActiveReports Server’s RESTful API gives you an easy way to login without having the user enter his credentials again.
The Login process is carried out by the following function:
function performLogin() {
            baseServerApi.login(userName, password)
                .done(onSuccessfulLogin)
                .fail(onError);
}
The baseServerApi.login() function in turn calls the ‘accounts/login’ api method with the username and password for authentication and returns an authentication token.
Here’s a link to the ‘accounts’ API that provides the login, logout, and other functionality. Here is a full list of APIs that the ActiveReports Server provides.
Upon successful login, we get the authentication token and save it in a cookie. The authentication token will then be used across the Designer to authenticate all subsequent api calls.
function onSuccessfulLogin(response) {
           var token = response && response.Token;
            // Set the AuthToken cookie
           Cookies.set(AuthTokenKey, token, { path: 'http://10.10.1.10:8080/api' });
           renderDesigner();
}
In this demo, we have used an external CDN dependency library ‘js-cookie’ for simplicity.
Step 3: Creating the UI
The third step is to add a new View for the Designer and then add the HTML elements which will be used to display the Designer, the File Menu and the Viewer on the page. Right-click on the Views folder and select Add > New Folder. Name the new folder as ‘WebDesigner’ or any name you’d like. Under the new WebDesigner folder, add a view ‘Index.cshtml’.
For this demo, we’re not going to be using the default layout, so you can uncheck ‘Use a layout page’ option in the dialog (You can leave it checked if you wish to use the default layout).
Add the following HTML markup for the Designer, Viewer and File View:
<div id="file-view-id" style="width: 100%; height: 100%; display: none;"></div>
<div id="report-viewer-id" style="width: 100%; height: 100%; display: none;"></div>
<div id="designer-id" style="width: 100%; height: 100%;"></div>
Once you’ve added the markup, we also need to add a link to the WebDesigner View on the Layout page. Open _Layout.cshtml from Views > Shared folder and add the following element to the navigation list:
<ul class="nav navbar-nav">
        <li>@Html.ActionLink("Home", "Index", "Home")</li>
        <li>@Html.ActionLink("WebDesigner", "Index", "WebDesigner")</li>
</ul>
Step 4: Adding references and running the application
The final step is to add references to the css and js files in the newly added view ‘Index. cshtml’ under the WebDesigner folder. These css and js files are what defines the UI and the functionalities of the Designer, File menu, and the Viewer components.
Open Index.cshtml from Views > WebDesigner folder and add the following references:
   <link rel="stylesheet" href="~/vendor/css/bootstrap.min.css" />
   <link rel="stylesheet" href="~/vendor/css/font-awesome.min.css">
   <link rel="stylesheet" href="~/vendor/css/ionicons.min.css">
   <link rel="stylesheet" href="~/vendor/css/materialdesignicons.min.css" media="all" type="text/css" />
   <link rel="stylesheet" href="~/vendor/css/fonts-googleapis.css" type="text/css">
   <link rel="stylesheet" href="~/Content/fileview.css" type="text/css" />
   <link rel="stylesheet" href="~/Content/viewer.css" type="text/css" />
   <link rel="stylesheet" href="~/Content/designer.css" type="text/css" />

   <script src="~/vendor/js/jquery.js"></script>
   <script src="~/vendor/js/bootstrap.min.js"></script>
   <script src="~/Scripts/baseServerApi.js"></script>
   <script src="~/Scripts/fileview.js"></script>
   <script src="~/Scripts/viewer.js"></script>
   <script src="~/Scripts/designer.js"></script>
   <script src="https://cdnjs.cloudflare.com/ajax/libs/js-cookie/2.2.0/js.cookie.min.js"></script>
   <script src="~/Scripts/site.js"></script>
Before running the application, you’ll need to change the web address to point to your ActiveReports Server at three locations:
- In baseServerApi.js > makeURL() function
function makeURL(path, queryParams) {
        var queryString = queryParams ? '&' + $.param(queryParams) : '';
        return 'http://10.10.1.10:8080/api/' + path + '?AuditSource=WebDesigner' +
     queryString;
}
Change the web address in the return statement above.
- In site.js > onSuccessfulLogin() function
function onSuccessfulLogin(response) {
        var token = response && response.Token;
        // Set the AuthToken cookie
        Cookies.set(AuthTokenKey, token, { path: 'http://10.10.1.10:8080/api' });
        renderDesigner();
}
Change the web address in the path attribute of Cookies.set statement above.
- In site.js > openViewer function
               openViewer: function (options) {
                    showViewer();
                    var viewerOptions = makeOptions(options, {
                    serviceUri: 'http://10.64.1.76:8080/',
Change the web address in the serviceUri attribute of the viewerOptions.
Note: There is a readme file (web-report-designer-api-readme.html) included with the sample project attached in this blog, which lists the APIs for the WebDesigner to accomplish various other tasks such as opening an existing report, saving a report, etc.
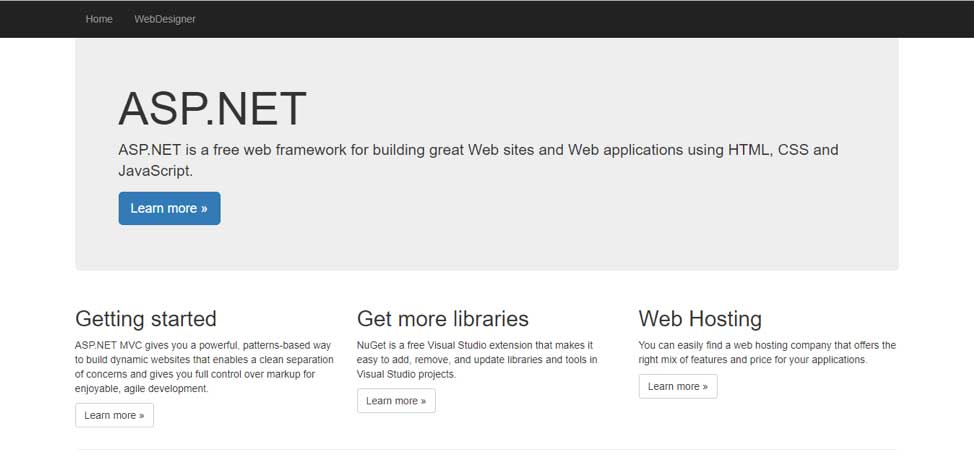
Let’s run the application. When the application is run, the Home page will appear (You would have some other page as the home page in your application). For the purpose of this blog, I have hardcoded the username and password so we don’t have to enter the login credentials manually (to mimic the real world scenario of web applications).
Now let’s open the Designer by clicking on the Web Designer menu item next to Home. The designer would look like this:
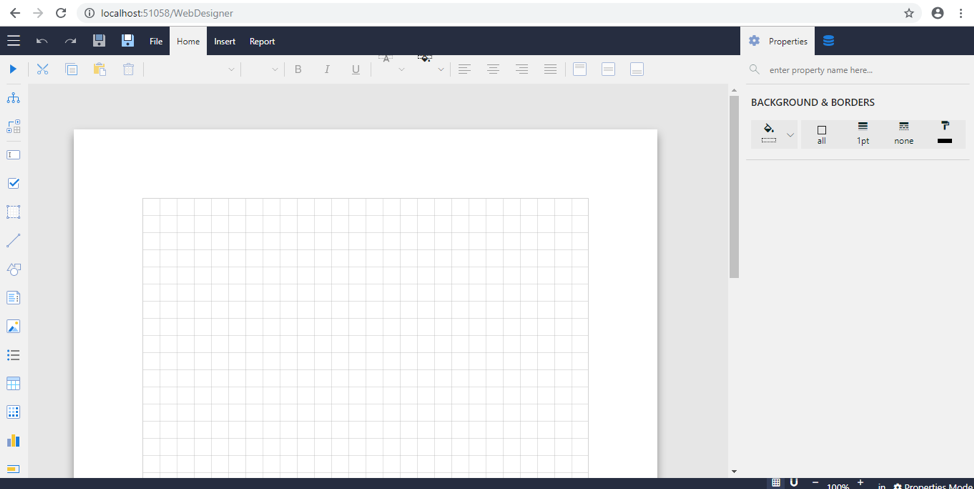
You can now design your reports just as you would through the ActiveReports Server Portal. ActiveReports Server provides several pre-defined templates for you to easily design reports with little effort. You can find more information on these templates on our documentation page.
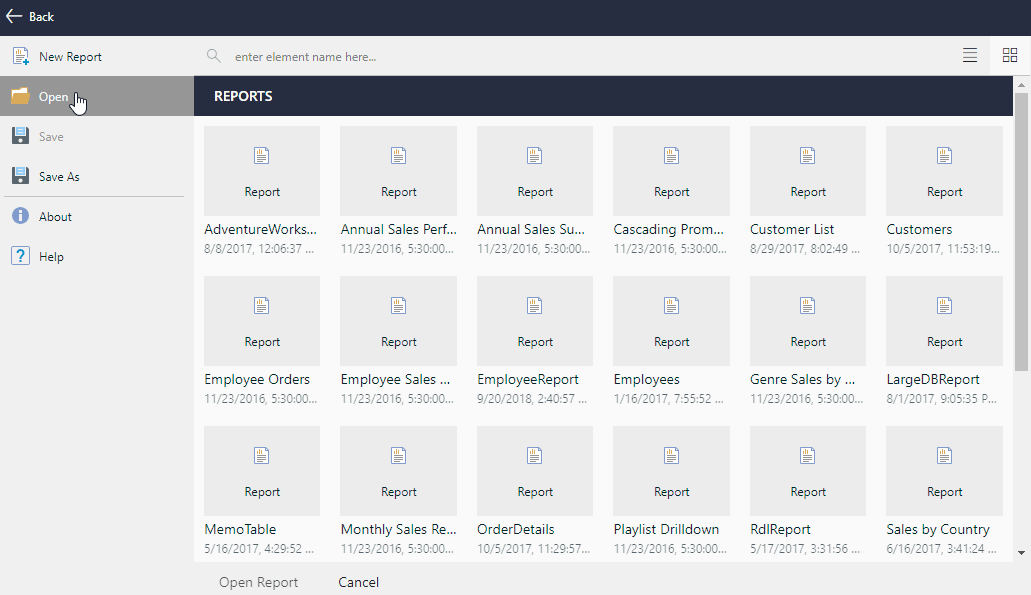
If you have existing reports on the server that you would like to open here, you can use the File menu > Open option.
The process of adding a Data Set is the same and you can get more information on it from the following documentation links: Shared Data Set | Embedded Data Set
I hope this article gives you a good idea of how to integrate the Active Reports Server Web Designer in your own applications. This way, you can integrate the ActiveReports Server Web Designer in almost any web application developed with HTML5 and JavaScript.
Download the sample app

Abdias Michael