Speed up your Angular App with Web Workers
Why do you need a Web Worker? A Web Worker is a code component for a web application. It allows the developer to create a new thread of execution for a JavaScript task so it doesn’t interrupt execution of the main app.
At first glance, it may seem that browsers inherently support threading and that the developer shouldn’t have to do anything special. Unfortunately, that’s not the case. Web Workers solve a real concurrency problem.
Web Workers are a part of the expected functional standards of web browsers and the specifications for them have been written up at the W3C. The Angular framework has wrapped up Web Workers for us and we can easily add them to our app using the Angular Command Line Interface (CLI).
In this article, we’ll first take a look at some misconceptions about thread concurrency with JavaScript in the browser. Then we’ll create a functional example that demonstrates how easy it is to implement Web Workers with Angular that enable concurrent threading in a web site.
Isn’t JavaScript Inherently Concurrent?
Some developers are led to believe that JavaScript is inherently concurrent in the browser because, when the browser connects to a web site and retrieves the HTML for a page, the browser is able to open multiple connections (around six) and pull resources (images, linked CSS files, linked JavaScript files, and so on) concurrently. This looks like the browser is executing a number of threads and executing numerous tasks at the same time (via context switching).
To the uninitiated web developer, this seems to indicate that the browser is capable of doing concurrent work. However, when it comes to JavaScript, the browser actually only executes one process at a time.
Most modern web sites, Single Page Apps (SPA), and the more modern Progressive Web Apps (PWA) are dependent upon JavaScript and typically contain numerous JavaScript modules. However, at any time the web app is running JavaScript, the browser is limited to a single thread of activity. None of the JavaScript will run concurrently under normal circumstances.
That means if we have a long-running or process-intensive task defined in one of our JavaScript modules, the user may experience the app stuttering or seeming to hang while the browser waits for the process to complete before the user interface (UI) can be updated. This kind of behavior makes users lose confidence in our web apps or SPAs and none of us want that.
A Web Worker for JavaScript Concurrency
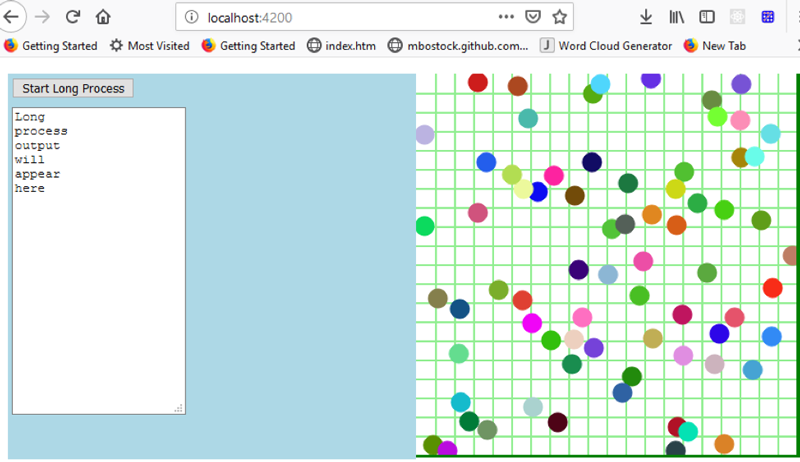
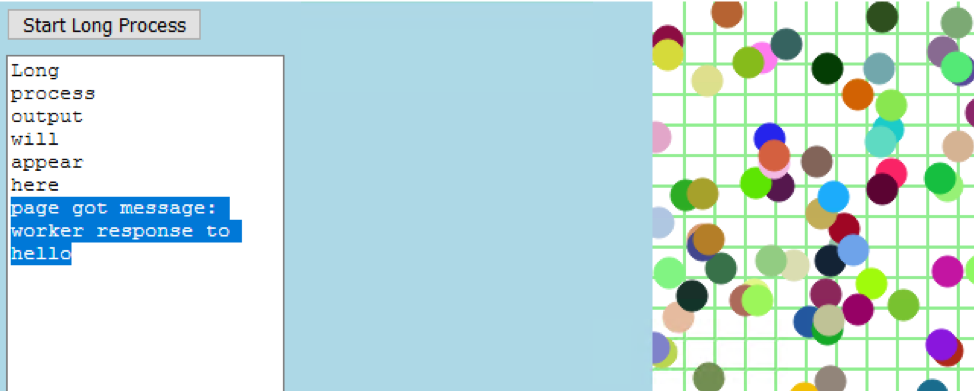
To enable our web app to run concurrent JavaScript threads, we’ll create an example page with two panes. In one pane the UI of our application is represented by a grid with circles, which constantly updates the picture and reacts to mouse clicks. The second pane will host a long running process, which normally will block the UI thread and prevent the UI from doing its job.
To make our UI responsive, we’ll run our long process in a Web Worker, which will execute it on a separate thread and will not block UI logic execution this way. We’ll use Angular as the framework for building the app because it makes constructing the Web Workers a simple one-command task.
Setting up the Angular App
To use the Angular CLI, we need to have Node.js and NPM (Node Package Manager) installed. Once we’ve made sure Node and NPM are installed, open a console window, then install the Angular CLI via NPM (this is a one-time thing):
npm install -g @angular/cli
Change directory to the target directory where we want to create our new app template. Now, we are ready to create our app. We use the “ng new” command to do that. We will name our project NgWebWorker:
ng new NgWebWorker
The project wizard asks if we want to include routing in our project. We do not need routing for this example so type n.
It will then ask what type of stylesheet format we want to use. Angular supports the use of stylesheet processors such as Sass and Less, but in this case we will use simple CSS, so just press Enter for the default.

We will then see some CREATE messages as NPM pulls the required packages and the CLI creates the template project. Finally, when it completes we get a blinking cursor again at the command line.
At this point, the Angular CLI has created a project and placed it in the NgWebWorker folder. Change directory to NgWebWorker. The Angular CLI created everything we need to work on our Angular project, including installing the Node HTTP server. That means all we have to do to get the template app started is the following:
ng serve
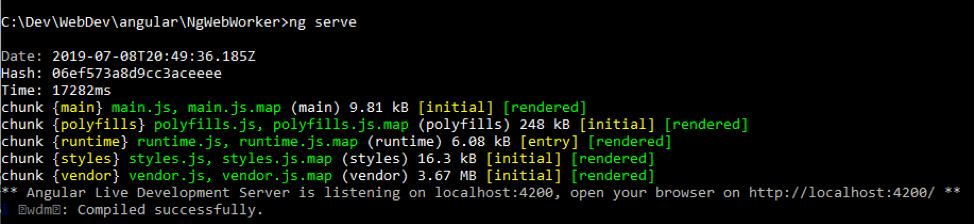
The Angular CLI compiles your project and starts the Node HTTP server. Now you can load the app in your browser by pointing it at the <a href="http://localhost:4200"target="_blank"> URL.
Our First Angular App From CLI
When we load the page, we will see the basic template with the project name at the top.
The benefit we get from running “ng serve” is that any changes made to the code will automatically cause the site to refresh in the browser also. That will make it a lot easier to see changes take effect.
Most of the code we’ll focus on is found under the /src/app directory.
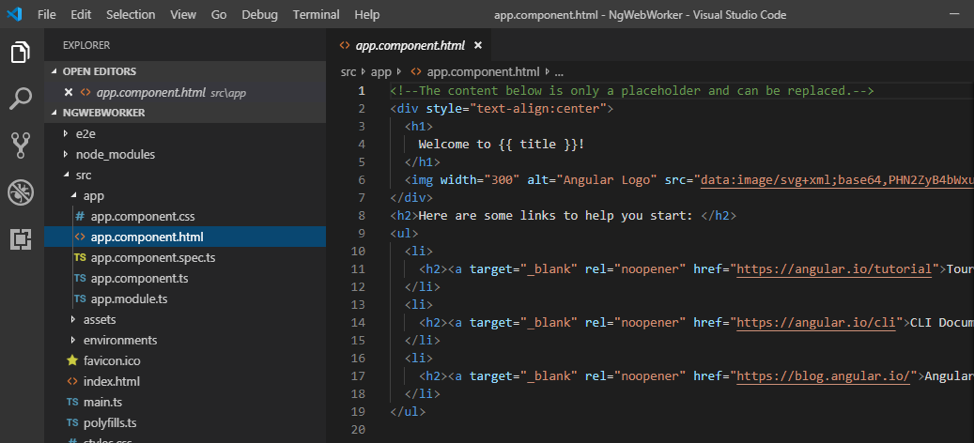
app.component.html contains HTML for the one component that is currently used to display the main page. The component code is represented in the app.component.ts (TypeScript) file.
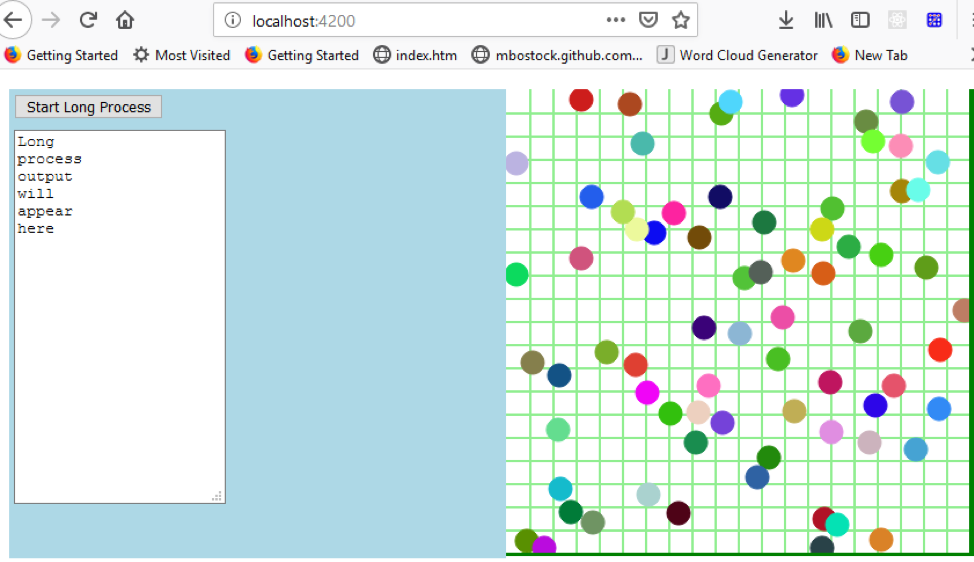
We’re going to delete the contents of app.component.html and add our own layout. We will create a split page that will display our long running process values on the left side and draw some random circles on the right side. This will allow our browser to run two additional Web Worker threads that will do work independently so you can see Angular Web Workers in action.
All of the code for the rest of the article can be obtained from the GitHub repository.
Here’s what the final page will look like while it is drawing the random circles (before the long running process starts).
Replace the code in app.component.html with the following:
<div id="first">

<div class="innerContainer"><button (click)="longLoop()">Start Long Process</button></div>

<div class="innerContainer"><textarea rows="20" [ngmodel]="longProcessOutput"></textarea></div>

</div>
The code download also includes some IDs and CSS classes and associated styles in styles.css and those are used for the very simple formatting of the UI so we have two sections (left and right) and other basic styling.
The important thing to notice here is that we’ve added an Angular event binding (click) to the button so that, when the user clicks the button, the long process will be started by calling the longLoop method found in the component TypeScript file, app.component.ts.
longLoop(){
   this.longProcessOutput = "";
   for (var x = 1; x <=1000000000;x++){
     var y = x/3.2;
     if ((x % 20000000) == 0){
        this.longProcessOutput += x + "\n";
        console.log(x);
}
This runs 10 billion iterations writing to a member variable of our component, longProcessOutput.
Because we’ve bound that member variable in app.component.html (on the textarea element), each time the variable is updated the UI will reflect the update. The ngModel value we set in the HTML is where we bind the member variable.
<textarea rows="20" [ngmodel]="longProcessOutput"></textarea>
Run it. We’ll see that when we click the button, nothing much happens, and then suddenly the TextArea is updated with a bunch of values. If we open the console, we see the values written there as the code runs.
Add a Random Circle Component Using the Angular CLI
Next, we’ll add a “circle” component which will draw random circles. We can do that using the Angular CLI with the following command:
ng generate component circle
The command created a new folder named circle and created 4 new files:
- circle.component.html
- circle.component.spec.ts (unit tests)
- circle.component.ts (TypeScript code)
-
circle.component.css (styles that will only be applied to associated HTML for this component)

The HTML is very simple. We just need the HTML that will represent our component. In our case this is the component on the right side of the page, which will display the light green grid and draw the circles. This drawing is done via HTML Canvas element.
<div id="second">
   <canvas #mainCanvas (mousedown)="toggleTimer()"></canvas>
</div>
We start and stop the drawing of the circles by adding an Angular even binding to grab the mousedown event. That means if the user clicks inside the Canvas area anywhere, the circles will begin drawing if the process is not already started. If the process is already started, then the toggleTimer method (found in circle.component.ts) clears the grid and stops the drawing of circles.
toggleTimer simply uses setInterval to draw a circle in a random location with a randomly selected color every 100 milliseconds (10 circles/second).
toggleTimer(){
   if (CircleComponent.IntervalHandle === null){
     CircleComponent.IntervalHandle = setInterval(this.drawRandomCircles,50);
   }
   else{
     clearInterval(CircleComponent.IntervalHandle);
     CircleComponent.IntervalHandle = null;
     this.drawGrid();
   }
 }
There’s more code in circle.component.ts that sets up the Canvas element, initializes member variables, and does the drawing, but for now, that’s all we need to know.
When the page loads, the circles will begin drawing. When we click the [Start Long Process] button, we will see the drawing pause. That’s because all of the work is being done on the same thread.
Let’s fix that problem by adding a Web Worker.
Adding an Angular Web Worker
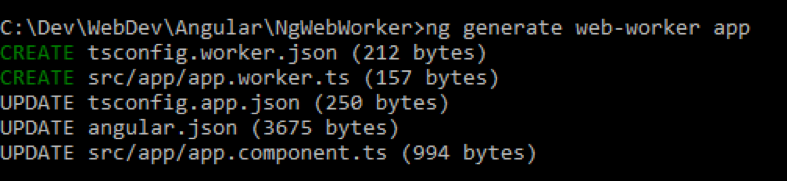
To add a new Web Worker using the CLI, we simply go to our project folder and execute the following command:
ng generate web-worker app
That last parameter (app) is the name of the component that contains our long running process which we will want to place into our Web Worker.
Angular will add some code to the app.component.ts that looks like the following:
if (typeof Worker !== 'undefined') {
 // Create a new
 const worker = new Worker('./app.worker', { type: 'module' });
 worker.onmessage = ({ data }) => {
   console.log(`page got message: ${data}`);
 };
 worker.postMessage('hello');
} else {
 // Web Workers are not supported in this environment.
 // You should add a fallback so that your program still executes correctly.
}
What does the new code do? We can see that this code references the new app.worker Component that the command also added. At this point, the code:
- Ensures that the browser supports Web Workers.
- Creates a new worker.
- Posts a message to the worker (found in app.worker.ts).
- When the worker receives the “hello” message, EventListener will fire (shown in the next code snippet).
- When the EventListener fires (in app.worker.ts), it will create a response object and post back to the caller.
Here’s the entire contents of app.worker.ts:
addEventListener('message', ({ data }) => {
 const response = `worker response to ${data}`;
 postMessage(response);
});
We will see messages in the console as a result of these steps, which will look like the last line in the following console output:

That is the console.log that occurs in the EventHandler that was created on the original Worker object:
worker.onmessage = ({ data }) => {
   console.log(`page got message: ${data}`);
 };
That lets us know that the app.component posted a message to the app.worker and the app.worker replied with a message of its own.
We want to use the Worker to run our Long Running process on another thread so our circle drawing code isn’t interrupted.
First, let’s move the code involved with our UI elements to a constructor of our app.component class.
constructor(){
   if (typeof Worker !== 'undefined') {
     // Create a new
     const worker = new Worker('./app.worker', { type: 'module' });
     worker.onmessage = ({ data }) => {
       this.longProcessOutput += `page got message: ${data}` + "\n";
     };
     worker.postMessage('hello');
   } else {
     // Web Workers are not supported in this environment.
     // You should add a fallback so that your program still executes correctly.
   }
This allows us to now reference the longProcessOutput variable. Now that we can access that variable, we have worker.onmessage add the basic data to the TextArea instead of writing to the console just as an initial test.
You can see the highlighted text on the left is the message that was received.
LongLoop in the Web Worker
We still need to move our long running loop over to the Web Worker to ensure that, when the loop runs, it will be running on its own thread.
Here’s the bulk of the code that we will have in our final app.component.ts:
 constructor(){
   if (typeof Worker !== 'undefined') {
     this.worker = new Worker('./app.worker', { type: 'module' });;
     this.worker.onmessage = ({ data }) => {
       this.longProcessOutput += `${data}` + "\n";
     };
   } else {
     console.log("Web Workers are not supported by your browser");
   }
 }

 longLoop(){
   this.longProcessOutput = "";
   // the following line starts the long process on the Web Worker
   // by sending a message to the Web Worker
   this.worker.postMessage("start looping...");
 }
We moved the worker variable out into the class so it is now a member variable. That way we can easily reference it from anywhere in our AppComponent class.
Next, let’s look more closely at how we have defined a message event handler on the worker object with the code in the constructor:
this.worker.onmessage = ({ data }) => {
       this.longProcessOutput += `${data}` + "\n";
     };
That code will run when the Web Worker class (found in app.worker.ts) calls postMessage(data). Each time the postMessage method is called, the longProcessOutput (the model bound to the TextArea) will be updated with the data plus a carriage return (“\n”), which is simply so each value will be written on its own line in the TextArea element.
Here’s all the code that is found in the actual Web Worker (app.worker.ts).
addEventListener('message', ({ data }) => {
 console.log(`in worker EventListener : ${data}`);
 for (var x = 1; x <=1000000000;x++){
   var y = x/3.2;
   if ((x % 20000000) == 0){
     // posts the value back to our worker.onmessage handler
      postMessage(x);
      // don't need console any more --> console.log(x);
   }
 }
});
This is the event handler that is fired when the user clicks the [Run Long Process] button. All of the code found in the Web Worker (app.worker.ts) runs on a new thread. That’s the value of the Web Worker: its code runs on a separate thread. That’s why it no longer affects the main thread of the web app.
The Web Worker code is fired when the user clicks the button because we now have the following code in our longLoop method.
longLoop(){
   this.longProcessOutput = "";
   // the following line starts the long process on the Web Worker
   // by sending a message to the Web Worker
   this.worker.postMessage("start looping...");
 }
When the message is posted to the worker, the EventListener fires and runs the code from our original longLoop that we’ve placed there.
Wrapping Up Angular Apps with Web Workers
Now when you run the app, you will find that clicking the [Start Long Process] button no longer causes the circle drawing to pause. You will also be able to directly interact with the circle-drawing Canvas component so that, if you click it while longLoop is still running, the Canvas will be redrawn immediately. Previously, the app behaved as if it were frozen if you did this.
Now you can add your long running processes to an Angular Web Worker and reap all the benefits of an app that doesn’t freeze.
If you want to see an example solved with JavaScript Web Workers you can see it at Plunker.
Some other useful resources include the documentation for the Angular CLI and Angular Web Workers. For a general overview of the new features in Angular, see our article What’s New in Angular 8.
Looking for framework-agnostic UI components? GrapeCity has a complete set of JavaScript UI components, including data grids, charts, gauges, and input controls. We also offer powerful spreadsheet components, reporting controls, and enhanced presentation views. We have deep support for Angular (as well as React and Vue) and are dedicated to extending our components for use in modern JavaScript frameworks.
GrapeCity Blogs
Try Our JavaScript Developer Tools
JavaScript Resources

Roger Deutsch