User Defined Label and Status in C1Scheduler for LightSwitch
The Appointment dialog box used in C1Scheduler for LightSwitch allows users to set a subject, location, label, start and end time, reminder, availability status, and whether the appointment is an all day event and recurring over a specified period of time. You can also specify any resources, categories, and contacts here. The scheduler provides twelve predefined labels and four predefined statuses for scheduler. This blog discusses approach to use the User Defined Label and Status in the Scheduler instead of predefined ones. This can be done in two :
- Modify LabelStorage and StatusStorage Through code
- Binding Scheduler to Label and Status DataTables
Modify LabelStorage and StatusStorage through Code
You can add User defined Labels and Statuses in the Created() method of Calendar screen using the following code :
partial void Calendar_Created()
{
    // Write your code here.
    IContentItemProxy _proxy = this.FindControl("C1Scheduler");
    _proxy.ControlAvailable += (s, ea) =>
        {
            C1Scheduler scheduler = ea.Control as C1Scheduler;

            //Adding a custom label
            C1.C1Schedule.Label label = new C1.C1Schedule.Label();
            label.Text = "Purple";
            label.Color = System.Windows.Media.Colors.Purple;
            scheduler.DataStorage.LabelStorage.Labels.Add(label);

            //Adding a custom status
            C1.C1Schedule.Status status = new C1.C1Schedule.Status();
            status.Text = "Very Busy";
            status.Color = System.Windows.Media.Colors.Red;
            scheduler.DataStorage.StatusStorage.Statuses.Add(status);
        };
}
Label & Status Binding to DataTable
The LabelCollection and StatusCollection can be bound to a datatable. For binding, follow the steps below :
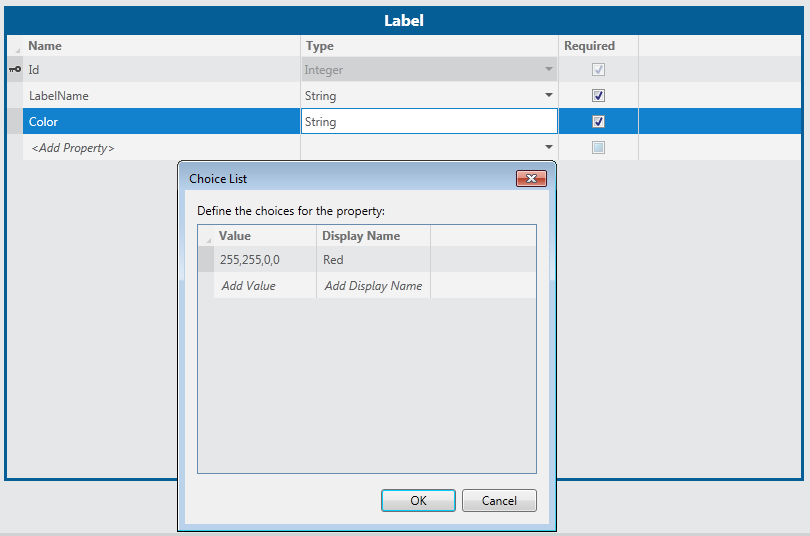
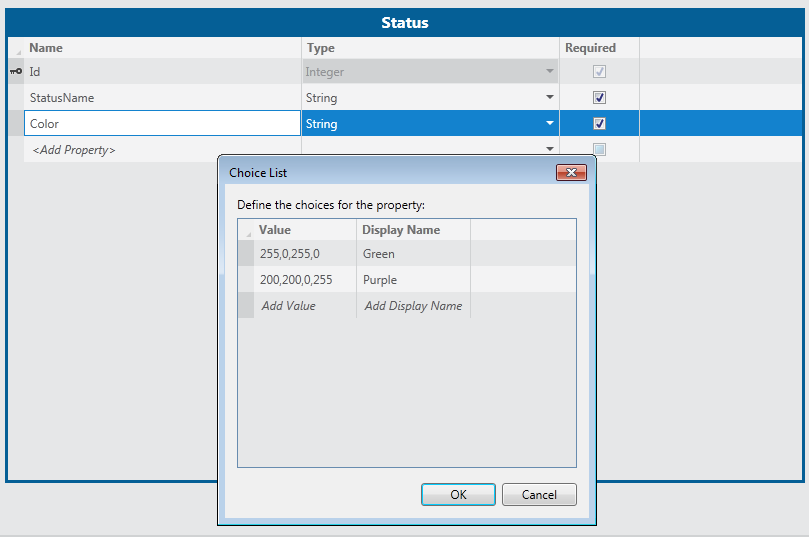
- Create a Label table with columns LabelName and Color. Similarly, create a Status table with columns StatusName and Color.
- Create a choice list for the “Color” entry for both Label and Status Table. Enter the name of the color and the CMYK value in the choice list. Label Table
 Status Table
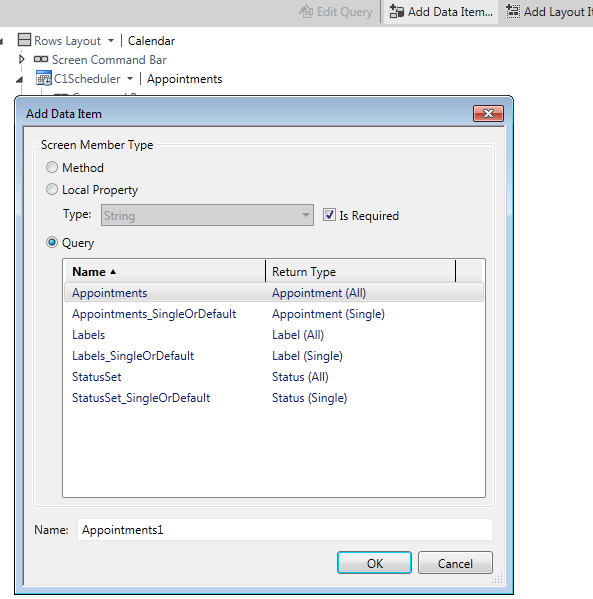
- Add a "Label" Dataitem and "Status" DataItem to the Calendar Screen as
- Run the application and add records in the LabelGrid and StatusGrid and select the color values from the choice lists.
- Now stop debugging and click on the dropdown of the Label Node and select C1Labels.
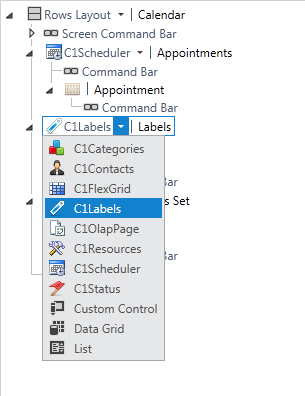
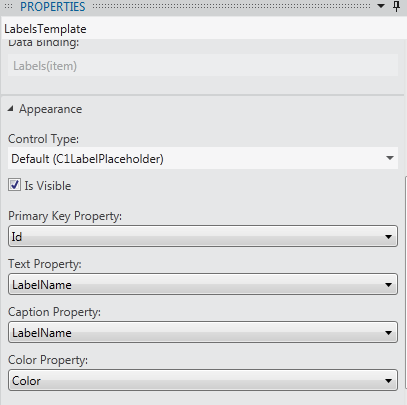
- In the properties for the C1Labels node, set the C1Labels control up to the table.
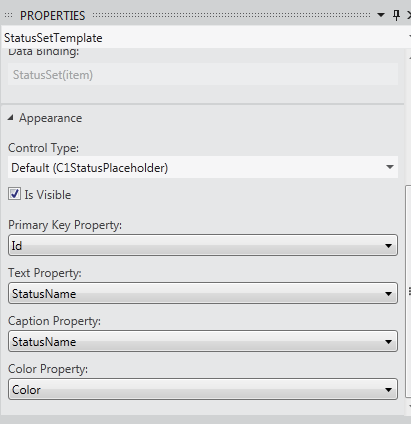
- For the Status node, select C1Status and set C1Status to Status table.
Now, if you run the application and create an appointment, you should see the new labels and status in the drop downs. 


