Usually, the licenses.licx file is created when the control is dragged and dropped on the windows form, XAML page or webpage. If multiple ComponentOne controls are used in the application, then entries of these controls are created in the same licensing file in the order they are dropped. This licenses.licx file contains information in the Control name, Assembly name, Product Version, Culture, PublicKeyToken order.
All ComponentOne controls, VisualStudio, and the assembly on your machine all work together through a file called licenses.licx. If you're new to using third party controls, you may have never seen this file in your life. If you're working on a pre-existing project, it may be available in the Solution Explorer underneath the Project Name > Properties > licenses.licx. However, if it is not available in your project, you can add it yourself by following these steps:

The text file will be added to your project.
In the licenses.licx file, add the namespace, class and DLL to the licenses file for the control(s) you are using in the following pattern:
Namespace.Class, dll name
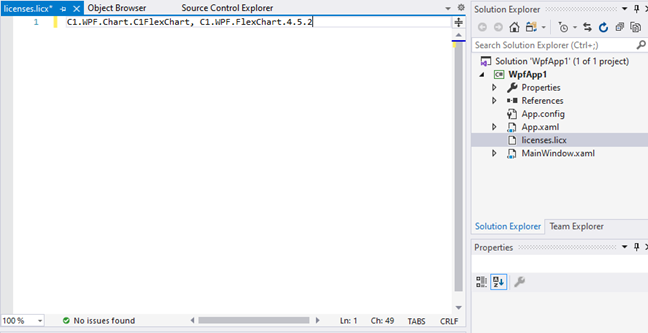
For example, if you want to generate license for the FlexChart control in a WPF application, add the Namespace as C1.WPF.Chart, the class in the FlexChart as C1FlexChart, and the DLL where all of this is coming from as C1.WPF.FlexChart.4.5.2, as depicted in the image below.
In case you want to add more controls to your project and add their licenses manually, add them the same way below the existing line of code.