MESCIUS License Manager Add-in
In This Topic
The licensing information for MVC 3, 4, and 5 applications is contained in Licenses.licx file. These licenses are bound to specified applications and are to be validated before execution.
To Generate License using MESCIUS License Manager Add-in
The add-in for generating license is available for all the MVC applications which are created in Visual Studio.
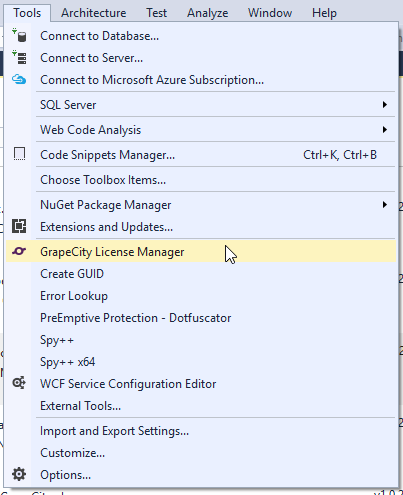
The add-in is visible in options within Tools menu in Visual Studio.
Complete the following steps to generate a trial or full license for your ASP.NET Core applications using Visual Studio add-in:
- Create a new ASP.NET MVC application. For more information. see Creating a new MVC Application.
- Add the required control references to your application.
- Click the MESCIUS License Manager add-in, from options within the Tools menu.
- In the MESCIUS License Manager window, enter your registered Email and Password to log in. In case you are not registered with MESCIUS, you can create a new account using Create an Account option.
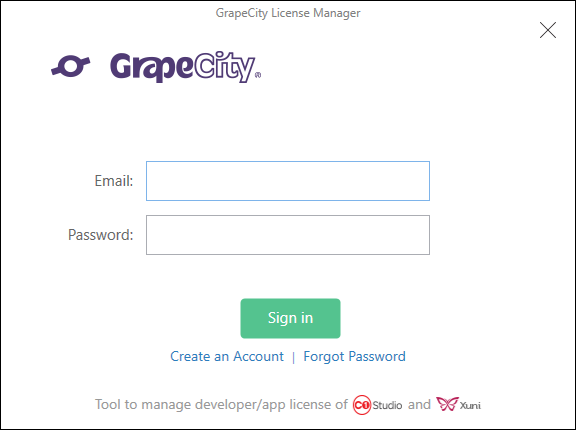
- Once you log-in, you can choose any one of the following options. You login information will be cached for 30 days in Visual Studio.
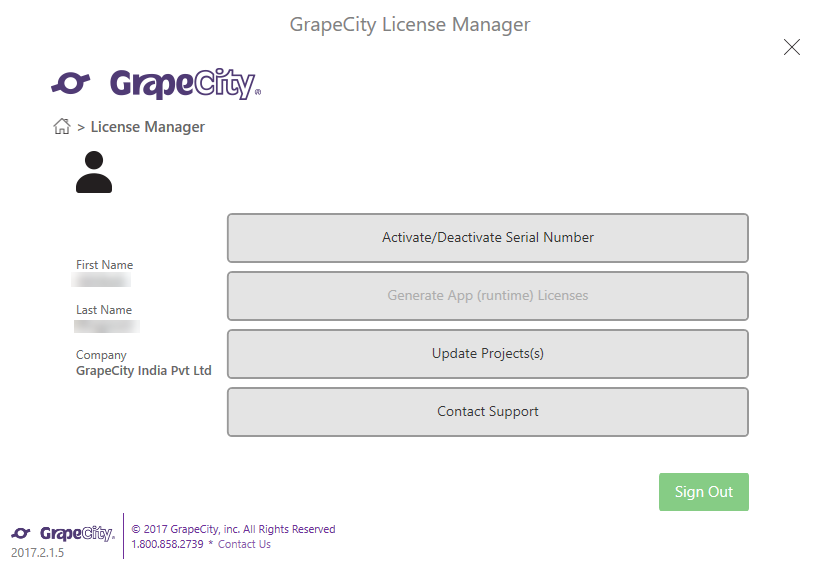
- Activate/Deactivate Serial Number - Allows the users to activate or deactivate the serial number using the internet, C1 Website, By Email, or Over the phone.
- Generate App (runtime) Licenses - Allows the users to generate and activate license for each MVC application you are working on your system. This option is disabled for ASP.NET applications.
-
Update Project(s) - Select one or more projects from the loaded solution to:
- Modify all references to ComponentOne assemblies so that they are not version specific.
- Update all entries in the licenses.licx file so that they are not version-specific.
- Add entries in the licenses.licx file for referred dlls which have been already added.
- Contact Support - Allows the user to open http://supportone.componentone.com/ website where the users can communicate with the support team for any support related issues.
- In the MESCIUS License Manager window, select Update Project(s) option.
- In the MESCIUS License Manager window, select the license updates according to your own requirements. In our case, we have selected Strip version information from license.licx file and Add missing entries to licenses.licx file options.
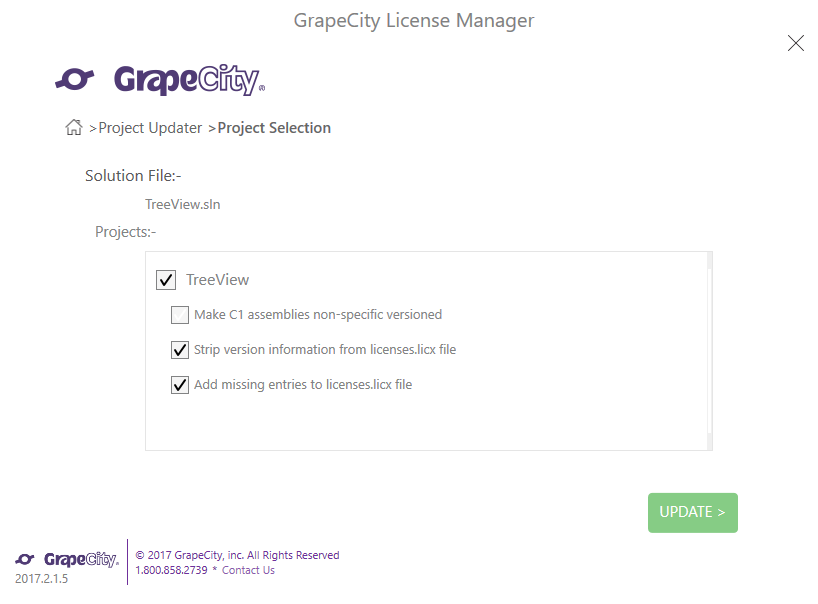
- In the MESCIUS License Manager window, click UPDATE to update the license information in your application. Once you click on UPDATE, a success message appears in the MESCIUS License Manager window.
The licenses.licx file is updated and placed in the same location as the project file and it is an embedded resource to the project.
To manually add the license file to the Application
- In the Solution Explorer, right click the project name and select Add | New Item. The Add New Item dialog appears.
- In the Add New Item dialog, select C# | General and select Text File in the right pane.
- Name the text file as licenses.licx.
- Paste the following code in the text file:
| licenses.licx |
Copy Code
|
C1.Web.Mvc.LicenseDetector, C1.Web.Mvc
|
- Few additional steps may be required for using FinancialChart, FlexSheet, MultiRow, FlexViewer and OLAP controls in your application. In the licenses.licx file, press enter after C1.Web.Mvc.LicenseDetector, C1.Web.Mvc, and paste the following code:
| licenses.licx |
Copy Code
|
C1.Web.Mvc.Finance.LicenseDetector, C1.Web.Mvc.Finance
C1.Web.Mvc.Sheet.LicenseDetector, C1.Web.Mvc.FlexSheet
C1.Web.Mvc.Viewer.LicenseDetector, C1.Web.Mvc.FlexViewer
C1.Web.Mvc.Olap.LicenseDetector, C1.Web.Mvc.Olap
C1.Web.Mvc.MultiRow.LicenseDetector, C1.Web.Mvc.MultiRow
|