In This Topic
The steps to scaffold ComponentOne Dashboard Layout control for ASP.NET MVC are as follows:
- Configure the datasource. For more information on configuring a datasource in ASP.NET Core application, see https://docs.microsoft.com/en-us/aspnet/core/data/ef-rp/intro?view=aspnetcore-3.1&tabs=visual-studio.
-
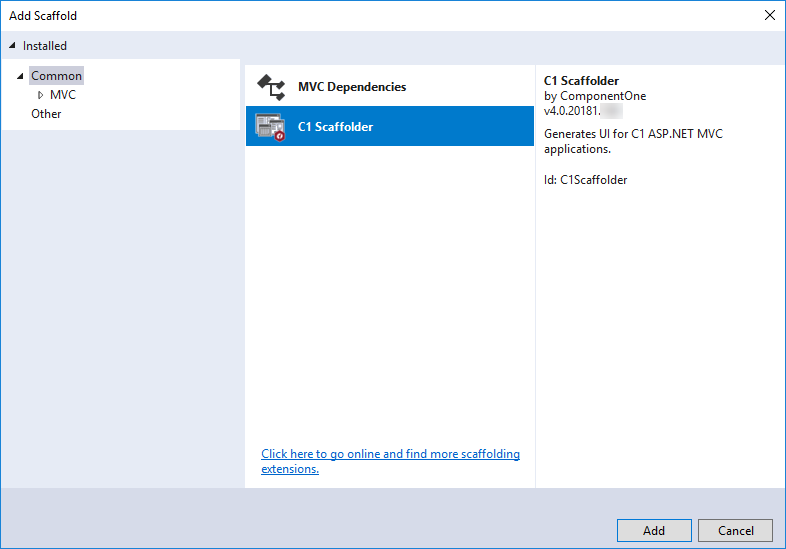
In the Solution Explorer, right-click the project name and select Add | New Scaffolded Item. The Add Scaffold wizard appears.
-
In the Add Scaffold wizard, select Common and then select C1 Scaffolder from the right pane. You can also select Common | MVC | Controller or Common | MVC | View and then C1 Scaffolder to add only a controller or a view.
-
Click Add. The AddScaffold wizard appears with the Data tab selected by default.
-
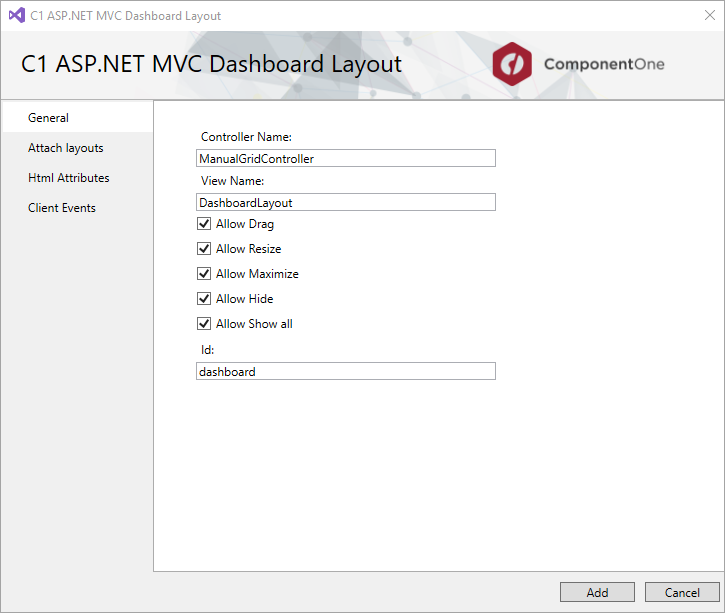
Select Dashboard Layout control and click Next. The C1 ASP.NET MVC Dashboard Layout wizard appears with the General tab selected by default.
-
In the General tab, specify the basic details as follows:
- Enter the Controller Name and View Name.
- Enter the Id for the DashboardLayout control.
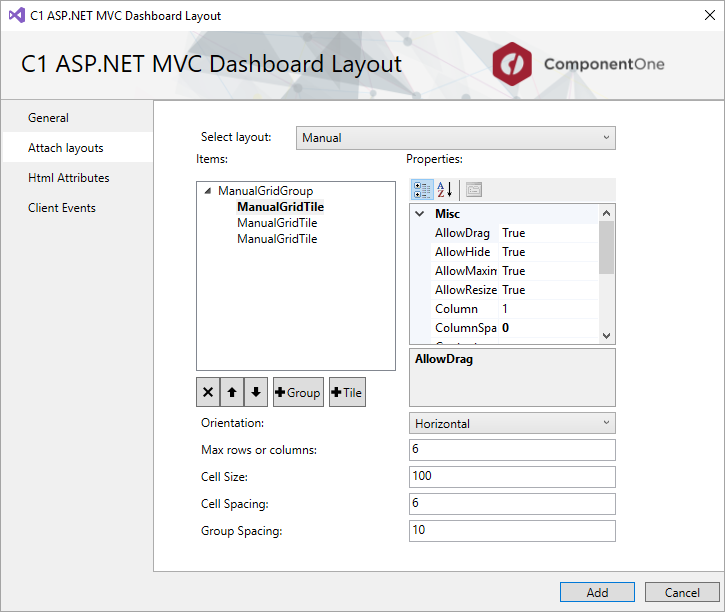
- In the Attach layouts tab, specify the layout details as follows:
- Select Manual from the Select layout dropdown list.
- Use the +Group button to add a ManualGridGroup layout in the DashboardLayout control.
- Use the +Tile button to add a ManualGridTile in the ManualGridGroup.
- Set the ManualGridTile properties as per your requirements from the properties section on the right.
- Click Add. You will notice that the Controller and View for the DashboardLayout control is added to your project.