ASP.NET Core MVC Controls | ComponentOne
Working with Controls / FlexPie / Quick Start
In This Topic
    Quick Start
    In This Topic

    The quick start guides you through the steps of adding a FlexPie control to your MVC web application and add data to it.

    Follow the steps given below to get started:

    Create an MVC Application

    Create a new MVC application using the ComponentOne or VisualStudio templates. For more information about creating an MVC application, see Configuring your MVC Application topic.

    Create a Data Source for FlexPie

    1. Add a new class to the folder Models (for example: FlexPieDataSource.cs). See Adding controls to know how to add a new model.
    2. Add the following code to the new model to define the classes that serve as a datasource for the FlexPie control.
      C#
      Copy Code
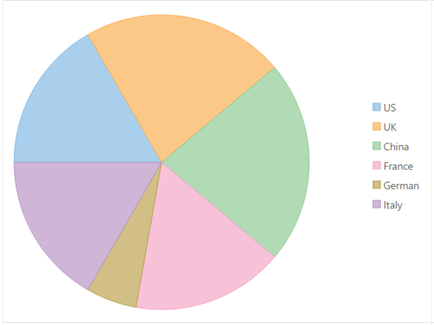
      public class FlexPieDataSource
       {
         public string Country { get; set; }
         public int Sales { get; set; }
      
       public static IEnumerable<FlexPieDataSource> GetData()
        {
          var countries = new[] { "US", "UK",   "China", "France", "German", "Italy" };
          var rand = new Random(0);
          List<FlexPieDataSource> list = new List<FlexPieDataSource>();
           for (int i = 0; i < 6; i++)
            {
              var sales = rand.Next(1, 5);
              list.Add(new FlexPieDataSource {  Sales = sales, Country = countries[i] });
                  }
                  return list;
              }
          }
      
    Back to Top

    Add a FlexPie control

    Complete the following steps to initialize a FlexPie control.

    Add a new Controller

    1. In the Solution Explorer, right click the folder Controllers.
    2. From the context menu, select Add | Controller. The Add Scaffold dialog appears.
    3. Complete the following steps in the Add Scaffold dialog:
      1. Select Empty MVC Controller template.
      2. Set name of the controller (for example: Default1Controller).
      3. Click Add.
    4. Include the MVC references as shown below.
      C#
      Copy Code
      using C1.Web.Mvc;
      using C1.Web.Mvc.Serializition;
      using C1.Web.Mvc.Chart;
      
    5. Replace the method Index() with the following method.
      C#
      Copy Code
      public ActionResult QuickStart()
      {
          return View(FlexPieDataSource.GetData());
      }
      

    Add a View for the Controller

    1. From the Solution Explorer, expand the folder Controllers and double click the controller QuickStartController to open it.
    2. Place the cursor inside the method QuickStart().
    3. Right click and select Add View. The Add View dialog appears.
    4. In the Add View dialog, verify that the view name is QuickStart and View engine is Razor (CSHTML).
    5. Click Add. A view is added for the controller.
    6. Instantiate a FlexPie control in the view QuickStart as shown below.
      Index.cshtml
      Copy Code
      <c1-flex-pie binding-name="Country" binding="Sales">
          <c1-items-source source-collection="Model"></c1-items-source>
      </c1-flex-pie>
      

    Back to Top

    Build and Run the Project

    1. Click Build | Build Solution to build the project.
    2. Press F5 to run the project.
      Append the folder name and view name to the generated URL (for example: http://localhost:1234/QuickStart/QuickStart) in the address bar of the browser to see the view.
    Back to Top