ASP.NET MVC Controls | ComponentOne
Working with Controls / Input Controls / InputDateTime / Quick Start
In This Topic
    Quick Start
    In This Topic

    The quick start guides you through the steps of adding an InputDateTime control to your application. For more information on how to add ASP.NET MVC Edition controls, see Adding Controls.

    To accomplish this, follow these steps:

    Create an MVC Application

    Create a new MVC application using the ComponentOne or VisualStudio templates. For more information about creating an MVC application, see Configuring your MVC Application topic.

    Back to Top

    Add a new Controller and View

    Add a new Controller:

    1. In the Solution Explorer, right click the folder Controllers.
    2. From the context menu, select Add | Controller. The Add Scaffold dialog appears.
    3. Complete the following steps in the Add Scaffold dialog:
      1. Select MVC 5 Controller - Empty template.
      2. Set name of the controller (for example: Default1Controller).
      3. Click Add.
    4. A new controller is added to the application.

    Add a View for the controller:

    1. Place the cursor inside the method Index().
    2. Right click and select Add View. The Add View dialog appears.
    3. In the Add View dialog, verify that the View name is Index and View engine is Razor (CSHTML).
    4. Click Add to add a view for the controller.

    Back to Top

    Add the Control

    1. Replace the default code of the Index.cshtml file with the code given below to initialize an InputDateTime control.
      Razor
      Copy Code
      @{
        var today = DateTime.Now.Date;
        var minDate = new DateTime(today.Year, 1, 1);
        var maxDate = new DateTime(today.Year, 12, 31);
      }
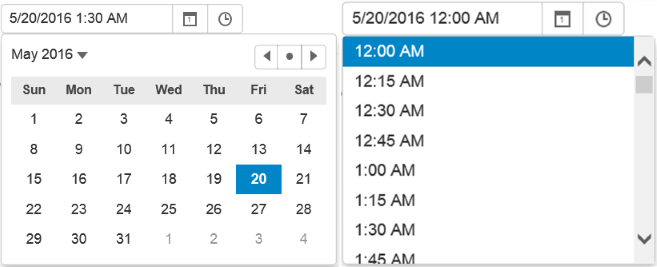
      <div> @(Html.C1().InputDateTime().Id("idtInputDateTime").Value(today).Min(minDate).Max(maxDate))</div>
      

    Back to Top

    Build and Run the Project

    1. Click Build | Build Solution to build the project.
    2. Press F5 to run the project.
      Append the folder name and view name to the generated URL (for example: http://localhost:1234/Index/index) in the address bar of the browser to see the view or link the view to the home page.

    Back to Top