ASP.NET MVC Controls | ComponentOne
Working with Controls / Input Controls / InputDateRange / Quick Start
In This Topic
    Quick Start
    In This Topic

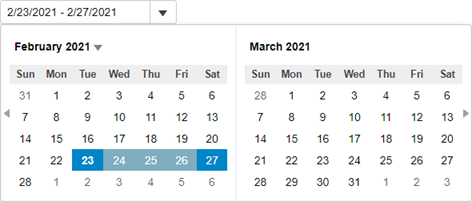
    The following quick start guide is intended to get you up and running with the InputDateRange control. In this quick start, you start with creating a new application, add the InputDateRange control to it, set its value and display a date range in it. When you click the drop-down button to open the calendar, the InputDateRange control shows two calendar months, by default. However, you can change the month count displayed in the control as per your requirements. For more information on changing the number of months displayed in the InputDateRange control, see Date Range topic.

    To accomplish this, follow these steps:

    Create an MVC Application

    Create a new MVC application using the ComponentOne or VisualStudio templates. For more information about creating an MVC application, see Configuring your MVC Application topic.

    Back to Top

    Add InputDateRange

    To add the InputDateRange control to your application, add C1.Web.MVC reference and follow these steps:

    Add a new Controller

    1. In the Solution Explorer, right click the folder Controllers.
    2. From the context menu, select Add | Controller. The Add New Scaffold Item dialog appears.
    3. In the Add New Scaffold Item dialog, follow these steps:
      1. Select the MVC 5 Controller - Empty template.
      2. Click Add. The Add Controller dialog appears.
      3. In the Add Controller dialog, set name of the controller (for example: InputDateRangeController).
      4. Click Add.

    Add a View for the Controller

    1. From the Solution Explorer, expand the folder Controllers and double click the InputDateRangeController.
    2. Place the cursor inside the method Index().
    3. Right click and select Add View. The Add View dialog appears.
    4. In the Add View dialog, verify that the View name is Index and View engine is Razor (CSHTML).
    5. Click Add to add a view for the controller. Copy the following code and paste it inside Index.cshtml to create a simple application with the InputDate control.
      Index.cshtml
      Copy Code
      @{
          var today = DateTime.Now.Date;
          var rangeEnd = today.AddDays(4);
      }
      
      @(Html.C1().InputDateRange().Id("demoControl")
              .Value(today)
              .RangeEnd(rangeEnd)
      )
      
    Back to Top

    Build and Run the Project

    1. Click Build | Build Solution to build the project.
    2. Press F5 to run the project.
      Append the folder name and view name to the generated URL (for example: http://localhost:1234/InputDateRange/Index) in the address bar of the browser to see the view.
    Back to Top