C1DataEngine Workbench is an Electron application that supports the creation and visualization of C1DataEngine workspaces. The C1DataEngine Workbench works like a standalone tool for data analysis. Also, the user doesn't require any programming knowledge to work with this desktop application.
The C1DataEngine Workbench tool provides many advantages for developers using C1DataEngine library in their .NET Core and .NET Standard applications:
The C1DataEngine Workbench application is available for the following platforms:
| Platform | Installer |
| Windows | C1DataEngine Workbench Setup.exe |
| macOS | C1DataEngine Workbench.dmg |
| Linux | C1DataEngine Workbench.AppImage |
To open the C1DataEngine Workbench application, double click the C1DataEngine Workbench Setup.exe. This launches the C1DataEngine Workbench application. The user can see a home screen with two tabs, Home and Workspace. You can also see links to Get Started blogs and Recent Workspaces (if any).

Users can create DataEngine workspaces using the C1DataEngine Workbench application. Follow the steps below to create a workspace.
Click the Workspace tab. A Select Folder dialog box appears.
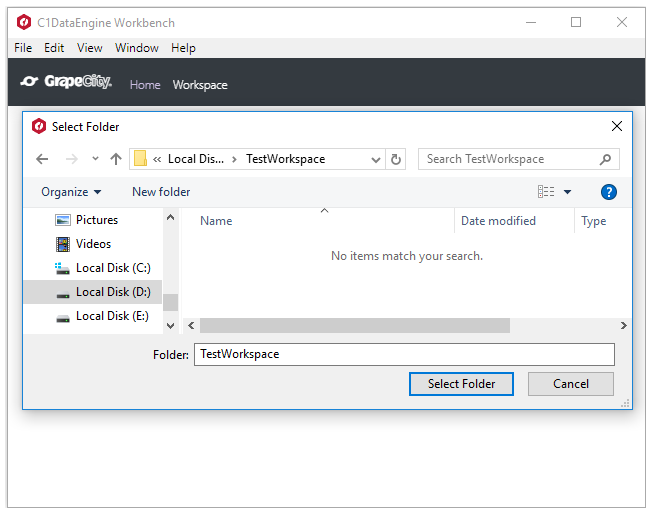
Select an empty folder to create a workspace.
You have created a workspace. Hence, you will be directed to the Import Base Table screen, where you can import JSON, SQL or CSV data.
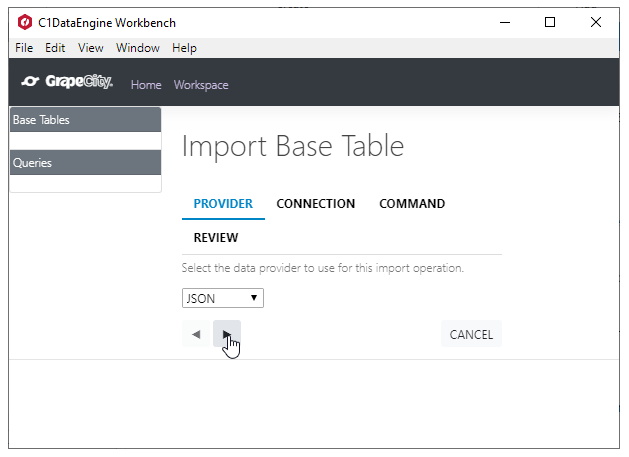
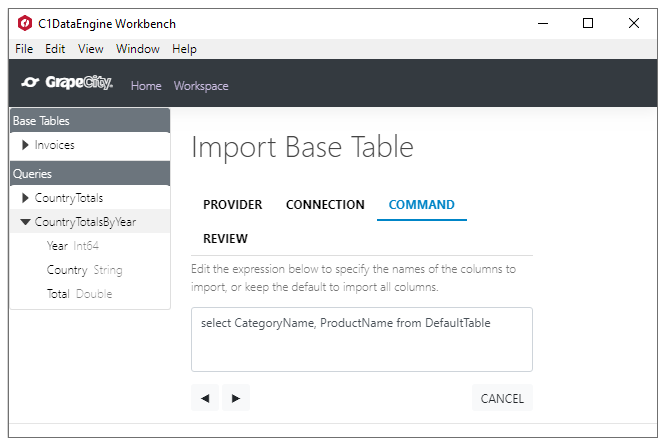
Once you are redirected to the Import Base Table screen, you can see Base Tables and Queries columns in the left panel and tabs like PROVIDER, CONNECTION, COMMAND and REVIEW in the right panel.
Let's say a user wants to import JSON data using the C1DataEngine Workbench application. In order to import JSON data, follow the steps below:
Select the JSON data provider in the dropdown menu of the PROVIDER tab. Click the right arrow button to proceed to the next tab.
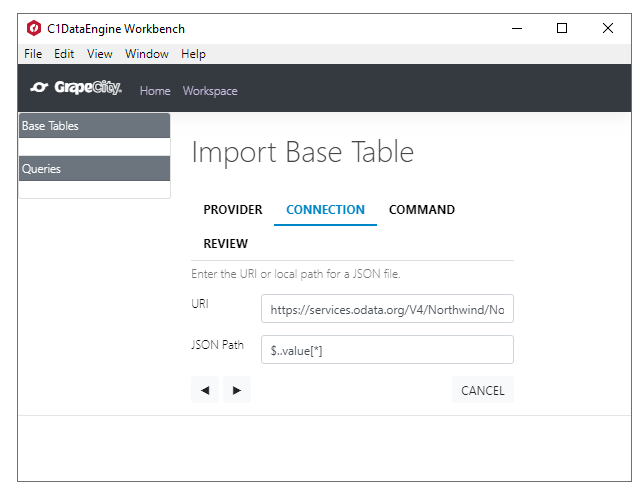
Enter the following URI and JSON Path in the CONNECTION tab. Note that OData v4 returns results in JSON format by default.
|
URI |
JSON Path |
|
https://services.odata.org/V4/Northwind/Northwind.svc/Invoices |
$..value[*] |
Click the right arrow button to proceed to the next tab.
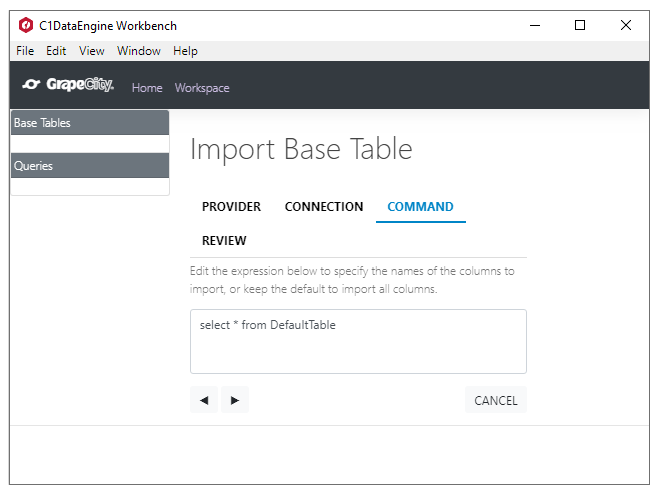
Edit the expressions in the COMMAND tab to specify the names of the columns to import. Click the right arrow button to proceed to the REVIEW tab.
Enter a unique name for the base table in the REVIEW tab, for example, 'Invoices'.
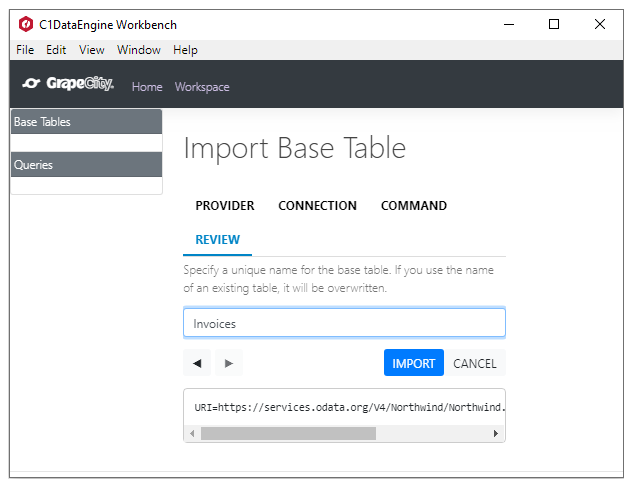
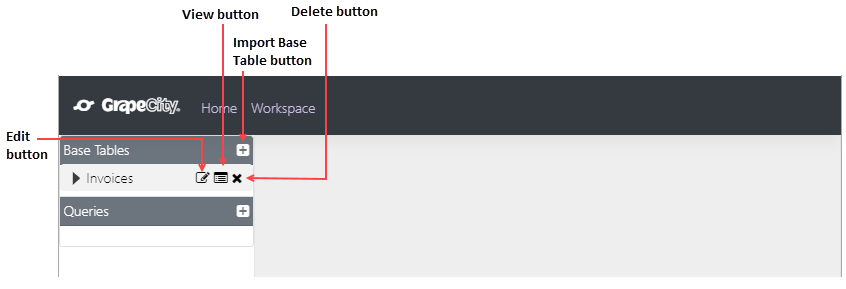
Click the IMPORT button. A spinning progress indicator appears. Once the import is complete, you can see a base table entry named 'Invoices'. Note that there appear three buttons, next to the Invoices entry, Edit, View and Delete buttons. The Edit button lets the user edit the base table, the View button lets you view the base table data in a resizable grid, and the Delete button lets you delete the base table. An Import Base Table button lets the user add a new base table.
Click the triangle icon that precedes it to expand the list of available columns. Click the View button to display the base table data in a resizable grid. Note that only the first 2000 rows are displayed.
Users can also customize the Base Table result set. This is explained in Customize Base Table and Query Data topic.
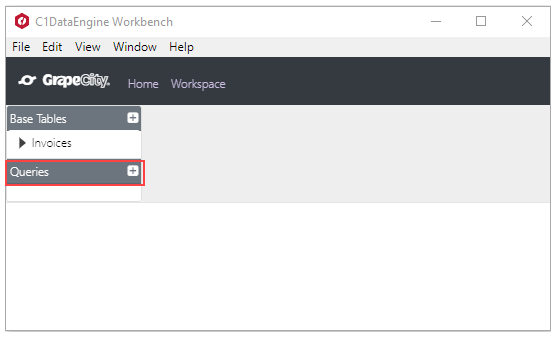
After importing the Base Tables entry 'Invoices', let's say the user wants to create a query.
You can create a query by following the steps below:
Locate the Queries column on the left panel. Click the add icon  . You will be directed to the Create Query screen.
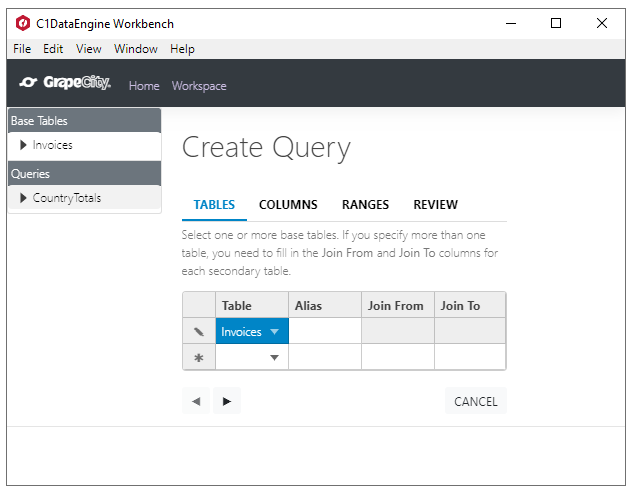
In the TABLES tab, select the Invoices Base Table in the top left cell of the grid, under the Table column. Click the right arrow button. Note that if you specify more than one table, you have to fill in the Join From and Join To columns for each secondary table.

In the COLUMNS tab, click the dropdown button in the top left grid cell. Select 'Country'. In the add new row, click the dropdown button and select 'ExtendedPrice'. In the Alias column for that row, enter 'Total'. In the Operation column for that row, select 'Sum'. Click the right arrow button to move to the next tab.

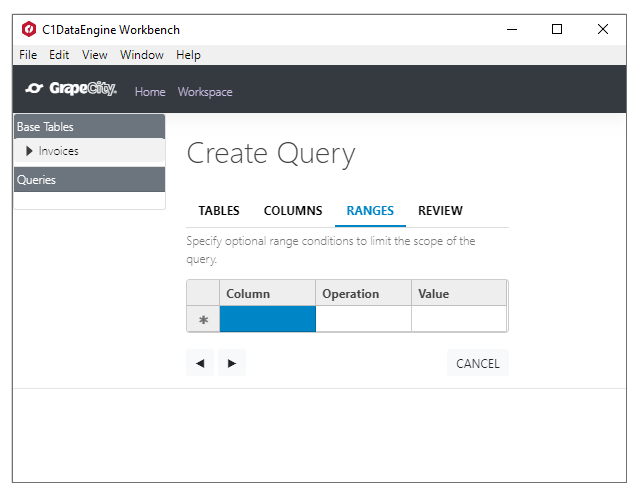
Click the right arrow button in the RANGES tab to move to the next Tab.
Enter a unique name for the query in the REVIEW tab. Here, the name 'CountryTotals' has been used. Click the Create button.

The text box at the bottom of the page is not editable, but shows the JSON data that will be used to create the query. Note that the user can copy the JSON string and use it in application code with the CreateQueryFromJsonString method of QueryFactory class.
Expand the newly added CountryTotals node. Display the results by clicking its grid icon.
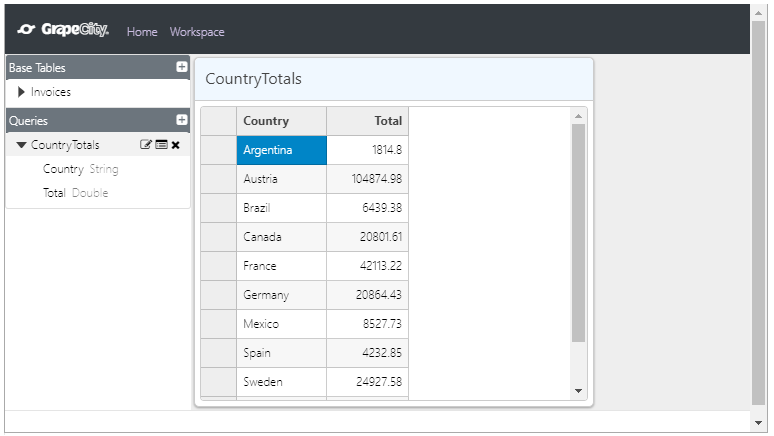
Users can also customize the Query result set. This is explained in Customize Base Table and Query Data topic.
Let's say the base table data contains date or time columns. In such a case, you can use date-specific functions in query definitions to aggregate by year, month, etc.
Follow the steps below to create query result with date and time aggregates.
Click the on the right of the Queries panel. Select Invoices in the top left grid cell, under the Tables column in the TABLES tab. Click the right arrow button.
Fill the cells of the grid in the COLUMNS tab as given in the image below:

Note that when a row contains a date or time column, the Operation column dropdown contains two groups of values, Aggregate and Date/Time.
Click the REVIEW tab, and enter 'CountryTotalsByYear' as the query name. Click the CREATE button.
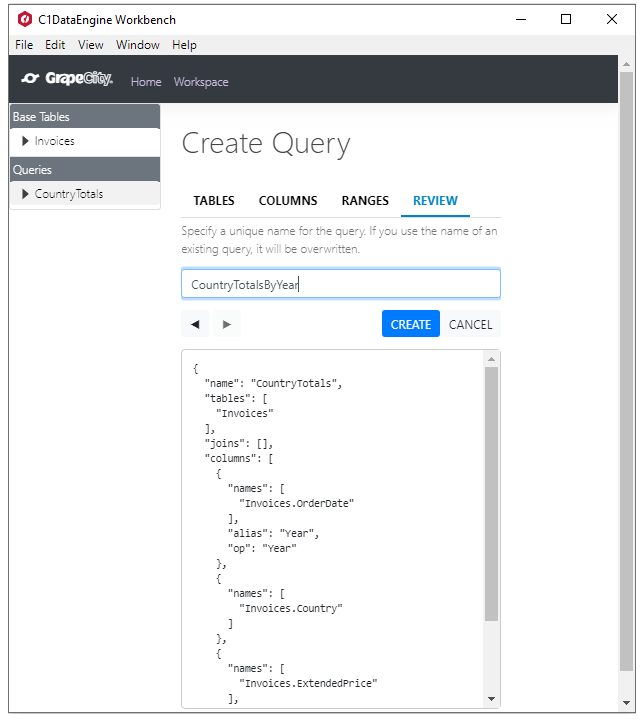
The text box at the bottom of the page is not editable, but shows the JSON data that will be used to create the query. Note that the user can copy the JSON string and use it in application code with the CreateQueryFromJsonString method of QueryFactory class.
Expand the newly added node under Queries. Click the grid icon to display the results.

Users can also customize the Query result set. This is explained in Customize Base Table and Query Data topic.
In this example, the current base table entry does not contain product category information. The user can import another table to create a join query.
Follow the steps below to join queries.
After changing the provider to JSON in the PROVIDER tab, enter the following URI and JSON path in the CONNECTION tab.
|
URI |
JSON Path |
|
https://services.odata.org/v4/Northwind/Northwind.svc/Product_Sales_for_1997 |
$..value[*] |
Modify the select statement in the COMMAND tab.
Click the right arrow button to move to the next tab.
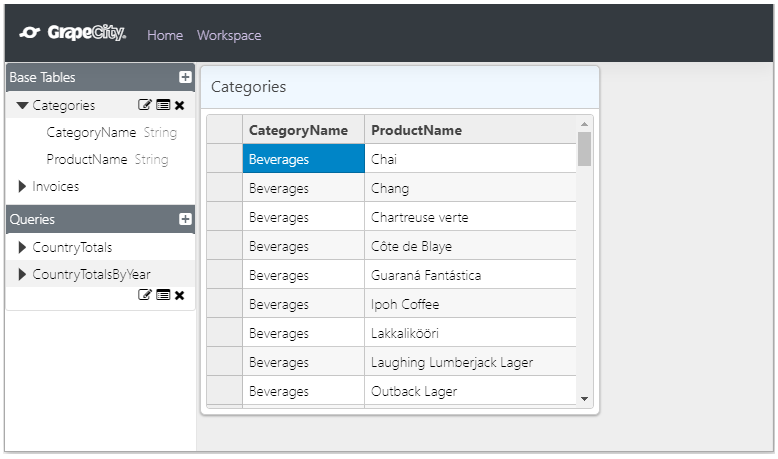
Enter 'Categories' as the base table name in the REVIEW tab. Click the IMPORT button. When the import is complete, you should see a base table entry named 'Categories'. Click the triangle icon to expand the list. Click the grid icon to display the base table data.
Add a query from Queries panel by clicking the button. Fill the cells in the grid under the TABLES tab as given in the image.

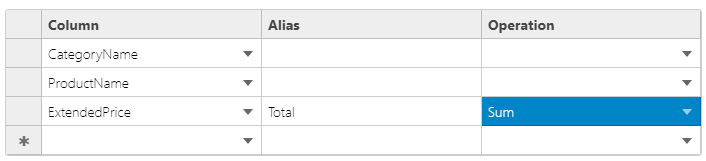
After clicking the right arrow button in the Tables tab, fill the cells in the grid under the COLUMNS tab as depicted in the image below.

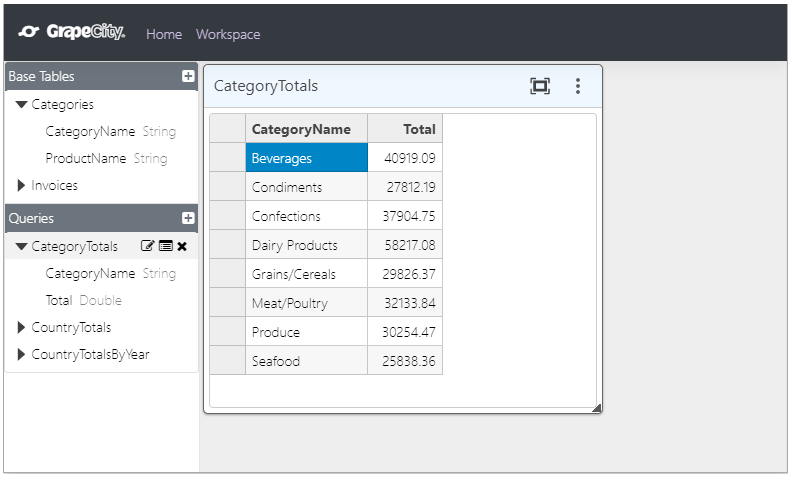
In the REVIEW tab, enter the query name as 'CategoryTotals'. Click CREATE button. The new query node gets added to the Queries panel. Display results by expanding and clicking the grid button.
Users can also customize the Query result set. This is explained in Customize Base Table and Query Data topic.
Note that the user can copy the JSON string and use it in application code with the CreateQueryFromJsonString method of QueryFactory class.
The user can also limit the scope of a query by specifying one or more range expressions. The following example depicts how a user can add a range to a join query. Note that you can also use ranges with single-table queries.
Follow the steps below to create query result with range expressions.
Add a query by clicking the in the Queries table. Fill the cells in the grid under the TABLES tab as given in the image.

Fill the cells in the grid under the COLUMNS tab as given in the image.
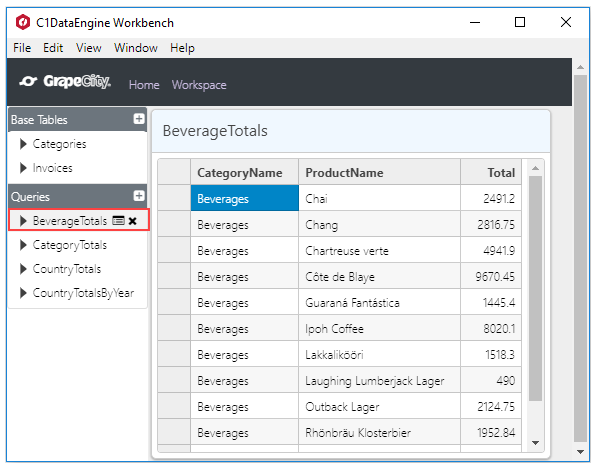
Fill the cells in the grid under the RANGES tab as given in the image. Here, as you can observe, we have filtered the Value 'Beverages' in the CategoryName Column using the Equal Operation.

In the REVIEW tab, add the query name as 'BeverageTotals'. Click the CREATE button. The newly added query appears in the Queries panel. Display the results by clicking its grid icon.
Users can also customize the Query result set. This is explained in Customize Base Table and Query Data topic.
Note that the user can copy the JSON string and use it in application code with the CreateQueryFromJsonString method of QueryFactory class.