Step 4 of 4: Running the Application
In This Topic
Now that you've created a UWP-style application and customized the application's appearance and behavior, the only thing left to do is run your application. To run your application and observe NumericBox for UWP's run-time behavior, complete the following steps:
- From the Debug menu, select Start Debugging to view how your application will appear at run time.
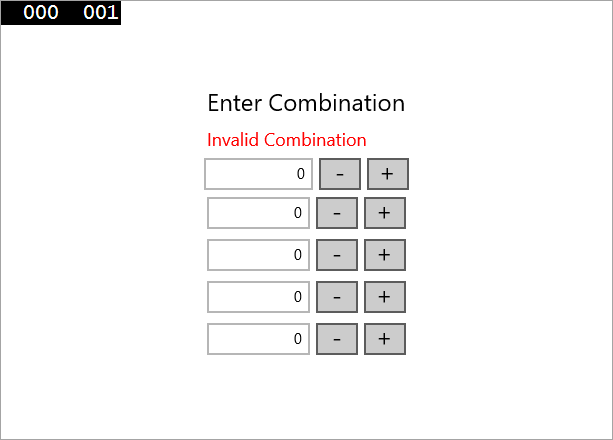
- Click the + button in the first C1NumericBox control until 5 is displayed. Note that the number increased by 1 each time you click the button, this is because the C1NumericBox.Increment property is set to 1 by default.
- Click inside the second C1NumericBox, highlight the "0" value, and type "2" to replace it.
- Try clicking the - button in the third C1NumericBox control and notice that the number does not change. This is because the C1NumericBox.Minimum property was set to 0 and so the control will not accept values less than zero. Click the + button until 3 is displayed.
- In the fourth C1NumericBox control, place the cursor in front of the 0 and click. Enter "5" so that "50" is displayed.
- Click inside the last C1NumericBox control. Notice that the 50 inside the fourth C1NumericBox was reset to 9. That's because the C1NumericBox.Maximum property was set to 9 so the control will not accept values greater than nine.
- Enter 9 in the last C1NumericBox control.
- Click the - button of the fourth C1NumericBox control twice so 7 is displayed. Note that the text of the second Label changed and the button is now visible.
- Try typing inside a C1NumericBox control or clicking its + or - buttons, notice that you cannot. That is because the C1NumericBox.IsReadOnly property was set to True when the correct number sequence was entered and the controls are now locked from editing.
- Click the now-visible Enter button to navigate to the ComponentOne Web site.
Congratulations! You've completed the NumericBox for UWP quick start and created a NumericBox for UWP application, customized the appearance and behavior of the controls, and viewed some of the run-time capabilities of your application.
See Also