Web API Core | ComponentOne
In This Topic
    Licensing
    In This Topic

    Web API Edition is a part of ComponentOne Studio Enterprise and follows the standard subscription model like all other ComponentOne products.

    Runtime license checks are done for Web API services, which means library requires a unique key to be validated at runtime. C1.Web.Api (for Web API 2.2) services use Development level license mode, while C1.AspNetCore.Api(for ASP.NET Core) services use Application level license mode.

    What all is included in a subscription of Studio Enterprise?

    A subscription of ComponentOne Studio Enterprise includes all updates, bug fixes and official releases for one year. For example, if you purchase 2015 v1, you are entitled to use versions 2015 v2, 2015 v3, 2016 v1 and all other versions released in between these versions. A subscription entitles you to unlimited, royalty-free app redistribution using any valid version of ComponentOne controls.

    For more information on the ComponentOne licensing model, visit ComponentOne Licensing FAQs.

    How does Licensing Work?

    You can work on multiple Web API 2.2 applications using the same license. The licenses.licx file containing the licensing information would automatically be generated by the Visual Studio template based on the ComponentOne license present on the system. The contents of the license file are as shown below.

    Licenses.licx
    Copy Code
    C1.Web.Api.LicenseDetector, C1.Web.Api
    

    You can even distribute your application across multiple users without worrying about paying any royalty or user fees for distribution. This is a huge cost-saver and also makes embedding ComponentOne controls into applications easier as there are no licensing pre-requisites.

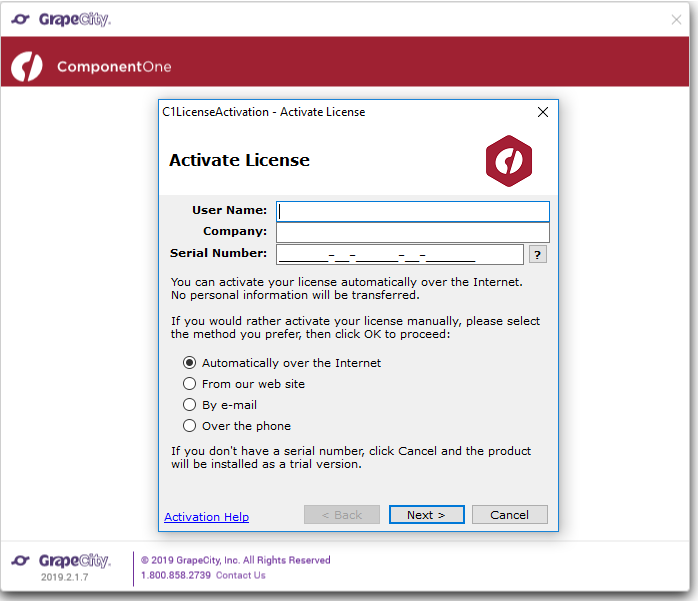
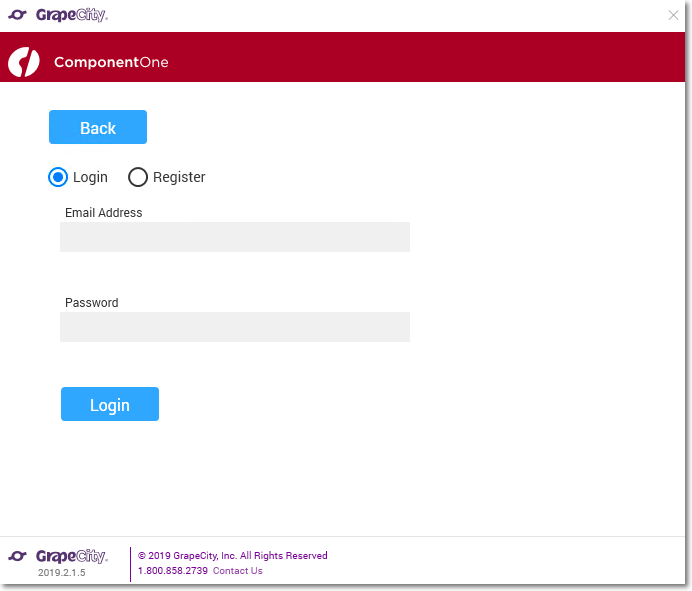
    When you download and install ComponentOne products, you are presented with the chance to activate a license. If you would rather evaluate our tools before buying, you can skip the license activation process. At that time, you will have a 30-day evaluation period. During that period, you will be able to use all features of ComponentOne products. At the end of the 30-day period, you will not be able to build applications that include unlicensed ComponentOne controls.

    You can purchase and activate a license at that point or you can request an evaluation key that will grant you another 30-day evaluation period. Once you have the evaluation key, you would activate it through the ComponentOne License Activation utility found in your ComponentOne Start menu.

    How to purchase a license or request a 30-day evaluation key?

    • License: You can purchase a license through our online store or by contacting our sales department. As soon as you purchase, a key will be emailed to you.
    • Evaluation Key: You can get a 30-day evaluation key by contacting sales or through our website's My Account section (you will need an account to proceed with this option).

    Complete the following steps to generate a 30-day evaluation key through our website:

    1. Visit https://developer.mescius.com/componentone.
    2. Open My Account and login or create an account. If you create an account, you must use the same email you used when you initially downloaded ComponentOne products.
    3. Find your current evaluation listed under My Evaluations and click Extend Evaluation button.
    4. You will receive an email with our key which you will then need to activate on your machine.

    How to activate the key on your machine?

    After you have received your license or evaluation key through email, complete the following steps to activate it on your machine.

    1. Find the ComponentOne License Activation utility at the following location and open it:
      ($/Program Files (x86)/ComponentOne/C1StartMenu) .
    2. Enter your key, choose an activation method, and follow the on-screen instructions.
      If you activate a 30-day evaluation key, your trial will proceed exactly as your previous trial did. If you activate a license key, you will be entitled to royalty-free perpetual use.

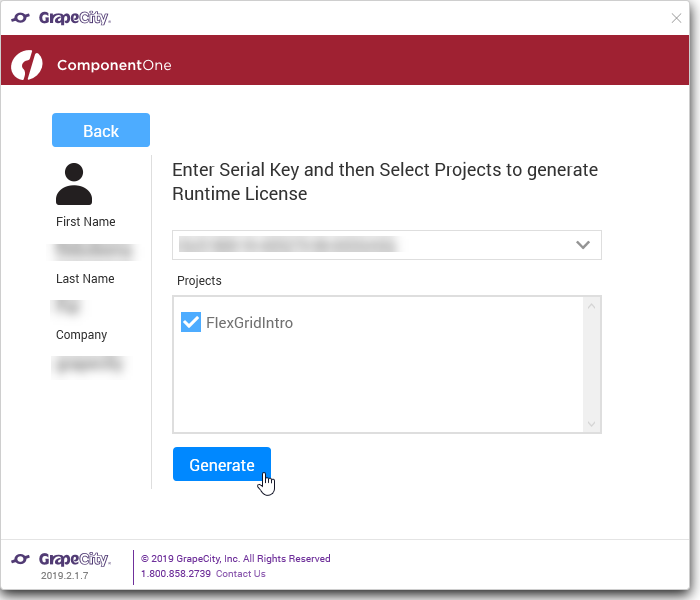
    How to manually add the license file to the application?

    1. In the Solution Explorer, right click the project and select Add | New Item. The Add New Item dialog appears.
    2. In the Add New Item dialog, select C# | General and select Text File in the right pane.
    3. Name the text file as licenses.licx.
    4. Add the following to the text file:
      Licenses.licx
      Copy Code
      C1.Web.Api.LicenseDetector, C1.Web.Api
      

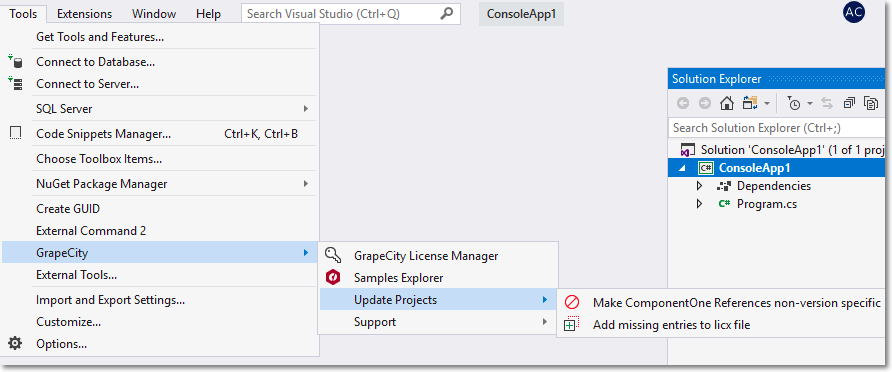
    If you are using ComponentOne controls with Visual Studio 2017 or above, you can use the MESCIUS ComponentOneMenu Extension to License applications, open Sample Explorerupdate projects and contact Technical Support. After installation, it gets available with various options as shown below.

    GrapeCity License Manager Extension for Visual Studio

    To use GrapeCity License Manager Extension, follow these steps:

    1. From the Tools menu, select GrapeCity. You will see four options as shown in the image below.

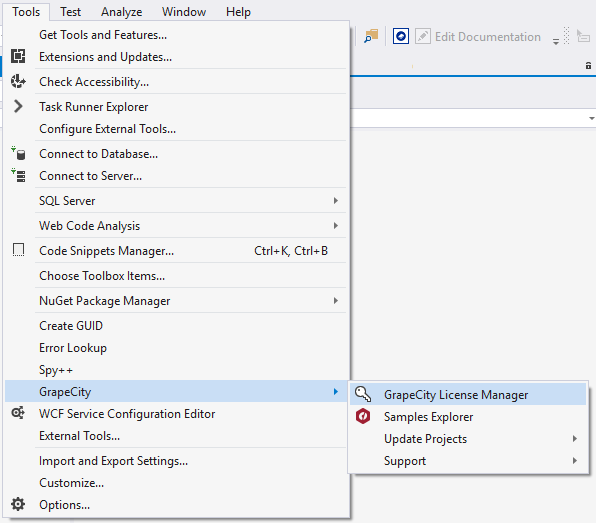
    2. Select GrapeCity License Manager. The License Manager window appears as shown in the image below:

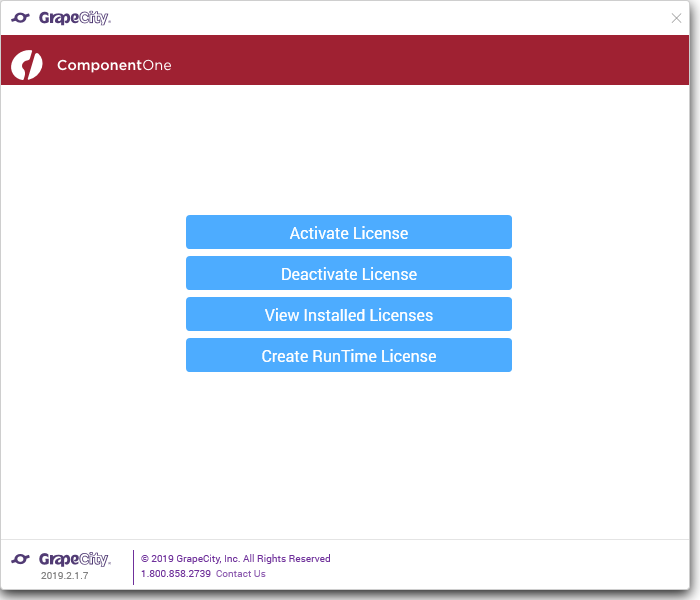
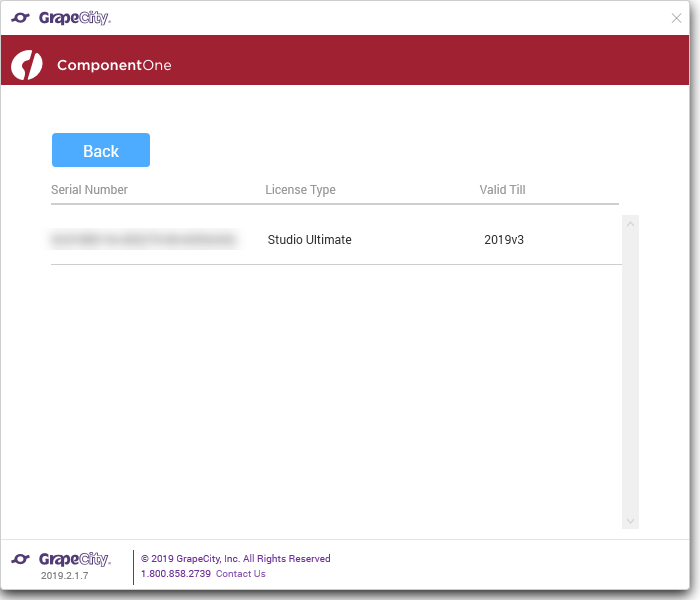
      The GrapeCity License Manager displays the following options:

      • Activate License - It allows the users to activate the License (Serial Number) using the Internet, ComponentOne website, e-mail, or over phone. On clicking this option, C1LicenseActivation - Activate License application window appears as shown below. Users can follow the wizard to do the license activation.


      • Deactivate License – It allows the users to deactivate the License (Serial Number) using the Internet, ComponentOne website, e-mail, or over phone. On clicking this option, C1LicenseActivation - Deactivate License application will appear as shown below. Users can follow the wizard to do the license deactivation.


      • View Installed Licenses - It allows the users to view the Serial Number, License Type, and Validity of the installed licenses on the system. The license can be viewed as shown below:


      • Create RunTime License - It allows the users to generate runtime license for the project(s). On clicking this option, the following window appears:


        To use this option, you need to login the MESCIUS Account. In case you don't have a MESCIUS Account, you can create it using the Register option. Once you Sign in, the following window appears:


        From the above window, you can select the license and the project for which license needs to be generated. On clicking the Generate button, a success message appears and a license file GCDTLicenses.xml is generated.

    Samples Explorer

    To view sample explorer, follow these steps:

    1. From the Tools menu, select GrapeCity.
    2. Select Samples Explorer. ComponentOne Samples Explorer window appears as shown in the image below:

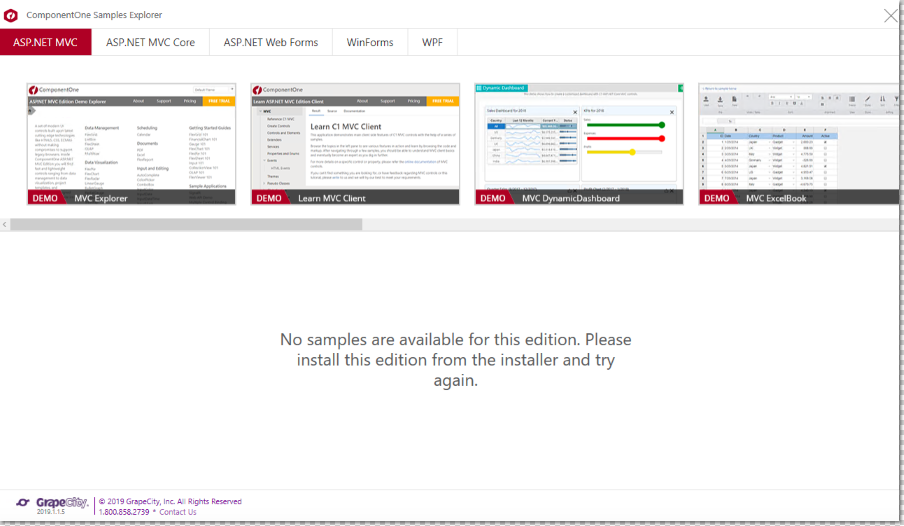
    This option allows the users to open the Sample Explorer that has been installed on the system with the installer. From the displayed window, you can open any of the required samples or demos.

    Update Projects

    To update existing projects, follow these steps:

    1. From the Tools menu, select GrapeCity.
    2. Select Update Projects. Update Projects provides two options to update the project(s) as shown and listed below:


      • Make ComponentOne References non-version specific - This option removes the version information from the Licenses.licx file and sets the Specific Version property of ComponentOne assemblies in the project(s) to false. On clicking this option, a window appears where you can select the Project, click Update, and click Finish to complete the update process.
      • Adding missing entries to Licx file - This option adds missing license information to the license file (*. licx) in the project(s). On Clicking, a window appears where you can select the Project, click Update, and click Finish to update the license files.

    Support

    To contact the Technical Support and view Documentation, follow these steps:

    1. From the Tools menu, select GrapeCity.
    2. Select Support. Support provides three options as shown and listed below.


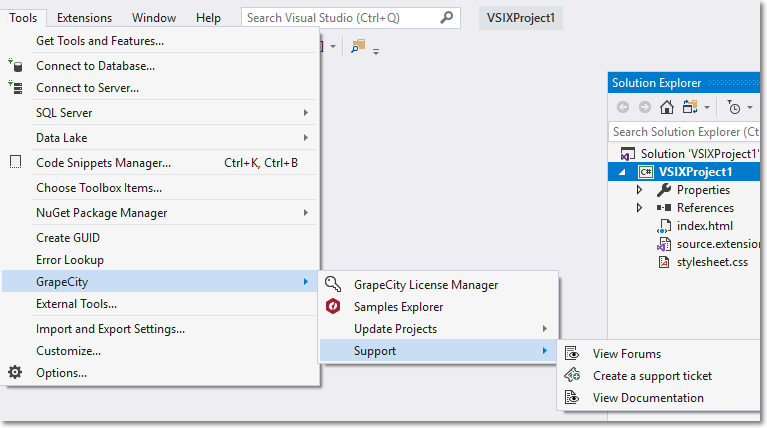
      • View Forums - This option opens the window shown below, which has the redirecting links to the MESCIUS ComponentOne Forums.


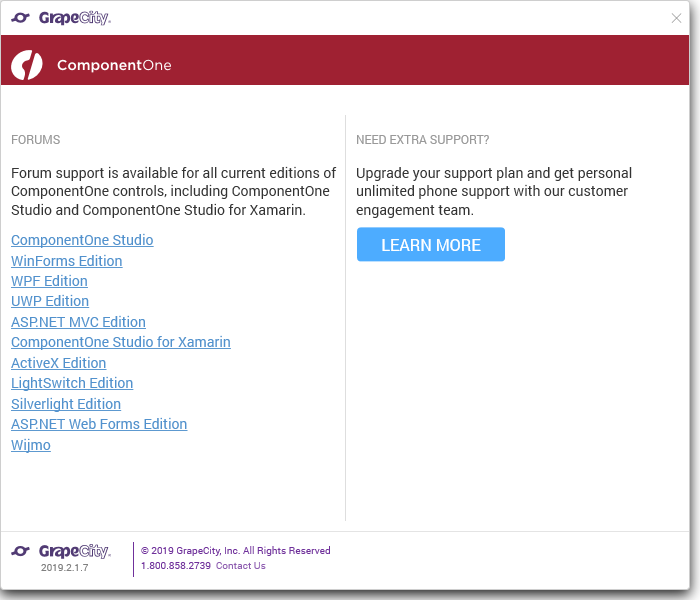
        You can login to access the community forums for all MESCIUS products and post queries/doubts related to the products. You can also find information on how to contact the support team by clicking Learn More.

      • Create a support ticket - This option redirects you to the Support Portal where you can login and get in touch with the support team directly. You can also post queries/doubts related to the products to get personalized support.

      • View Documentation - This option redirects you to the Documentation page where you can access all the documents related to all the MESCIUS products.

    Note: If you are using Visual Studio 2015 or previous versions of Visual Studio, you can use the GrapeCity License Manager add-in. The add-in is available in Tools menu in Visual Studio. For detailed information on using the GrapeCity License Manager add-in, see Generate License using GrapeCity License Manager Add-in.
    See Also