You can easily create a linked navigation list using the C1ListView control. Follow these steps to create a navigation list:
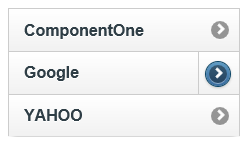
<cc1:C1ListView ID="C1ListView1" runat="server"></cc1:C1ListView><cc1:C1ListView> </cc1:C1ListView> tags and insert the following markup:<Items> </Items><Items> tags, add the following markup to add three C1ListViewLinkItems. The NavigateUrl property embeds the link to an outside website:<cc1:C1ListViewLinkItem Text="ComponentOne" NavigateUrl="http://www.componentone.com/"></cc1:C1ListViewLinkItem>
<cc1:C1ListViewLinkItem Text="Google" NavigateUrl="http://www.google.com/"> </cc1:C1ListViewLinkItem>
<cc1:C1ListViewLinkItem Text="YAHOO" NavigateUrl="http://www.yahoo.com/" Title="yahoo"></cc1:C1ListViewLinkItem><cc1:C1ListViewLinkItem Text="Google" NavigateUrl="http://www.google.com/" SplitUrl="http://news.google.com/" SplitTitle="google news"> </cc1:C1ListViewLinkItem>