Now that you've customized the C1Splitter and added content to it, you are going to run the project and observe some of the changes that you've made to the control.
Complete the following steps:
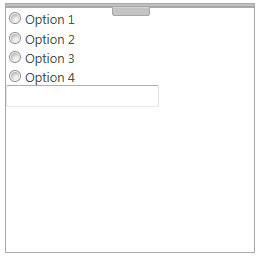
Observe that only Panel2 appears; Panel1 is collapsed, which is what you specified when you set the SplitterPanel.Collapsed property to True.
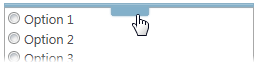
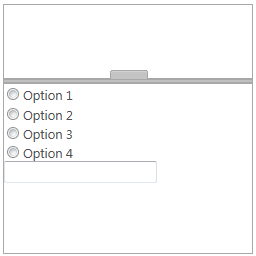
Panel1 expands into view.
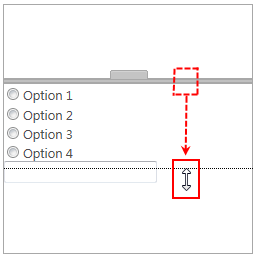
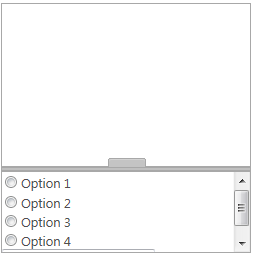
As you've probably noticed by now – and as you can see in the image above – you can't expand the bar to the bottom of the control. This is because you set the SplitterPanel.MinSize to 82 in step 2 so that users wouldn't be able to minimize Panel2 to a height of less than 82 pixels. Thus, upon releasing your cursor, the result will resemble the following image:
What You've Accomplished
Congratulations! You have successfully completed the C1Splitter quick start. In this topic, you added a C1Splitter control to your Web page, customized its behavior and appearance, added content to its panels, and manipulated the control at run time.