Calendar for WinForms | ComponentOne
CalendarView / QuickStart
In This Topic
    QuickStart
    In This Topic

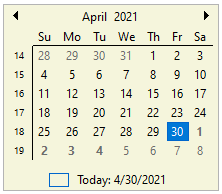
    This quick start gets you started with the CalendarView control by letting you create a WinForms application, add CalendarView control to it, and set a specific date in CalendarView.

    To quickly get started using the control, follow these steps:

    Add CalendarView control

    1. Create a Windows Forms App in Visual Studio.
    2. Add the following assemblies (dependant assemblies for CalendarView control):
      • C1.Win.Calendar
      • C1.Win.Input
      • C1.Win
    3. Drag and drop the CalendarView control from the Toolbox to the form.
    4. Set the Name property of CalendarView control to 'calendarView' by navigating to the Properties window. Alternatively, you can also initialize the CalendarView control via the code editor as given below:
      C#
      Copy Code
      C1CalendarView calendarView = new C1CalendarView();
      

    Configure CalendarView control

    1. Set the location for CalendarView control using the Location property:
      C#
      Copy Code
      // Set CalendarView location
      calendarView.Location = new System.Drawing.Point(300, 152);
      
    2. Use the BoldedDates property and set it to a DateTime array, to make the four consecutive days after the current day as bold.
      C#
      Copy Code
      calendarView.BoldedDates = new DateTime[]
         {
             DateTime.Today.AddDays(1),
             DateTime.Today.AddDays(2),
             DateTime.Today.AddDays(3),
             DateTime.Today.AddDays(4)
          };
      

      Set a background color for the CalendarView control:
      C#
      Copy Code
      // Set Background color
      calendarView.BackColor = Color.Beige;
      

    Build and Run the Project

    1. Click Build | Build Solution to build the project.
    2. Press F5 to run the project.