Design-Time Support
In This Topic
CalendarView provides design-time support to simplify working with the object model. While the CalendarView control includes a smart tag to readily access properties, it also provides a collection editor to quickly add and remove dates.
Smart tags
CalendarView includes smart tags to readily access common properties and other options.
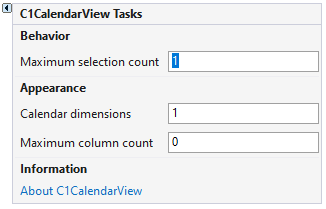
The C1CalendarView Tasks menu provides the following options:
- Maximum selection count: Allows you to set the maximum number of dates that can be selected.
- Calendar dimensions: Enables you to set the number of months to be shown.
- Maximum column count: Allows you to set the maximum number of columns for calendar dimensions.
- About C1CalendarView: Enables you to find the version number of the control and online resources.
Collection Editor
CalendarView provides DateTime Collection Editor that lets you add or remove annually bolded, bolded, and disabled dates.

To access the DateTime Collection Editor, for adding or removing annually bolded dates, follow these steps:
- Right-click on the C1CalendarView control and select Properties from the context menu.
- In the Properties window, click the ellipsis button next to the AnnuallyBoldedDates property to open DateTime Collection Editor.
-
Add annually bolded dates:
- Click the Add button to add annually bolded dates.
- Click the dropdown button
 next to the Value property in the right panel to select a date.
 - Add more dates in the same manner using the Add button.
- Click the OK button to confirm the changes in the CalendarView.
-
Remove annually bolded dates:
- Select the date that you want to remove from annually bolded status. Select more than one dates using the Ctrl key.
- Click the Remove button to remove the selected dates.
- Click OK button to confirm the changes in the CalendarView.
Note: To access DateTime Collection Editor for bolded or disabled dates, click the ellipsis button next to the BoldedDates or the DisabledDates property respectively.