Changing the Orientation of Ribbon Items
In This Topic
Ribbon for WinForms allows users to change the orientation of the items added to the C1Ribbon control. You can change the default orientation (left-to-right) of the ribbon items such as images to right-to-left by using the FlipImageRtl property.
The following code example shows how you can change the orientation of the added ribbon items from left-to-right to right-to-left. The example given below is created using the Quick Start sample.
In Code
- Add a toggle button in the ribbon toolbar and modify its properties through the Properties window as follows:
- Name - ribbonToggleButton1
- Set the Image property to a 16x16 Brush preset image from the floating toolbar
- Add another toggle button in the ribbon toolbar and modify its properties through the Properties window as follows:
- Name - ribbonToggleButton4
- Set the Image property to a 32x32 image from the floating toolbar. In this example, the C1Logo image is used.
- Drag-and-drop two general button controls onto the Form and place them to the right-most corner of the ribbon control such that the Design view appears similar to the following image.

- Set the Text property for the first button to Turn RightToLeft, and the Text property of the second button to Flip. The Design view appears similar to the image below.
- Subscribe the Click events on the button controls added in Step 4 through the Properties window.
- Switch to the code view and add the following code in the event handlers created for the button click events subscribed in Step 5.
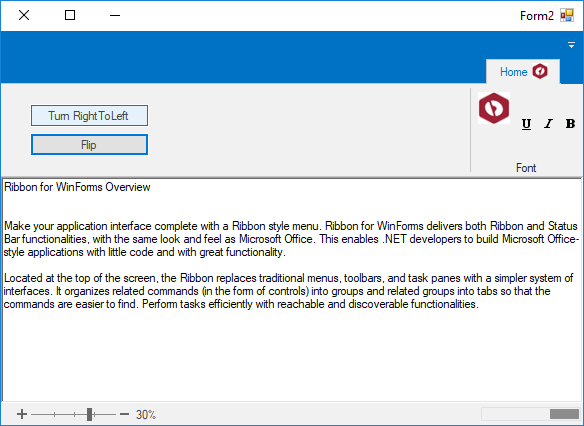
- Run the application and observe that the form appears similar to the image below.
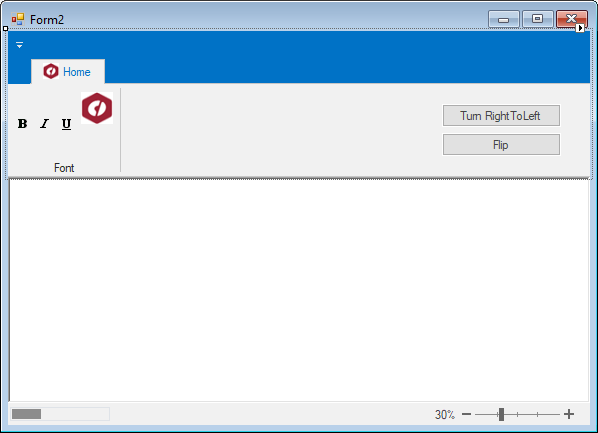
- Click the Turn RightToLeft button and notice that the form's default orientation changes as illustrated in the image below.
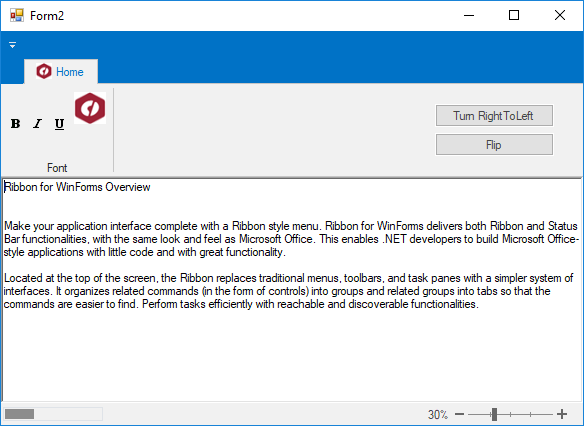
- Click the Flip button to see the images applied to the toggle buttons flip their orientation as illustrated below.