DashboardLayout for WinForms | ComponentOne
Walkthroughs / Customizing Child Container Headers
In This Topic
    Customizing Child Container Headers
    In This Topic

    This walkthrough explains the steps to add custom elements to the child container headers of the DashboardLayout control. As an example, this walkthrough helps you to add custom header elements to perform the following functions on the dashboard tiles:

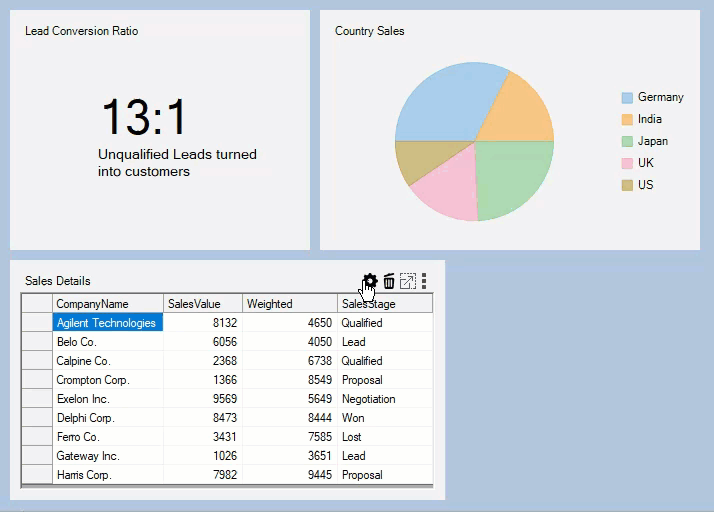
    The following GIF image shows the custom header for each tile in the DashboardLayout control.

    Custom header

    1. Create a dashboard application using the Creating Dashboard with FlowLayout walkthrough topic.
    2. In the Form’s designer file, open the C1DashboardLayout Tasks menu by clicking on the smart tag glyph on the upper-right corner of the DashboardLayout control.
    3. In the C1DashboardLayout Tasks menu, click on Show Options.HeaderElements panel. This opens a panel on the top side of the DashboardLayout control with the following text:
      ‘Drag control here to add it to Options.HeaderElements’.
      Note: The controls dragged and dropped in the Options.HeaderElements panel appear in the child container headers next to the default header elements. It is also possible to show/hide the Options.HeaderElements panel by using the downward/upward arrow button button which appears when the DashboardLayout control is selected in the designer file.
    4. Drag and drop three IconBox controls from the ToolBox onto the Options.HeaderElements panel to add any WinForms controls directly to the panel. In this walkthrough, we are adding the IconBox controls as we need to display only three different icons which when clicked perform the desired actions.
    5. In the Properties window, navigate to the BackgroundImage property of the IconBox controls, click the ellipsis button to open the Select Resource dialog.
    6. In the Select Resource dialog, click Import button to import images for remove, export and settings icons from your system, and then click OK.
    7. Subscribe to the click event for the added icon boxes to generate their respective click event handlers.
    8. Add the following code in the Click event handler of the icon box with the remove icon to remove the item container from DashboardLayout.
      C#
      Copy Code
      private void removeIconBox_Click(object sender, EventArgs e)
      {
          //Removes the item container from DashboardLayout
          c1DashboardLayout1.Items.Remove(c1DashboardLayout1.GetSelectedItem().Id);
      }
      

      VB
      Copy Code
      Private  Sub removeIconBox_Click(ByVal sender As Object, ByVal e As EventArgs)
          ' Removes the item container from DashboardLayout
          c1DashboardLayout1.Items.Remove(c1DashboardLayout1.GetSelectedItem().Id)
      End Sub
      
    9. Use the following code to add a new form which acts as a popup window for renaming the caption that includes a TextBox control showing the old Caption and allows user to change that caption by clicking on the Save button.
      C#
      Copy Code
      public partial class CaptionChangeForm : Form
      {
          //NewCaption is a public property which is accessed in Form1 to change the child container's Caption
          public string NewCaption { get; set; }
          public CaptionChangeForm(string oldCaption)
          {
              InitializeComponent();
              captionTextBox.Text = oldCaption;
          }
      
          private void saveButton_Click(object sender, EventArgs e)
          {
              //Sets the value of NewCaption property and closes the form
              if (captionTextBox.Text != String.Empty)
              {
                  NewCaption = captionTextBox.Text;
                  this.DialogResult = DialogResult.OK;
              }
              this.Close();
          }
      }
      

      VB
      Copy Code
      Public partial Class CaptionChangeForm
               Inherits Form
          'NewCaption is a public property which is accessed in Form1 to change the child container's Caption
          Public Property NewCaption() As String
          End Property
          Public  Sub New(ByVal oldCaption As String)
              InitializeComponent()
              captionTextBox.Text = oldCaption
          End Sub
       
          Private  Sub saveButton_Click(ByVal sender As Object, ByVal e As EventArgs)
              'Sets the value of NewCaption property and closes the form
              If captionTextBox.Text <> String.Empty Then
                  NewCaption = captionTextBox.Text
                  Me.DialogResult = DialogResult.OK
              End If
              Me.Close()
          End Sub
      End Class
      
    10. Add the following code to Click event handler of the icon box with the settings icon to change the caption of the child container.
      C#
      Copy Code
      private void changeCaptionIconBox_Click(object sender, EventArgs e)
      {
          //Creates a new form which takes new Caption of the item container as input from the user.
          CaptionChangeForm captionChangeForm = new CaptionChangeForm(c1DashboardLayout1.GetSelectedItem().Caption);
          if (captionChangeForm.ShowDialog() == DialogResult.OK)
              c1DashboardLayout1.SetCaption(c1DashboardLayout1.GetSelectedItem().ItemContainer, captionChangeForm.NewCaption);
          captionChangeForm.Dispose();
      }
      

      VB
      Copy Code
      Private  Sub changeCaptionIconBox_Click(ByVal sender As Object, ByVal e As EventArgs)
          'Creates a new form which takes new Caption of the item container as input from the user.
          Dim captionChangeForm As CaptionChangeForm =  New CaptionChangeForm(c1DashboardLayout1.GetSelectedItem().Caption) 
          If captionChangeForm.ShowDialog() = DialogResult.OK Then
              c1DashboardLayout1.SetCaption(c1DashboardLayout1.GetSelectedItem().ItemContainer, captionChangeForm.NewCaption)
          End If
          captionChangeForm.Dispose()
      End Sub
      
    11. Add the following code to Click event handler of the icon box with the export icon to export the control (i.e., FlexPie to image/FlexGrid to Excel) within the child container.
      C#
      Copy Code
      private void exportIconBox_Click(object sender, EventArgs e)
      {
          //Exports the FlexGrid to an Excel file and FlexChart to an image 
          //if the selected item container contains these controls
          foreach (Control control in c1DashboardLayout1.GetSelectedItem().Items)
          {
              var dialog = new SaveFileDialog();
              if (control is C1FlexGrid)
              {
                  dialog.Filter = "Excel Files|*.xls;*xlsx;*xlsm";
                  if (dialog.ShowDialog() == DialogResult.OK)
                      ((C1FlexGrid)control).SaveExcel(dialog.FileName, FileFlags.IncludeFixedCells);
              }
              else if (control is FlexPie)
              {
                  dialog.Filter = "PNG|*.png|JPEG |*.jpeg|SVG|*.svg";
                  if (dialog.ShowDialog() == DialogResult.OK)
                  {
                      using (Stream stream = dialog.OpenFile())
                      {
                          var extension = dialog.FileName.Split('.')[1];
                          ImageFormat fmt = (ImageFormat)Enum.Parse(typeof(ImageFormat), extension, true);
                          ((FlexPie)control).SaveImage(stream, fmt, control.Width, control.Height);
                      }
                  }
              }
          }
      }
      

      VB
      Copy Code
      Private  Sub exportIconBox_Click(ByVal sender As Object, ByVal e As EventArgs)
          'Exports the FlexGrid to an Excel file and FlexChart to an image 
          'if the selected item container contains these controls
          Dim control As Control
          For Each control In c1DashboardLayout1.GetSelectedItem().Items
              Dim dialog As var =  New SaveFileDialog() 
              If TypeOf control Is C1FlexGrid Then
                  dialog.Filter = "Excel Files|*.xls;*xlsx;*xlsm"
                  If dialog.ShowDialog() = DialogResult.OK Then
                      (CType(control, C1FlexGrid)).SaveExcel(dialog.FileName, FileFlags.IncludeFixedCells)
                  End If
              Else If TypeOf control Is FlexPie Then 
                  dialog.Filter = "PNG|*.png|JPEG |*.jpeg|SVG|*.svg"
                  If dialog.ShowDialog() = DialogResult.OK Then
                      Imports (Stream stream = dialog.OpenFile())
                      {
                          Dim extension As var =  dialog.FileName.Split("."c)(1) 
                          Dim fmt As ImageFormat = CType(Enum.Parse(Type.GetType(ImageFormat),extension,True), ImageFormat)
                          (CType(control, FlexPie)).SaveImage(stream, fmt, control.Width, control.Height)
                      }
                  End If
              End If
          Next
      End Sub
      
    12. Subscribe to the ItemContainerSelected event in the Form_Load event handler in order to enable the export option only for the tiles which contain the FlexGrid or FlexPie control.
      C#
      Copy Code
      c1DashboardLayout1.ItemContainerSelected += C1DashboardLayout1_ItemContainerSelected;
      

      VB
      Copy Code
      c1DashboardLayout1.ItemContainerSelected += C1DashboardLayout1_ItemContainerSelected
      

      Add the following code to the C1DashboardLayout_ItemContainerSelected event handler.

      C#
      Copy Code
      private void C1DashboardLayout1_ItemContainerSelected(object sender, EventArgs e)
      {
          exportIconBox.Visible = false;
          foreach (Control control in c1DashboardLayout1.GetSelectedItem().Items)
          {
              //If the selected child container contains a Flexgrid or FlexChart the export option is enabled.
              if (control is C1FlexGrid || control is FlexPie)
                  exportIconBox.Visible = true;
          }
      }
      

      VB
      Copy Code
      Private  Sub C1DashboardLayout1_ItemContainerSelected(ByVal sender As Object, ByVal e As EventArgs)
          exportIconBox.Visible = False
          Dim control As Control
          For Each control In c1DashboardLayout1.GetSelectedItem().Items
              'If the selected child container contains a Flexgrid or FlexChart the export option is enabled.
              If TypeOf control Is C1FlexGrid Or control Is FlexPie Then
                  exportIconBox.Visible = True
              End If
          Next
      End Sub
      
    13. Run the application.
      Observe: The child container headers show custom elements which can be used to perform different functions on the dashboard tiles.