In This Topic
This quick start will guide you through the steps of adding FlexGrid and FilterEditor controls to an application, binding FlexGrid to a data source and setting the properties of controls.
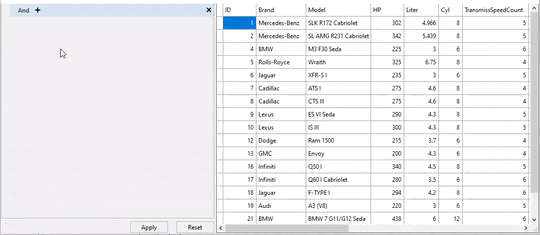
Complete the steps given below to see how the FilterEditor control appears after data binding and setting properties.
- Create a new Windows Forms App.
- Drag and drop the C1FilterEditor control from the Toolbox onto your form.
- Drag and drop the C1FlexGrid control from the Toolbox onto your form.
Back to Top
- Open the FlexGrid Tasks menu by clicking on the smart tag glyph on the upper-right corner of the FlexGrid control.
- In the FlexGrid Tasks menu, click the Choose Data Source drop-down arrow and select the Add Project Data Source link from the drop-down box. The Data Source Configuration Wizard appears.
- On the Choose a Data Source Type page, select Database and click Next.
- On the Choose a Database Model page, leave Dataset selected and click Next.
- Click the New Connection button to create a new connection or choose one from the drop-down list. When you click New Connection, the Add Connection dialog box appears. Set Microsoft Access Database File as the Data source.
- Click the Browse button under Database file name. In the Select Microsoft Access Database File dialog box, browse to the C1NWind.mdb database in the Documents\ComponentOne Samples\Common directory. Select the C1NWind.mdb file and click Open.
- In the Add Connection dialog box, click the Test Connection button to make sure that you have successfully connected to the database or server and click OK.
- Click OK to close the Add Connection dialog box .
- Click the Next button to continue. A dialog box will appear asking if you would like to add the data file to your project and modify the connection string. Since it is not necessary to copy the database to your project, click No.
- Save the connection string in the application configuration file by checking the Yes, save the connection as box and entering a name. Click the Next button to continue.
- On the Choose Your Database Objects page and click Finish.
Back to Top
- Select a Combination from the drop-down list which contains AND & OR logical functions to create a filter expression in the FilterEditor control. Note that the AND function is set by default.
- Click on the (+) sign and select an Operation from the drop-down list after adding the combination.
- Select Field using the ellipsis button. It is the property to which expression applies.
- Now, select the logical operator and Operand Value. The implementation can be seen in the GIF below.
The above filter expression created at runtime can also be created using the following code.
| C# |
Copy Code
|
private static CombinationExpression GetPredefinedFilter()
{
  var filterExpression = new CombinationExpression();
  var filterExpressions = filterExpression.Expressions;
  var hpGreaterThen200Expression = new OperationExpression()
   {
      PropertyName = "HP",
      FilterOperation = FilterOperation.GreaterThanOrEqual,
      Value = 200
   };
   filterExpressions.Add(hpGreaterThen200Expression);
   return filterExpression;
}
|
To apply and clear the filter conditions given in example above, FilterEditor provides ApplyFilterAsync and ClearFilter methods. For more information, refer to Filter Expressions topic.
Back to Top