Installing WinForms Edition
In This Topic
The topic below discusses the procedure of installing WinForms Edition. In order to install the WinForms Edition, please follow the given steps:
- Download the C1ControlPanel from https://developer.mescius.com/componentone to install the latest edition of WinForms.
- Open the ControlPanel using ComponentOneC1ControlPanel.exe. Note that any running instances of Visual Studio must be closed.
- An existing user can login using the registered email address and password.
If you are a new user:
- Register with Component One and create an account by filling the required fields.
- A verification mail will be sent to your email address.
- Visit the activation link to verify your email address.
If you do not want to login or register, you can proceed as an anonymous user.
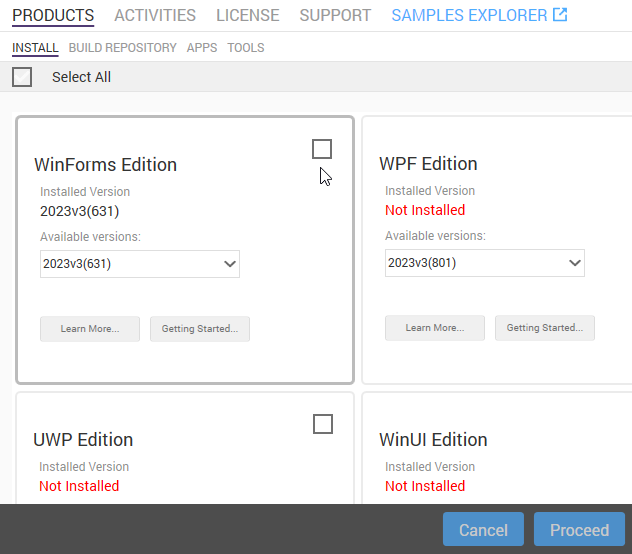
- In the WinForms Edition tile, select the checkbox and click on the Proceed button. You can also install all editions by selecting the checkbox against All Editions. Click the View More button to know more about the Edition.
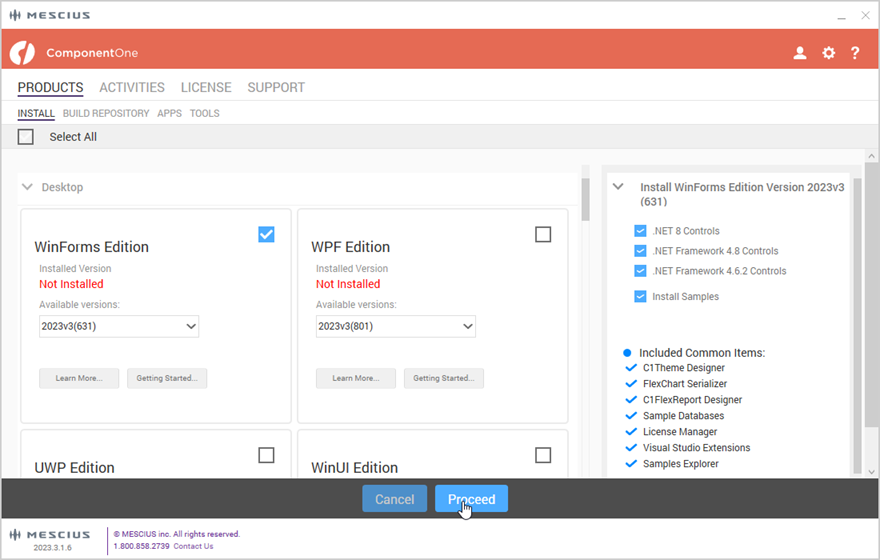
- Upon clicking the Proceed button, a page is displayed asking to review the License Agreement. Click the Accept License Agreement button.
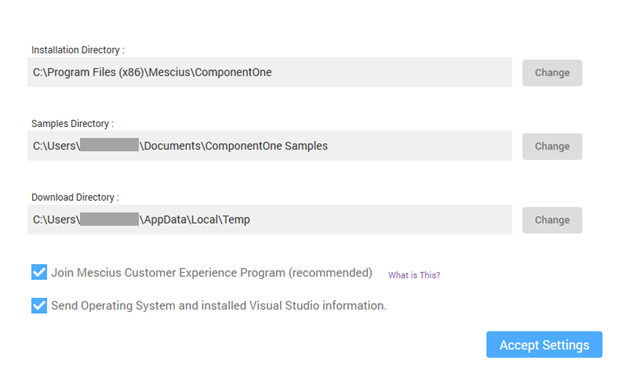
- After accepting the License Agreement, another page appears with the Settings and directory path change buttons. The Installation Directory contains all the DLLs, Samples Directory contains the samples from ComponentOne and the Download Directory contains the log files. Click on Accept Settings button to confirm the directory path and start the installation process.
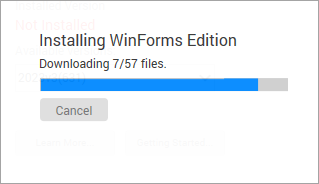
- The installer installs the controls and display its progress as it does so.
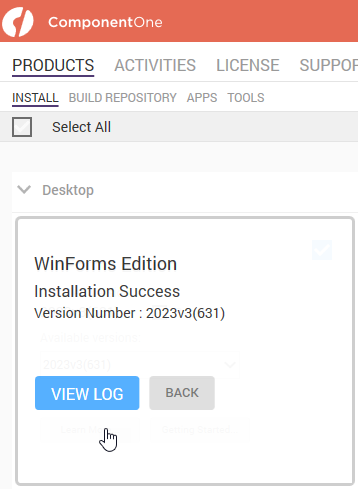
- The installer displays the "Installation Success" screen when the controls are installed. Note that the version currently installed gets displayed in the respective Edition.
Note: By default, ControlPanel downloads the latest version of an edition. You can select older versions by clicking on the Change/Repair Version button.
In case you want to uninstall WPF Edition, see Uninstalling WinForms Edition
Uninstalling WinForms Edition
In This Topic
To uninstall WinForms Edition, follow these steps:
- Open the Control Panel using ComponentOneC1ControlPanel.exe.
- Unselect the checkbox in the WinForms tile. Note that the checkbox is selected if you have already downloaded the WinForms edition.
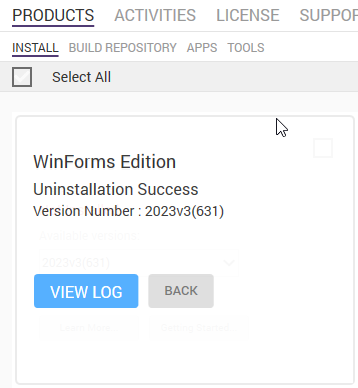
- After successful uninstallation, the following message appears.
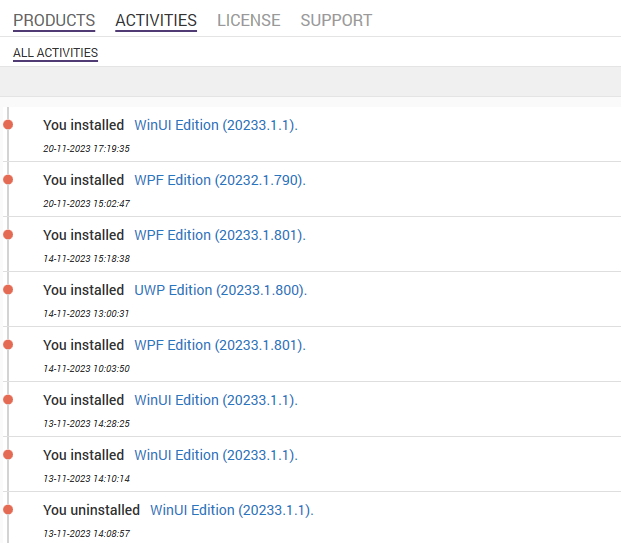
- To get information about all the editions you have installed and uninstalled, click the Activities button.
Adding the ComponentOne Controls to WinForms Project
In This Topic
ComponentOne controls are automatically added to Visual Studio Toolbox while installing WinForms Edition.
To use a ComponentOne control, add it to the form or add a reference to the appropriate assembly to your project. In the following example, we will use C1BarCode.
Note: With some assemblies, like C1Zip, there is no visible component that appears in the Visual Studio Toolbox. In these cases, it is necessary to reference the assembly in your project.
If ComponentOne controls are not available in the Visual Studio Toolbox after installation, then users need to manually add these controls to the Toolbox.
Adding a Control to the Toolbox
To manually add C1BarCode control to the Visual Studio Toolbox, follow these steps:
- Open the Visual Studio IDE (Integrated Development Environment), and the desired Windows Forms project. Make sure the Toolbox is visible (select Toolbox in the View menu if necessary). Right-click within the Toolbox to open its context menu.
- To make C1BarCode control appear on its own tab in the Toolbox, select Add Tab from the context menu and provide a tab name (For example, C1BarCode).
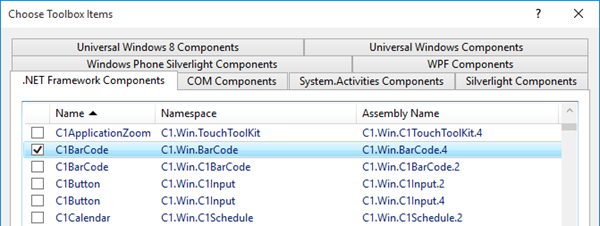
- Right-click the tab where the component is to appear and select Choose Items from the context menu. Choose Toolbox Items dialog box opens.
- In the dialog box, select the .NET Framework Components tab. Sort the list by Namespace (click the Namespace column header) and check the check boxes for all the components belonging to namespace C1.Win.BarCode. Note that there may be more than one components for each namespace.
Adding a Control to the Form
To add C1BarCode control to the form in Design view, follow these steps:
- Make sure that the control exists in the Toolbox.
- Double-click the control name in Visual Studio Toolbox, or drag and drop it onto the form.
Adding Reference to an Assembly
To add a reference to the C1BarCode assembly, follow these steps:
- Select Add Reference option from Project menu in Visual Studio menu bar.
- Select the C1BarCode assembly from the list on the .NET tab or browse to find the C1.Win.BarCode assembly and click OK.
Note: All .NET 4.5.2 components and controls can be used in WinForms Core 3.1 applications.