The FlexReportDesigner control displays .flxr files in design mode and allows you to drag, copy, and resize report fields and sections. The advantage of using the FlexReportDesigner control in place of the FlexReportDesigner app is that you can modify the FlexReportDesigner source code to suit your needs. Using the FlexReportDesigner control, you can create your own fully functional report designer app or add certain report design functionality to your apps.
Creating your own customized report designer is useful in many situations, for example:
To use the FlexReportDesigner component, simply create a Windows Forms App, add a FlexReport control to the form, bind it with the report you want to edit, and set the Report property in the designer control.
The following steps describe how to create a sample designer and implement a simple report using the C1FlexReportDesigner control. The purpose of this sample designer is to illustrate how the FlexReportDesigner control integrates with a designer application. It allows you to load and save files containing multiple reports, edit and preview reports, add and remove reports from the file, undo/redo, and modify reports.
The following image showcases a sample designer application.
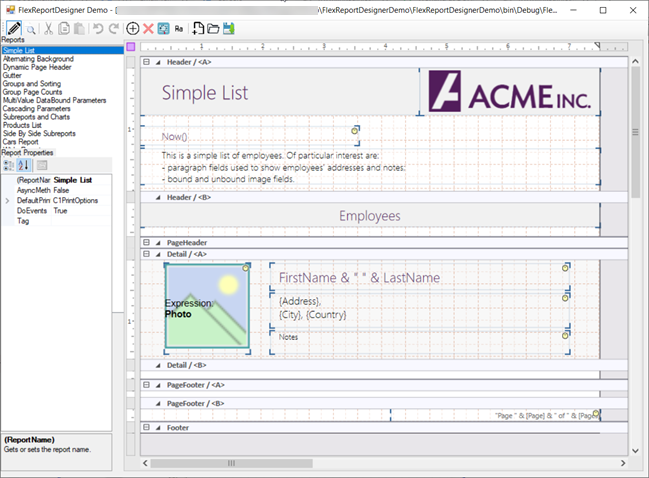
Follow the step-by-step implementation for creating a sample designer app.
| Control | Control Name | Description |
|---|---|---|
| Label | label1, label2 | Label control displays some informative text on the UI. |
| C1FlexViewerPane | c1FlexViewerPane1 | C1FlexViewer Pane control for previewing the reports. |
| C1FlexReportDesigner | c1FlexReportDesigner1 | C1FlexReport Designer control for designing and editing reports. |
| PropertyGrid | PropertyGrid1 | PropertyGrid control for editing properties of object selected in the designer. |
| ListBox | listReport | ListBox control with a list of reports currently loaded. |
| Splitter | splitter1 | Splitter control resizes the docked controls at run-time. |
| ToolStrip | toolStrip1 | ToolStrip control acts like a container without adding its child controls. |
| C1FlexReport | c1FlexReport1 | C1FlexReport component used for rendering reports into the c1FlexViewerPane1 control. |
The form contains controls such as labels and splitters, which are used to improve the layout. These are optional and may be omitted depending on your needs. The application source code implements all of these controls, and you can use the source code as a basis for your implementation.
| C# |
Copy Code
|
|---|---|
// fields private string _fileName; // name of the current file private bool _dirty; // current file has changed int _ctr = 0; // title to display in the form caption private const string _appName = "FlexReportDesigner Demo"; |
|
| C# |
Copy Code
|
|---|---|
private void Form1_Load(object sender, EventArgs e) { UpdateUI(); } private void UpdateUI() { // update caption Text = (_fileName != null && _fileName.Length > 0) ? string.Format("{0} - [{1}] {2}", _appName, _fileName, _dirty ? "*" : "") : _appName; // push/release design/preview mode buttons bool design = c1FlexReportDesigner1.Visible && c1FlexReportDesigner1.Report != null; _btnDesign.Checked = design; _btnPreview.Checked = !design; // enable/disable buttons _btnCut.Enabled = design && c1FlexReportDesigner1.CanCut; _btnCopy.Enabled = design && c1FlexReportDesigner1.CanCopy; _btnPaste.Enabled = design && c1FlexReportDesigner1.CanPaste; _btnUndo.Enabled = design && c1FlexReportDesigner1.CanUndo; _btnRedo.Enabled = design && c1FlexReportDesigner1.CanRedo; bool reportSelected = design && listReport.SelectedItem != null; _btnAddReport.Enabled = c1FlexReportDesigner1.Visible; _btnDelReport.Enabled = reportSelected; _btnAddField.Enabled = reportSelected; _btnAddLabel.Enabled = reportSelected; } |
|
Notice how UpdateUI uses the CanCut, CanPaste, CanUndo, and CanRedo properties to enable and disable toolbar buttons.
| C# |
Copy Code
|
|---|---|
private void toolStrip1_ItemClicked(object sender, ToolStripItemClickedEventArgs e) { // design/preview mode if (e.ClickedItem == _btnDesign) SetDesignMode(true); if (e.ClickedItem == _btnPreview) SetDesignMode(false); // file commands if (e.ClickedItem == _btnNew) NewFile(); if (e.ClickedItem == _btnOpen) OpenFile(); if (e.ClickedItem == _btnSave) SaveFile(); //// allow user to undo clipboard operations if (e.ClickedItem == _btnCut || e.ClickedItem == _btnPaste) c1FlexReportDesigner1.UndoSaveState(); //// clipboard if (e.ClickedItem == _btnCut) c1FlexReportDesigner1.DoCut(); if (e.ClickedItem == _btnCopy) c1FlexReportDesigner1.DoCopy(); if (e.ClickedItem == _btnPaste) c1FlexReportDesigner1.DoPaste(); //// undo/redo if (e.ClickedItem == _btnUndo) c1FlexReportDesigner1.UndoUndo(); if (e.ClickedItem == _btnRedo) c1FlexReportDesigner1.UndoRedo(); //// add/remove reports if (e.ClickedItem == _btnAddReport) NewReport(); if (e.ClickedItem == _btnDelReport) DeleteReport(); //// add fields //// (just set create info and wait for CreateField event from designer) if (e.ClickedItem == _btnAddField) { c1FlexReportDesigner1.DoCreateFieldWithMouse(e.ClickedItem); } if (e.ClickedItem == _btnAddLabel) { c1FlexReportDesigner1.DoCreateFieldWithMouse(e.ClickedItem); } } |
|
| C# |
Copy Code
|
|---|---|
private void SetDesignMode(bool design) { // show/hide preview/design panes c1FlexReportDesigner1.Visible = design; c1FlexViewerPane1.Visible = !design; // no properties in preview mode if (!design) { label2.Text = "Properties"; propertyGrid1.SelectedObject = null; } // attach copy of the report to preview control // (so changes caused by script aren't saved) if (!design) { c1FlexViewerPane1.DocumentSource = null; c1FlexReport1 = c1FlexReportDesigner1.Report; Cursor = Cursors.WaitCursor; c1FlexReport1.Render(); if (c1FlexReport1.PageCount > 0) c1FlexViewerPane1.DocumentSource = c1FlexReport1; Cursor = Cursors.Default; } // done, update UI UpdateUI(); } |
|
This simple designer has three commands that support files: New, Open, and Save. The following steps help you add these commands to the designer toolbar.
| C# |
Copy Code
|
|---|---|
private void NewFile() { _fileName = ""; _dirty = false; listReport.Items.Clear(); c1FlexViewerPane1.DocumentSource = null; c1FlexReportDesigner1.Report = null; UpdateUI(); } |
|
| C# |
Copy Code
|
|---|---|
public void OpenFile() { // get name of file to open OpenFileDialog dlg = new OpenFileDialog(); dlg.FileName = "*.flxr"; dlg.Title = "Open Report Definition File"; if (dlg.ShowDialog() != DialogResult.OK) return; // check selected file string[] reports = null; try { reports = C1FlexReport.GetReportList(dlg.FileName); } catch { } if (reports == null || reports.Length == 0) { MessageBox.Show("Invalid (or empty) report definition file"); return; } // clear list NewFile(); // load new file Cursor = Cursors.WaitCursor; _fileName = dlg.FileName; foreach (string reportName in reports) { C1FlexReport rpt = new C1FlexReport(); rpt.Load(_fileName, reportName); listReport.Items.Add(new ReportHolder(rpt)); } Cursor = Cursors.Default; // select first report listReport.SelectedIndex = 0; } |
|
| C# |
Copy Code
|
|---|---|
public void SaveFile() { // get name of file to save SaveFileDialog dlg = new SaveFileDialog(); dlg.FileName = _fileName; dlg.Title = "Save Report Definition File"; if (dlg.ShowDialog() != DialogResult.OK) return; // save file XmlTextWriter w = new XmlTextWriter(dlg.FileName, System.Text.Encoding.Default); w.Formatting = Formatting.Indented; w.Indentation = 2; w.WriteStartDocument(); // write all reports to it Cursor = Cursors.WaitCursor; w.WriteStartElement("Reports"); w.WriteElementString("FormatVersion", "1.0 1.0.0.0"); foreach (ReportHolder rh in listReport.Items) rh.Report.Save(w); w.WriteEndElement(); Cursor = Cursors.Default; // close the file w.Close(); // and be done _fileName = dlg.FileName; _dirty = false; UpdateUI(); } |
|
| C# |
Copy Code
|
|---|---|
public class ReportHolder { public readonly C1FlexReport Report; public ReportHolder(C1FlexReport report) { Report = report; } override public string ToString() { string s = Report.ReportName; return (s != null && s.Length > 0) ? s : "Unnamed Report"; } } |
|
Next, add the event handlers that hook up all the controls together.
| C# |
Copy Code
|
|---|---|
private void ListReport_SelectedIndexChanged(object sender, EventArgs e) { // switch to design mode SetDesignMode(true); // attach selected report to designer and preview controls c1FlexReportDesigner1.Report = null; c1FlexViewerPane1.DocumentSource = null; if (listReport.SelectedItem != null) c1FlexReportDesigner1.Report = ((ReportHolder)listReport.SelectedItem).Report; } |
|
| C# |
Copy Code
|
|---|---|
private void C1FlexReportDesigner1_SelectionChanged(object sender, EventArgs e) { // object[] sel = c1FlexReportDesigner1.SelectedFields; if (c1FlexReportDesigner1.SelectedFields.Count > 0) { label2.Text = "Field Properties"; propertyGrid1.SelectedObjects = c1FlexReportDesigner1.SelectedFields.ToArray(); } else if (c1FlexReportDesigner1.SelectedSubSections.Count>0) { label2.Text = "Section Properties"; propertyGrid1.SelectedObject =c1FlexReportDesigner1.GetCurrentSection(); } else if (c1FlexReportDesigner1.Report != null) { label2.Text = "Report Properties"; propertyGrid1.SelectedObject = c1FlexReportDesigner1.Report; } else // nothing selected { label2.Text = "Properties"; propertyGrid1.SelectedObject = null; } // done UpdateUI(); } |
|
| C# |
Copy Code
|
|---|---|
private void C1FlexReportDesigner1_ValuesChanged(object sender, ValuesChangedEventArgs e) { propertyGrid1.Refresh(); _dirty = true; UpdateUI(); } private void PropertyGrid1_PropertyValueChanged(object s, PropertyValueChangedEventArgs e) { c1FlexReportDesigner1.Refresh(); _dirty = true; UpdateUI(); } |
|
| C# |
Copy Code
|
|---|---|
// remove current report from the list private void DeleteReport() { // a report must be selected int index = listReport.SelectedIndex; if (index < 0) return; // remove report from the designer and from the list c1FlexReportDesigner1.Report = null; listReport.Items.RemoveAt(index); // select another report if we can if (index > listReport.Items.Count - 1) index = listReport.Items.Count - 1; if (index > -1) listReport.SelectedIndex = index; // done _dirty = true; UpdateUI(); } |
|
| C# |
Copy Code
|
|---|---|
private void NewReport() { // select a data source (just mdb files in this sample) OpenFileDialog dlg = new OpenFileDialog(); dlg.FileName = "*.mdb"; dlg.Title = "Select report data source"; if (dlg.ShowDialog() != DialogResult.OK) return; // select first table from data source string connString = string.Format(@"Provider=Microsoft.Jet.OLEDB.4.0;Data Source={0};", dlg.FileName); string tableName = GetFirstTable(connString); if (tableName == null || tableName.Length == 0) { MessageBox.Show("Failed to retrieve data from the selected source."); return; } // create new report C1FlexReport rpt = new C1FlexReport(); rpt.ReportName = tableName; // set data source rpt.DataSource.ConnectionString = connString; rpt.DataSource.RecordSource = tableName; // add a title field Section s = rpt.Sections[SectionTypeEnum.Header]; s.Visible = true; s.Height = 600; TextField f = new TextField(); f.Name = "TitleField"; f.Text = tableName; f.Height = 600; f.Width = 4000; f.Top = 0; f.Left = 0; f.Font.Bold = true; f.Font.Size = 24; f.ForeColor = Color.Navy; s.Fields.Add(f); FieldInfo fld1 = (FieldInfo)(rpt.DataSource.DataSourceInfo.Fields[1]); FieldInfo fld2 = (FieldInfo)(rpt.DataSource.DataSourceInfo.Fields[2]); string[] fieldNames = new string[] { fld1.Name, fld2.Name}; int cnt = Math.Min(5, fieldNames.Length); // add a page header s = rpt.Sections[SectionTypeEnum.PageHeader]; s.Visible = true; s.Height = 400; Rectangle rc = new Rectangle(0, 0, 1000, (int)s.Height); for (int i = 0; i < cnt; i++) { f = new TextField(); f.Name = "TitleField"; f.Text = fieldNames[i]; f.Height = rc.Height; f.Width = rc.Width; f.Top = rc.Top; f.Left = rc.Left; f.Font.Bold = true; f.Font.Bold = true; rc.Offset(rc.Width, 0); s.Fields.Add(f); } // add detail section s = rpt.Sections[SectionTypeEnum.Detail]; s.Visible = true; s.Height = 300; rc = new Rectangle(0, 0, 1000, (int)s.Height); for (int i = 0; i < cnt; i++) { f = new TextField(); f.Name = "TitleField"; f.Text.Expression = fieldNames[i]; f.Height = rc.Height; f.Width = rc.Width; f.Top = rc.Top; f.Left = rc.Left; f.Font.Bold = true; f.Font.Bold = true; rc.Offset(rc.Width, 0); s.Fields.Add(f); } // add new report to the list and select it listReport.Items.Add(new ReportHolder(rpt)); listReport.SelectedIndex = listReport.Items.Count - 1; // done _dirty = true; UpdateUI(); } |
|
| C# |
Copy Code
|
|---|---|
private string GetFirstTable(string connString) { string tableName = null; OleDbConnection conn = new OleDbConnection(connString); try { //get schema conn.Open(); DataTable dt = conn.GetOleDbSchemaTable(OleDbSchemaGuid.Tables, null); foreach (DataRow dr in dt.Rows) { // check the table type string type = dr["TABLE_TYPE"].ToString().ToUpper(); if (type != "TABLE" && type != "VIEW" && type != "LINK") continue; // get the table name tableName = dr["TABLE_NAME"].ToString(); break; } // done conn.Close(); } catch { } // return the first table we found return tableName; } |
|
| C# |
Copy Code
|
|---|---|
private void C1FlexReportDesigner1_CreateField(object sender, CreateFieldEventArgs e) { // save undo info c1FlexReportDesigner1.UndoSaveState(); // add label field string fieldName = string.Format("NewField{0}", ++_ctr); string fieldText = fieldName; TextField field = new TextField(); field.Text = fieldText; field.Name = fieldName; field.Top = e.FieldBounds.Top; field.Width = e.FieldBounds.Width; field.Height = e.FieldBounds.Height; field.Left= e.FieldBounds.Left; e.SubSection.ParentSection.Fields.Add(field); // if this is a calculated field, if (e.CreateFieldInfo == _btnAddField) { FieldInfo fld1 = (FieldInfo)(c1FlexReportDesigner1.Report.DataSource.DataSourceInfo.Fields[0]); field.Text.Expression = fld1.Name; } c1FlexReportDesigner1.UpdateFromReport(); } |
|