Change Working Time Dialog Box
In This Topic
The Change Working Time dialog box enables you to change the working time for the specified calendar. You can specify the calendar you wish to change or you can also create a new calendar for setting the working time. This is useful when you would rather create a new calendar instead of changing the default one.
Access the Change Working Time Dialog Box
You can access the Change Working Time Dialog Box by clicking on the Change Working Time button, , in the C1GanttView Toolbar.
The Change Working Time dialog box appears as the following:
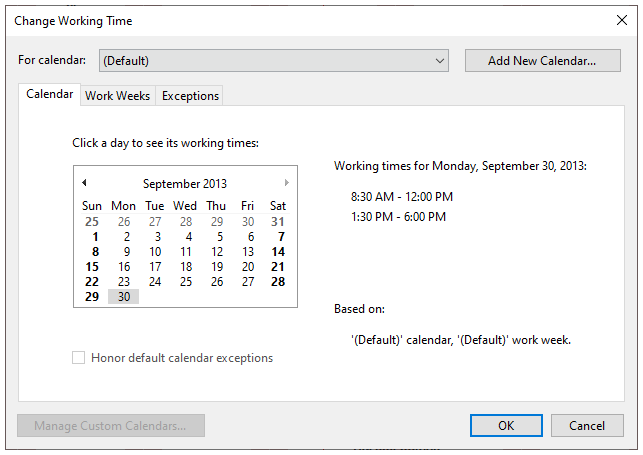
To change the working time, follow the given steps:
- From the For calendar dropdown, select the calendar you wish to change. You can select the Add New Calendar button to create a new calendar or a copy of a calendar based on another calendar.
- Click on the Manage Custom Calendars if you wish to add or remove the custom calendars.
- Set the working time for the selected or added calendar.
- Once you are finished with changing the working time in your schedule click OK to apply your changes to your calendar and close the Change Working Time dialog box.
This changes the working time for the selected calendar.
Calendar Tab
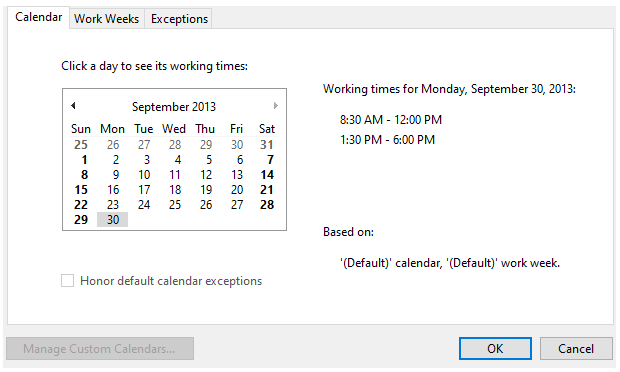
The Calendar Tab enables you to check the working time of each day based on the default calendar work week. You can do so by clicking a day in the default calendar.
The following image displays the Calendar Tab in the Change Working Time dialog box.
Work Weeks Tab
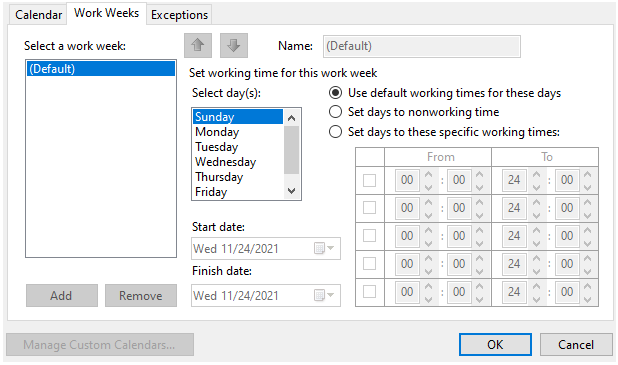
Work Weeks Tab lets you change the default work week for the project calendar, or resource calendar, or for a newly created calendar. In addition to, you can choose or create an additional schedule for a range of days that differ from the default work day such as work week that includes weekend days for tutoring.
To change the work week, follow the steps given below:
- Click Add button to add a work week, and type a descriptive name for the work week in the Name textbox.
This creates a new work week in the Work Week list.
- Enter the start date in the Start date dropdown listbox and finish date in the Finish date dropdown listbox
- Select the day(s) for which you want to change the schedule and choose one of the following:
- Use Default working times for these days: Choose the days that should use the default working times.
- Set days to nonworking time: Choose the days on which no work can be scheduled.
- Set days to these specific working times: To set the working times for the selected days throughout the schedule, type the times that you want work to start in the From boxes and the times you want work to end in the To boxes.
Exceptions Tab
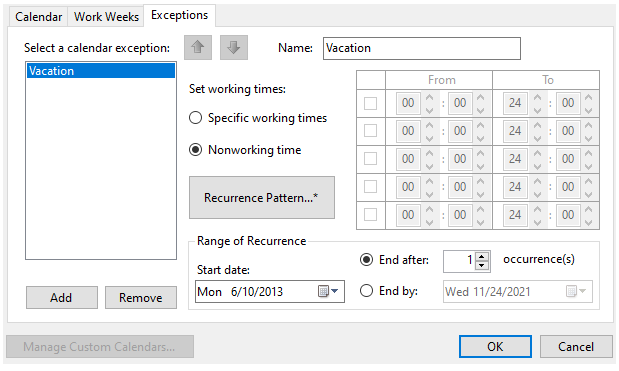
Exceptions Tab lets you define a calendar exception without you having to worry about the scheduled tasks as any task scheduled around the calendar exception will automatically be rescheduled. This is useful in declaring company holidays and so on.
To add an exception, follow the steps given below:
- In the Exceptions tab, click the Add button to add a calendar exception.
- Type a descriptive name for the exception, such as Company Holiday, in the Name textbox.
- Enter the start and finish dates of exception in the Start date dropdown listbox and the End by dropdown listbox respectively.
- Click the Recurrence Pattern… button if the exception will be repeated throughout the section of the schedule.
The Recurrence Pattern dialog box appears.
- In the Recurrence Pattern dialog box, specify the first, second, third, fourth, or last item in the Recur every dropdown listbox.
- Then, select the days that the recurrence will occur.
- Specify the day, month, year, and the number of times it will occur.
This adds a recurring exception to your calendar.