In This Topic
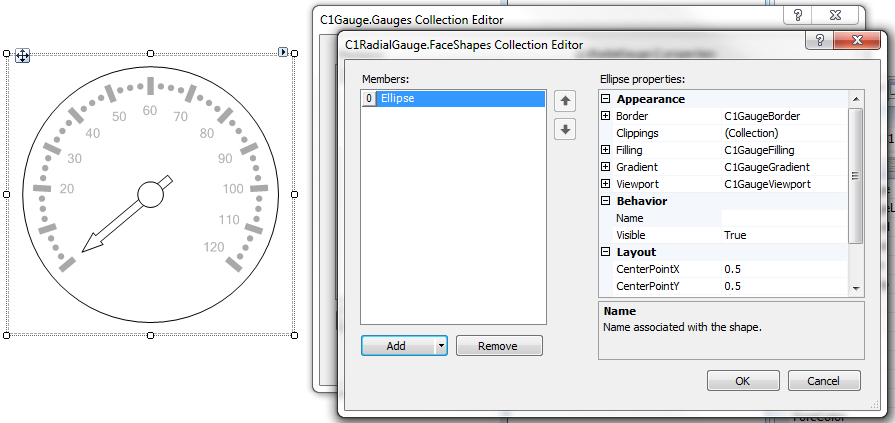
To visually enhance the look of the gauge we need to add a background layer behind our scale, tick-marks and pointer. To do this, we will add shapes to the FaceShapes collection.
From the FaceShapes collection editor, you will notice we can add a variety of shapes including Ellipses, Rectangles, Sectors, Segments or even our own bitmap images.
- Click the ellipsis button next to the Gauges property in the Properties window. The C1Gauge.Gauges Collection Editor dialog box opens.
- Click the ellipsis button next to the FaceShapes property. The C1RadialGauge.FaceShapes Collection Editor opens.
- Select C1GaugeEllipse from the Add drop-down button. We will style this ellipse by giving it a gradient background and thicker border.
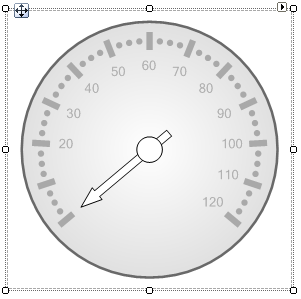
- Expand Filling and set the Color property to White and set the Color2 property to LightGray.
- With Filling still expanded, set the BrushType property to Gradient.
- To modify the gradient direction, expand Gradient and set the Direction property to RadialOuter. You can also set many more gradient related properties under the Gradient node.
- Expand Border and set the Color property to DimGray and the Thickness property to 2.
See Also