Tutorial 8 Displaying Translated Data
In This Topic
In this tutorial, you will learn how to use the Translate and DisplayValue properties to assign text to numerical values for a more descriptive list.
- Create a new .NET 2.0 project.
- Double-click the C1List icon in Visual Studio's Toolbox to add it to the Form.
Note: See Adding the C1List Components to a Project for information on adding a component to the Toolbox.
- Go to the DataSource property and select Add Project Data Source from the drop-down. In the adapter's Data Source Configuration Wizard, either select a connection to C1NWind.mdb or create a new connection to this database. On the Choose Your Database Objects page of the wizard, select all fields in the Contacts table and type "DsContacts" into the DataSet name box, and then finish out the wizard.
- Double click on DsContacts.xsd in the Solution Explorer window to edit it in the Designer. Right click on the Contacts table and choose Configure from the context menu.
- Modify the SQL string in the Table Adapter Configuration Wizard to:
SELECT Contacts.UserCode, Contacts.ContactDate, Contacts.Callback,

    Contacts.Comments, Contacts.ContactType, Customers.LastName,

    Customers.FirstName, Customers.Company, Customers.Contacted, Customers.Phone,

Customers.CustType FROM (Contacts INNER JOIN Customers ON Contacts.UserCode = Customers.UserCode) - The Contacts table is now joined with the Customers table. Click Finish to exit the wizard.
- Return to Design view and if prompted to replace existing column layout, click Yes.
Note: If all of the columns are not showing up in C1List, select the DataSource again from the drop-down menu.
- Visual Studio 2005 adds the following code to the Form_Load event:
To write code in Visual Basic
Visual Basic Copy CodeMe.ContactsTableAdapater.Fill(Me.DsContacts.Contacts)
To write code in C#
C# Copy Codethis.ContactsTableAdapater.Fill(this.DsContacts.Contacts);
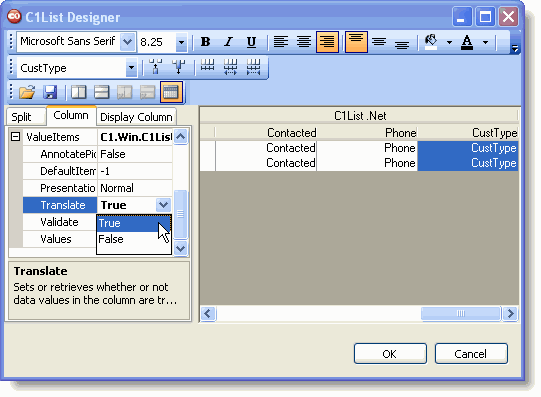
- Click the ellipsis button next to the Columns property of C1List1 in the Properties window. This will bring up the C1List Designer. Select CustType in the right pane, and in the left pane expand the ValueItems property. Set the Translate property to True.
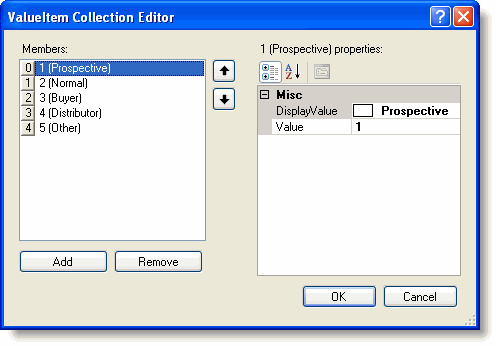
- Click the ellipsis button next to the Values property and the ValueItem Collection Editor appears. Click the Add button and the first ValueItem member appears in the left pane. In the right pane enter Prospective in the DisplayValue box and enter 1 in the Value box.
- Add four more members with the following properties to the Members list:
Member DisplayValue Value 1 Normal 2 2 Buyer 3 3 Distributor 4 4 Other 5 The ValueItem Collection Editor should look like the following:
- Click OK to return to the C1List Designer. Select Callback in the right pane, and in the left pane expand the ValueItems property. Set the Presentation property to CheckBox and the Translate property to True.

Run the program and observe the following:
- In the CustType column C1List1 displays the DisplayValues that you entered in the ValueItem Collection Editor. Setting the Translate property to True displays the DisplayValues instead of the data values entered for the Value property.
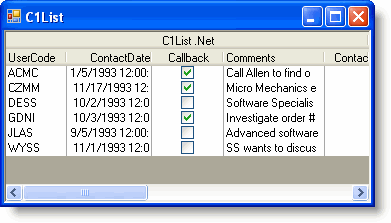
- In the Callback column C1List1 automatically places a checkmark next to the customers wanting a call back instead of True or False.
This concludes the tutorial.