An important feature of True DBGrid for WinForms is its ability to automatically sense changes to the database at run time. In this tutorial, you will learn how to use True DBGrid for WinForms to display the results of ad-hoc SQL queries. In addition, it will also outline how to set up a connection to a DataSet at run time. Note that in order for the grid to automatically respond to field layout changes, you must not have defined any column properties at design time. If a layout is already defined, use the grid's Clear Fields context menu command to remove it. This will cause the grid to configure itself automatically at run time.
Complete the following steps:
- Create a new .NET project.
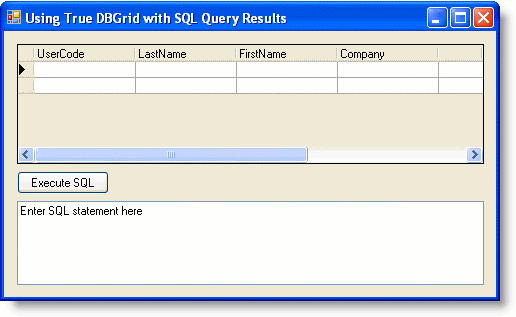
- Place a C1TrueDBGrid control (C1TrueDBGrid1), a Button (Button1), and a TextBox control (TextBox1) on the form. Set the Text property of the command button to read "Execute SQL" and set the Text property of the TextBox1 to "Enter SQL statement here":
- Go to the DataSource property and select Add Project Data Source from the drop-down. In the adapter's Data Source Configuration Wizard, either select a connection to C1NWind.mdb or create a new connection to this database. On the Choose your database objects page of the wizard, select all fields in the Customers table and type "DsCustomers" into the DataSet name box, and then finish out the wizard.
- Visual Studio will add the following code to the Form_Load event:
To write code in Visual Basic
Visual Basic Copy CodeMe.CustomersTableAdapter.Fill(Me.DsCustomers.Customers)
To write code in C#
C# Copy Codethis.CustomersTableAdapter.Fill(this.DsCustomers.Customers);
-
Add the following code to the Click event of Button1:
To write code in Visual Basic
Visual Basic Copy CodePrivate Sub Button1_Click(ByVal sender As System.Object, ByVal e As System.EventArgs) Handles Button1.Click Dim sqlStr As String = TextBox1.Text Dim da as Oledb.OleDbDataAdapter = New Oledb.OleDbDataAdapter (sqlStr, Me.CustomersTableAdapter.Connection) Dim ds As DataSet = New DataSet() ds.Clear() Try da.Fill(ds, "mySQL") Me.C1TrueDBGrid1.DataSource = Nothing Me.C1TrueDBGrid1.ClearFields() Me.C1TrueDBGrid1.SetDataBinding(ds.Tables("mySQL"), "", False) Catch MessageBox.Show("Error in SQL clause") End Try End SubTo write code in C#
C# Copy Codeprivate void button1_Click(System.object sender, System.EventArgs e) { string sqlStr = TextBox1.Text; da as Oledb.OleDbDataAdapter = New Oledb.OleDbDataAdapter (sqlStr, this.CustomersTableAdapter.Connection); DataSet DataSet ds = new DataSet(); ds.Clear(); try { da.Fill(ds, "mySQL"); this.c1TrueDBGrid1.DataSource = null; this.c1TrueDBGrid1.ClearFields(); this.c1TrueDBGrid1.SetDataBinding(ds.Tables["mySQL"], "", false); } catch () { MessageBox.Show ("Error in SQL clause"); } }
Run the program and observe the following:
As in Tutorial 1: Binding True DBGrid to a DataSet, True DBGrid for WinForms retrieves the database schema information from the DataSet and automatically configures itself to display the data for all fields in the database table. Note that the field names are used as the default column headings.
-
In the TextBox control, type the following SQL statement:
Select * from CustomerPress the Execute SQL button. The above SQL statement displays all fields from the Customer table and is equivalent to the default display.
-
In the TextBox control, type the following SQL statement:
Select Company from CustomerPress the Execute SQL button. The grid responds by displaying only one column for the Company field.
-
In the TextBox control, type the following SQL statement:
Select LastName, Company from CustomerPress the Execute SQL button. This is similar to the previous SQL statement except that two columns (LastName and Company) are now displayed.
-
In the TextBox control, type the following SQL statement:
Select Count(*) from CustomerPress the Execute SQL button. The above SQL statement uses an aggregate function, Count(*), to return the total number of records in the Customer table. Even though the SQL result is not a set of records, the grid faithfully responds by displaying the number of records in a single column. By default, Expr1000 is used as the column heading, indicating that the display is the result of an expression.
-
In the TextBox control, type the following SQL statement:
Select UCase(LastName) as ULAST, UCase(FirstName) AS UFIRST from CustomerPress the Execute SQL button. The above SQL statement produces two calculated columns that display the LastName and FirstName fields in upper case. The grid also displays the (assigned) calculated column names, ULAST and UFIRST, as the column headings.
-
In the TextBox control, type the following SQL statement:
SELECT * FROM Customer WHERE FirstName = "Jerry"Press the Execute SQL button. The above SQL statement displays only records with FirstName equal to Jerry.
-
In the TextBox control, type the following SQL statement:
SELECT * FROM Customer ORDER BY LastNamePress the Execute SQL button. The above SQL statement displays records in alphabetical order according to the LastName field.
You can also use an SQL statement to join two database tables, as demonstrated in Tutorial 3: Linking Multiple True DBGrid Controls.
This concludes tutorial 2; you've successfully completed using True DBGrid with SQL query results.