Using ComponentOne Template
In This Topic
ComponentOne WinUI Edition provides predefined project templates to create and configure WinUI applications in Visual Studio. These project templates get registered in Visual Studio after the ComponentOne Studio installer is run to install WinUI Edition. ComponentOne project template provides several benefits over Visual Studio templates as it automatically adds the required resources to the project as listed below:
- Adds required WinUI Edition references to the project.
- Registers all the ComponentOne WinUI controls to the project.
- Adds a sample to see the related control or component in action.
Complete the following steps to create a WinUI project in Visual Studio using ComponentOne project templates and use the ComponentOne WinUI controls. First, you need to make sure to check the System Requirements before proceeding.
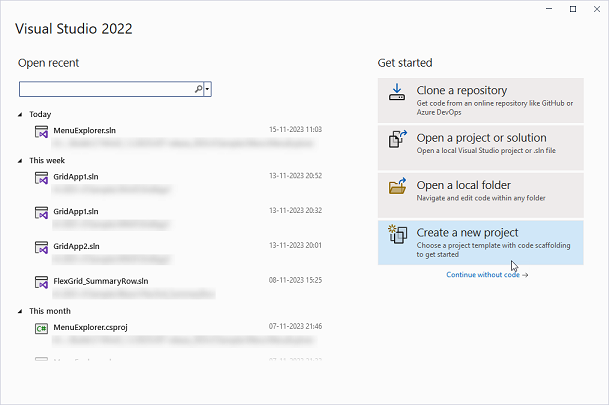
- Open Visual Studio and select Create a new project from the Get started pane.
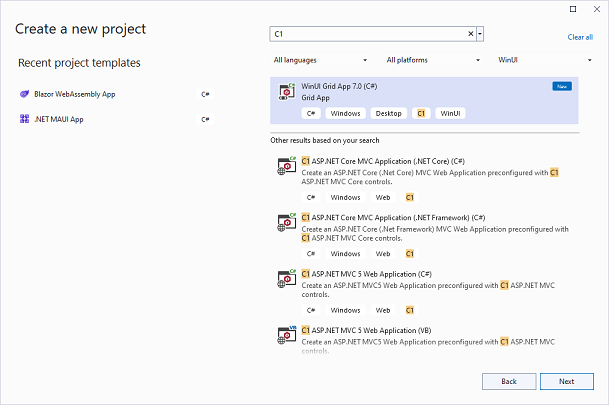
- In the Create a new project window, type C1 in the search bar to get the list of all the installed C1 templates and select WinUI from the project drop-down.
- Select the WinUI Grid App 7.0 (C#) project type and click Next.
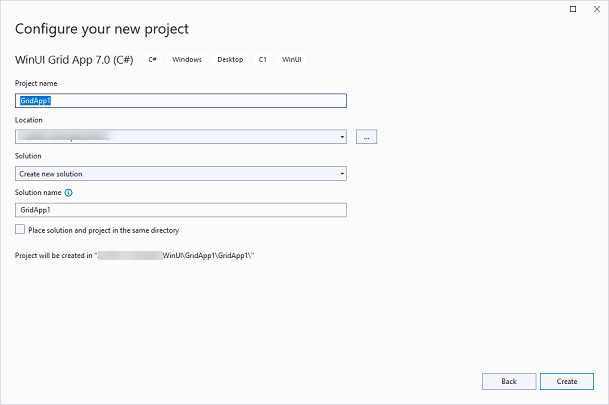
- In the Configure your new project window, provide name of the project you want to create in the Project name field, say Winui_App, and location for the project in the Location field. We have kept the default Project name, GridApp1. Then, click Create.
Observe that a new .NET WinUI app is created with the following dependencies.
- C1.WinUI.Accordion
- C1.WinUI.BarCode
- C1.WinUI.Calendar
- C1.WinUI.Core
- C1.WinUI.DataFilter
- C1.WinUI.DataPager
- C1.WinUI.DateTimeEditor
- C1.WinUI.Grid
- C1.WinUI.GridControl
- C1.WinUI.Input
- C1.WinUI.Menu
- C1.WinUI.Rendering