Step 1 of 3: Setting Up the Application
In This Topic
In this step, you'll create an application using HyperPanel for WPF and Silverlight.
Complete the following steps:
- In Visual Studio, select File | New Project.
- In the New Project dialog box, select either Windows Desktop or Silverlight from the Templates in the left-hand pane.
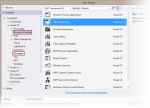
New Project Dialog Box
- Select WPF Application or Silverlight Application, depending on the template you chose.
- Enter a Name for your project, for example "QuickStart", and click OK. In a WPF Application, the MainWindow.xaml file will open.
- If you selected a Silverlight Application, when you click OK, the New Silverlight Application dialog box will appear.
- Click OK to accept default settings. This will close the New Silverlight Application dialog box and create your project.
- The MainPage.xaml file should open.
- Add the following assemblies to your application by right-clicking the References folder and selecting Add Reference:
- WPF: C1.WPF.4.dll
- Silverlight: C1.Silverlight.5.dll
- Navigate to the Toolbox and double-click the C1HyperPanel icon to add the panel to the project.
- Give your control a name by adding x:Name="c1hp1" to the <c1:C1HyperPanel> tag so that it appears similar to the following:
| XAML |
Copy Code
|
<c1:C1HyperPanel x:Name="c1hp1"></c1:C1HyperPanel>
|
By giving it a unique identifier, you'll be able to access the control in code.
- Resize your control by adding Height="Auto" Width="Auto" to the <c1:C1HyperPanel> tag so that it appears similar to the following:
| XAML |
Copy Code
|
<c1:C1HyperPanel x:Name="c1hp1" Height="Auto" Width="Auto"></c1:C1HyperPanel>
|