The following quick start guide is intended to get you up and running with DockPanel for WPF. In this quick start, you'll create a new project in Visual Studio, and add elements docked on the top, bottom, left, right, or even fill the C1DockPanel.
In the next step, you'll add and style C1DockPanels.
In this step we'll add and style several C1DockPanels.
XAML
In the next step, you'll run the application.
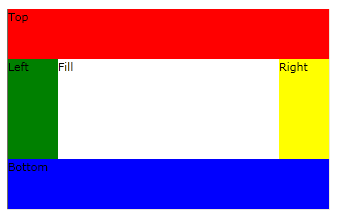
Now you're ready to run the application. From the Debug menu, select Start Debugging. Your application will look similar to the following, with four C1DockPanels on the top, right, left, and bottom and the center block filled:
Congratulations! You have successfully completed the DockPanel for WPF quick start.