GanttView enables you to perform various operations on tasks. The following sections discuss the operations that can be performed on the GanttView tasks.
GanttView allows you to insert a task at a specific index. To do so, you can use Insert method and pass the index and the task to be inserted as its parameters. The following code shows how to insert a task at a specific position. Here, we insert a task "t" at index 2.
| C# |
Copy Code
|
|---|---|
TaskCollection tasks = c1GanttView1.Tasks; // create a new task Task t = new Task(); tasks.Insert(2,t); t.Mode = TaskMode.Automatic; t.Name = "New Task"; t.Duration = 3; |
|
Alternatively, you can insert a task at runtime through the Add Task button on the Toolbar. Clicking the Add Task button opens the Task Information dialog to set basic properties of the task such as name, percent complete, start and finish dates, etc.
To delete a task, you can use the RemoveAt method and specify the index of the task that you want to remove. The following code shows how you can delete a task programmatically.
| C# |
Copy Code
|
|---|---|
TaskCollection tasks = c1GanttView1.Tasks;

    // find NewTask
    int index = tasks.IndexOf("New Task");
    if (index >= 0)
    {
        // delete and dispose the new task
        Task t = tasks[index];
        tasks.RemoveAt(index);
        t.Dispose();
    }
|
|
Alternatively, you can also delete a task at runtime by using the Delete button from the toolbar. For more information, see Toolbar.
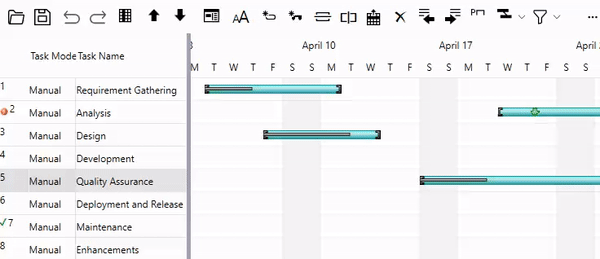
GanttView makes it easier for you to rearrange your tasks to occupy new positions in the project's schedule by moving them up or down.
The following GIF shows how you can move a task at runtime using the Up or Down arrows located on the toolbar.
Alternatively, you can move a task by using RemoveAt and Insert methods as demonstrated in the following code.
| C# |
Copy Code
|
|---|---|
int taskindex = tasks.IndexOf("Task 1"); Task task1 = tasks[taskindex]; tasks.RemoveAt(0); tasks.Insert(1, task1); |
|
GanttView enables you to split tasks into several parts, making it easy for you to deal with complex and extensive tasks. You can move the separated parts of a task, increase and decrease period of work or suspension on chart view.
Split task feature can be used in situations where a resource already working on a task goes on a leave or is assigned another task on high priority. In the latter case, the resource might need to put the currently assigned task on hold to start the newly assigned task. In this situation, the ongoing task can be split into two parts so that the newly assigned high priority task can be started. Then, the resource can resume the interrupted task again as soon as the high priority task gets completed.
You can use SplitTask method of the Task class to split a task programmatically. The following code splits a task at the 6th index.
| C# |
Copy Code
|
|---|---|
gv.Tasks[6].SplitTask(ganttView.Tasks[6].Start.Value.AddDays(15), 3); |
|
GanttView control allows you to disable a task by inactivating it while maintaining its record in the project. When you inactivate a task, it remains in the project plan but does not affect other tasks schedule, project schedule, and resource availability.
Inactivating tasks can help in building project budgets by disabling the tasks that are no longer required, without deleting them permanently. Deleting a task can affect the schedule of the entire project plan. Hence, inactivating a task is always a better option as you can keep the record of cancelled tasks and reactivate them anytime during the scope of the project.
You can inactivate a task programmatically by setting Inactive property of the Task class to true as demonstrated in the following code.
| C# |
Copy Code
|
|---|---|
//Inactivate a task gv.Tasks[4].Inactive = true; |
|
Grouping enables you to put data into groups wherein the elements share some common attributes. In GanttView, you can create groups where each group task is a summary task and all its children may have the same property values.
GanttView facilitates you to create groups based on various task properties as described in the following table:
| Task Elements | Description |
|---|---|
| Task Mode | Group the tasks by TaskMode property. |
| Duration | Group the tasks by Duration property. |
| Milestones | Group the tasks by two groups: milestone or not milestone. |
| Resource | Group the tasks by their ResourceNames string. |
| Status | Group the task by their PercentComplete and ProgressLine. |
| ConstraintType | Group the task by their ConstraintType. |
To create groups in GanttView, you can use Group method of the C1GanttView class. The Group method provides two overloads as discussed in the following table.
| Overload | Description |
|---|---|
| Group(C1.GanttView.BaseGroup groupModel) | Performs grouping by a group model. |
| Group(C1.GanttView.GroupModelCollection groupModels) | Performs grouping by a group definition. |
To create a group in GanttView, use the following code. In this example, we create an instance of ConstraintTypeGroup class and pass it as a parameter to the Group method. Here, Group method is performing grouping based on the ConstraintType group model which is sorted in ascending order in the given code.
| C# |
Copy Code
|
|---|---|
gv.Group(new ConstraintTypeGroup(true)); |
|
In the above code, we used true for ConstraintTypeGroup instance to sort it in ascending order. However, you can choose to sort the group in descending order by setting it as false.
Furthermore, you can create advance groups using the Group dialog box. Here, you can add any number of group models and the blank group model automatically gets added below the last group model enabling you to create a view with multiple layers of group.