ListView for WPF | ComponentOne
Work with ListView / Item Customization
In This Topic
    Item Customization
    In This Topic

    The ListView control lets you customize the default look and behavior of the control by using the ItemTemplate property.

    item customization

    Let's understand this by using an example. Here, we define the ItemTemplate such that each listview item should consist of a grid with two columns, one for textblock and the other for progressbar.

    1. Create a class. For example, we have created a sample class Tasks.

      C#
      Copy Code
       public class Task
          {
              public string TaskName { get; set; }
              public int Status { get; set; }
          }
      
    2. Initialize a list in the MainWindow constructor, and add the items to it, and assign the list to the ItemsSource of the ListView.

      List<Task> tasks = new List<Task>();
      tasks.Add(new Task() { TaskName = "Task 1", Status = 90 });
      tasks.Add(new Task() { TaskName = "Task 2", Status = 50 });
      tasks.Add(new Task() { TaskName = "Task 3", Status = 20 });
      tasks.Add(new Task() { TaskName = "Task 4", Status = 70 });
      tasks.Add(new Task() { TaskName = "Task 5", Status = 30 });
      tasks.Add(new Task() { TaskName = "Task 6", Status = 10 });
      tasks.Add(new Task() { TaskName = "Task 7", Status = 60 });
      tasks.Add(new Task() { TaskName = "Task 8", Status = 40 });
      tasks.Add(new Task() { TaskName = "Task 9", Status = 95 });
      tasks.Add(new Task() { TaskName = "Task 10", Status = 80 });
      tasks.Add(new Task() { TaskName = "Task 11", Status = 35 });
      tasks.Add(new Task() { TaskName = "Task 12", Status = 45 });
      tasks.Add(new Task() { TaskName = "Task 13", Status = 55 });
      tasks.Add(new Task() { TaskName = "Task 14", Status = 65 });
      tasks.Add(new Task() { TaskName = "Task 15", Status = 95 });
      
      tasks.Add(new Task() { TaskName = "Task 16", Status = 15 });
      tasks.Add(new Task() { TaskName = "Task 17", Status = 46 });
      tasks.Add(new Task() { TaskName = "Task 18", Status = 79 });
      tasks.Add(new Task() { TaskName = "Task 19", Status = 85 });
      tasks.Add(new Task() { TaskName = "Task 20", Status = 30 });
      tasks.Add(new Task() { TaskName = "Task 21", Status = 99 });
      tasks.Add(new Task() { TaskName = "Task 22", Status = 77 });
      tasks.Add(new Task() { TaskName = "Task 23", Status = 50 });
      tasks.Add(new Task() { TaskName = "Task 24", Status = 10 });
      tasks.Add(new Task() { TaskName = "Task 25", Status = 5 });
      listView.ItemsSource = tasks; // Setting ListView ItemsSource
      
    3. Create the XAML code as given below between the grid tags for template.

      <c1:C1ListView Name="listView" HorizontalAlignment="Stretch" VerticalAlignment="Stretch">
          <c1:C1ListView.ItemTemplate>
              <!-- Setting custom ListView Item Template-->
              <DataTemplate>
                  <Grid Margin="0,2">
                      <Grid.ColumnDefinitions>
                          <ColumnDefinition Width="*" MinWidth="60" />
                          <ColumnDefinition Width="100" />
                      </Grid.ColumnDefinitions>
                      <TextBlock Text="{Binding TaskName}" />
                      <ProgressBar Grid.Column="1" Margin="5, 0" Minimum="0" Maximum="100" Value="{Binding Status}" />
                  </Grid>
              </DataTemplate>
          </c1:C1ListView.ItemTemplate>
      </c1:C1ListView>
      
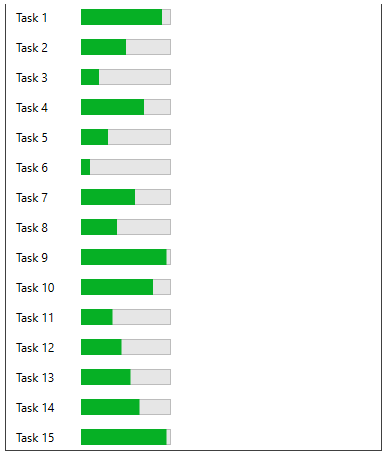
    4. Run the code and see the populated data in the listview items.