Rearranging the Map Tools
In This Topic
You can modify map tools using the C1MapToolsLayer (see Tool Customization for more information) and template.
Complete the following steps:
- Select C1Maps to reveal its list of properties in the Properties panel.
- Clear the Show Tools check box. This will hide the default tools.
- Click the Layers (Collection) ellipsis button. The IMapLayer Collection Editor: Layers dialog box opens.
- Click Add another item to open the Select Object dialog box.
- Select C1MapToolsLayer and then press OK to close the Select Object dialog box.
- In the Objects and Timeline panel, right-click [C1MapToolsLayer] and select Edit Template | Edit a Copy. Name the template "Tutorial Template" and then press OK.
Your new template is created. Observe that, under the Objects and Timeline tab, there is parent grid with two child grids.
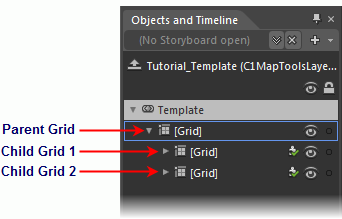
- Click Child Grid 1 and observe that it takes focus in Design view.
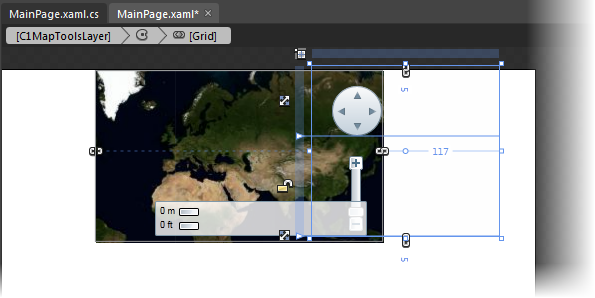
- In Design view, use your cursor to move the selected grid to the right side of the map so that your project resembles the following:
- In the Objects and Timeline panel, click the Child Grid 2 to give it focus in Design view.
- In Design view, use your cursor to move the selected grid to the top-left of the control so that it resembles the following:

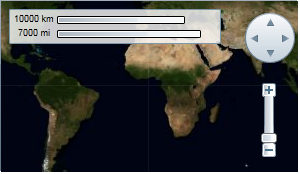
- Press F5 to run the project and observe that the C1Maps control looks as follows:
See Also