In This Topic
The C1Maps control comes equipped with a light blue default theme, but you can also apply six themes (see C1Maps Theming) to the control. In this topic, you will change the C1Maps control's theme to C1ThemeRainierOrange.
In Blend
Complete the Following steps:
- Click the Assets tab.
- In the search bar, enter "C1ThemeRainierOrange". The C1ThemeRainierOrange icon appears.
- Double-click the C1ThemeRainierOrange icon to add it to your project.
- In the search bar, enter "C1Maps" to search for the C1Maps control.
- Double-click the C1Maps icon to add the C1Maps control to your project.
- In the Objects and Timeline panel, select [C1Maps] and use a drag-and-drop operation to place it under [C1ThemeRainierOrange].
- Run the project.
In Visual Studio
Complete the following steps:
- Open the .xaml page in Visual Studio.
- Place your cursor between the <Grid></Grid> tags.
- In the Tools panel, double-click the C1ThemeRainierOrange icon to declare the theme. Its tags will appear as follows:
<my:C1ThemeRainierOrange></my:C1ThemeRainierOrange>
- Place your cursor between the <my:C1ThemeRainierOrange> and </my:C1ThemeRainierOrange> tags.
- In the Tools panel, double-click the C1Maps icon to add the control to the project. Its tags will appear as children of the <my:C1ThemeRainierOrange> tags, causing the markup to resemble the following:
| XAML |
Copy Code
|
<my:C1ThemeRainierOrange>
    <c1:C1Maps Height="172" Width="288" Margin="200,0,34,0"/> </my:C1ThemeRainierOrange>
|
- Run your project.
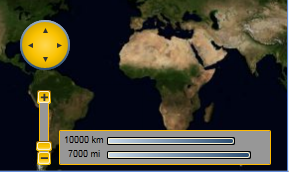
This Topic Illustrates the Following:
The following image depicts a C1Maps control with the C1ThemeRainierOrange theme.