C1DocumentViewer Quick Start
In This Topic
In this quick start you'll create a code-free WPF application in Visual Studio that uses the C1DocumentViewer control to preview reports and documents.
Note: This quick start assumes that you have the C1Report sample CommonTasks.xml report definition file available on your system. The CommonTasks.xml is installed in the ComponentOne Samples\C1WPFReport\C1Report\Samples\XML\CommonTasks directory installed in your MyDocuments folder (Documents in Vista) by default.
Complete the following steps to create a basic application to preview reports and documents:
-
Create a new WPF project in Visual Studio.
-
Navigate to the Toolbox and double-click the C1DocumentViewer icon to add the control to the application window.
-
Resize the window and resize the C1DocumentViewer control to fill the window.
-
Click once on the C1DocumentViewer control to select it and navigate to the Properties window.
-
Expand the C1Report node and click on the ellipsis button (…) to the right of theC1DocumentViewer.FileName text box.
-
In the Open dialog box, locate and highlight a report definition file, for example select CommonTasks.xml (installed in the samples directory by default) and click Open to select the file in the editor.
-
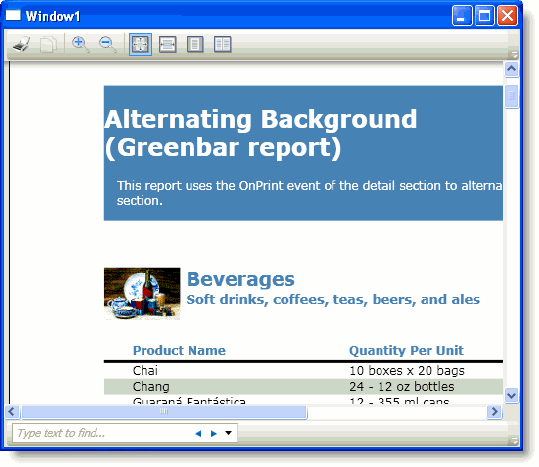
Click the drop-down arrow next to the C1DocumentViewer.ReportName property and select a report; for example, select 01: Alternating Background (Greenbar report).
The report appears in the C1DocumentViewer window.
That's it; no code is necessary! You can now run your application and preview your report.
Run the application and observe:
Your simple application to view reports will look similar to the following:
See Also