In this step you'll create a WPF application using ReportViewer for WPF and Silverlight. When you add a C1ReportViewer control to your application, you'll have a complete, functional document viewer interface that you can display PDF and HTML files in. To set up your project and add a C1ReportViewer control to your application, complete the following steps:
xmlns:c1="http://schemas.componentone.com/winfx/2006/xaml".
The namespaces will now appear similar to the following:
| WPF XAML |
Copy Code
|
|---|---|
<Window x:Class="MainWindow" xmlns="http://schemas.microsoft.com/winfx/2006/xaml/presentation" xmlns:x="http://schemas.microsoft.com/winfx/2006/xaml" xmlns:c1="http://schemas.componentone.com/winfx/2006/xaml" Title="MainWindow" Height="350" Width="525"> |
|
| Silverlight XAML |
Copy Code
|
|---|---|
<UserControl x:Class="QuickStart.MainPage" xmlns="http://schemas.microsoft.com/winfx/2006/xaml/presentation" xmlns:x="http://schemas.microsoft.com/winfx/2006/xaml" xmlns:d="http://schemas.microsoft.com/expression/blend/2008" xmlns:mc="http://schemas.openxmlformats.org/markup-compatibility/2006" xmlns:c1="http://schemas.componentone.com/winfx/2006/xaml" mc:Ignorable="d" d:DesignHeight="300" d:DesignWidth="400"> |
|
This is a unified namespace that will enable you to work with most ComponentOne WPF or Silverlight controls without adding multiple namespaces.
<c1:C1ReportViewer x:Name="C1ReportViewer1" /> tag within the Grid tags on the page to add the C1ReportViewer control to the application.
The XAML will appear similar to the following:
| XAML |
Copy Code
|
|---|---|
<Grid x:Name="LayoutRoot" Background="White"> <c1:C1ReportViewer x:Name="C1ReportViewer1" /> </Grid> |
|
This will add a C1ReportViewer control named "C1ReportViewer1" to the application. If you run the application now, it will appear similar to the following image:
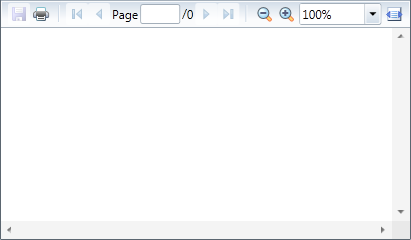
You've successfully set up your application's user interface, but if you run your application now you'll see that the C1ReportViewer control currently contains no content. In the next steps you'll add content to the C1ReportViewer control, and then you'll observe some of the run-time interactions possible with the control.