Step 4 of 4: Running the Application
In This Topic
Now that you've created a schedule application, bound the schedule to a datasource, and customized the schedule's appearance in Blend, the only thing left to do it run the application.
To run the schedule application and observe Scheduler for WPF's run-time behavior:
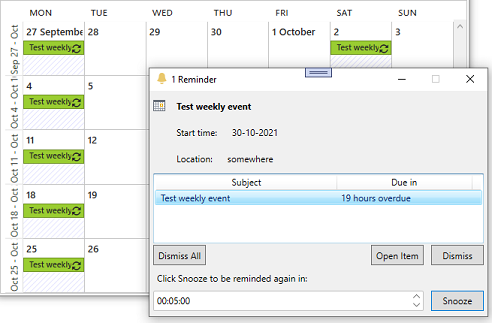
- Press F5 or select Test Solution from the Project menu. The schedule and a Reminder dialog box appears. Click Dismiss All.
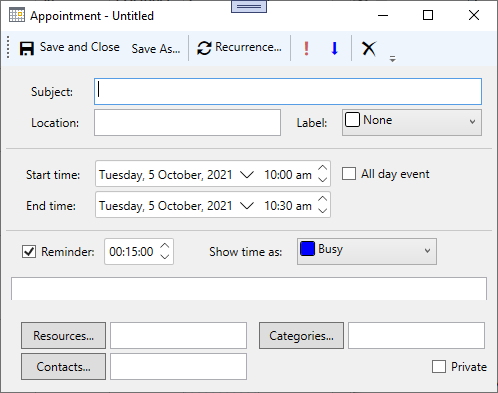
- Set up an appointment by double-clicking the time for the appointment under the desired day and time. In this example, create an appointment for 8AM on Wednesday, June 9th. The Appointment dialog box opens.
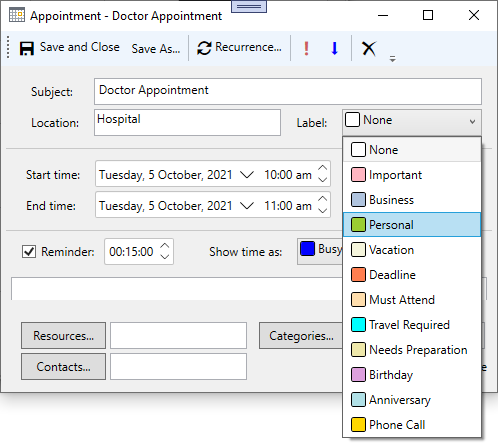
- Enter “Doctor Appointment” for the Subject, “Hospital” for the Location, and “9:00AM” for the End time.
- Click the drop-down arrow next to the Label and select Personal.
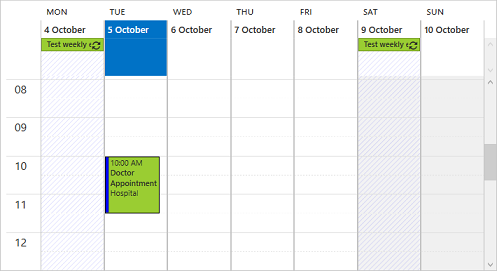
- Click the Save and Close button. The appointment now appears in the schedule.
Congratulations! You've completed the quick start and created a WPF application, bound the schedule to a data source, and created a new appointment.