Document Solutions for Excel, .NET Edition | Document Solutions
In This Topic
    Getting Started
    In This Topic

    System Requirements

    The DsExcel .NET packages are fully supported on Visual Studio 2017 or later for Windows, Visual Studio for MAC, and Visual Studio Code for Linux and are compatible with the following:

    Dependencies

    The following table lists the open-source library that is used in DsExcel .NET:

    Name Version Description and Usage
    Newtonsoft.Json 13.0.1 Reads and writes JSON. It also Implements JSON DOM data binding.

    Setting up an Application

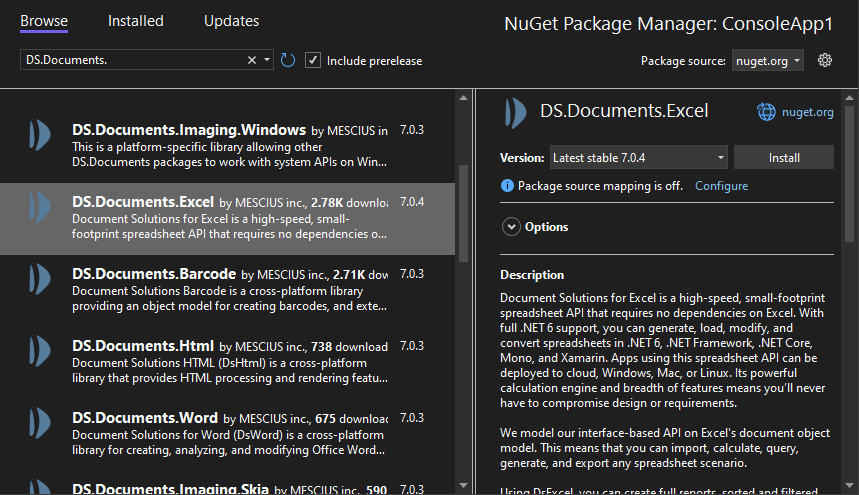
    DsExcel .NET reference is available through NuGet, a Visual Studio extension that automatically adds libraries and references to your project. To work with DsExcel .NET, you need to have following references in your application:

    Reference Purpose
    DS.Documents.Excel To use DsExcel in an application, you need to reference (install) just the DS.Documents.Excel package. It pulls in the required infrastructure packages.

    Add reference to DsExcel .NET in your application

    In order to use DsExcel .NET in a .NET Core, ASP.NET Core, .NET Framework application (any target that supports .NET Standard 2.0), install the NuGet packages in your application using the following steps:

    To find and install the DS.Documents.Excel NuGet package

    1. In Solution Explorer, right-click either Dependencies or a project and select Manage NuGet Packages.
    2. In the Browse tab, select nuget.org from the Package source dropdown.
    3. In the Browse tab, type "ds.documents" or "DS.Documents" in the search text box at the top and find the package "DS.Documents.Excel".
    4. Click Install to install the DS.Documents.Excel package and its dependencies into the project. When the installation is complete, make sure you check the NuGet folder in your solution explorer and confirm whether or not the DS.Documents.Excel package is added to your project dependencies.

    To manually create NuGet package source

    In order to manually create Nuget feed source, you need to complete the following steps to add the Nuget feed URL to your Nuget settings in Visual Studio. Before you proceed with this step, make sure you first download DsExcel from the website and put the DS.Documents.Excel nuget package in a local folder, for example - "D:\Nupkg".

    1. From the Tools menu, select Nuget Package Manager | Package Manager Settings. The Options dialog box appears.
    2. In the left pane, select Package Sources.
    3. Click the Add button button in the top right corner. A new source is added under Available Package Sources.
    4. Set a Name for the new package source.
    5. To add source in the Source field, click the ellipsis button next to the Source field to browse for the Nupkg folder.
    6. After you select the Nupkg folder, click the Update button and finally click OK.

    To install the DS.Documents.Excel package using command line interface

    1. Open the CommandPrompt window on your Windows system.
    2. Create a console application 'myApp' by using the command: dotnet new console -o myApp
    3. Use the cd command to navigate to your project folder: cd myApp
    4. Install DsExcel .NET NuGet package using the following command:
      dotnet add package DS.Documents.Excel

    To add DS.Documents.Excel package reference

    DsExcel .NET is a cross-platform spreadsheet component that can be used on multiple platforms including Windows, Linux and Mac operating system.

    In case you are creating an application using the Visual Studio, user can edit the **.csproj file and a package reference as shown in the image below:

    Copy Code
    <Project Sdk="Microsoft.NET.Sdk">
      <PropertyGroup>
        <OutputType>Exe</OutputType>
        <TargetFramework>net6.0</TargetFramework>
      </PropertyGroup>
    
      <ItemGroup>
        <PackageReference Include="DS.Documents.Excel" Version="7.0.0" />
      </ItemGroup>
    </Project>

    After this step, follow the steps in the Quick Start section.

    1. Open Visual Studio for MAC.
    2. Create any application (any target that supports .NET Standard 2.0).
    3. In tree view on the left, right-click Dependencies and choose Add Packages.
    4. In the Search panel, type "DS.Documents".
    5. From the list of packages displayed in the left panel, select DS.Documents.Excel and click Add Packages.
    6. Click Accept.

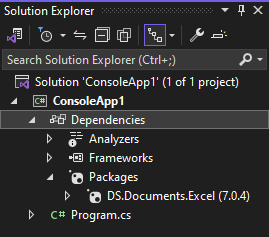
    This automatically adds references of the package and its dependencies to your application. After this step, follow the steps in the Quick Start section.

    1. Open Visual Studio Code.
    2. Install Nuget Package Manager from Extensions.
    3. Create a folder "MyApp" in your Home folder.
    4. In the Terminal in Visual Studio Code, type "cd MyApp"
    5. Type command "dotnet new console"
      Observe: This creates a .NETCore application with MyApp.csproj file and Program.cs.
    6. Press Ctrl+P. A command line opens at the top.
    7. Type command: ""
      Observe: "Nuget Package Manager: Add Package" option appears.
    8. Click the above option.
    9. Type "Ds" and press Enter.
      Observe: Document Solutions packages get displayed in the dropdown.
    10. Choose DS.Documents.Excel.
    11. Type following command in the Terminal window: "dotnet restore"

    This adds references of the package to your application. After this step, follow the steps in the Quick Start section.