DsImaging allows you to process images in different ways, such as alter the image size, crop, rotate, flip image, and change image resolution. It provides various properties and methods, such as Resize, FlipRotate, etc. in the GcBitmap class to handle such type of processing.
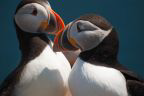
DsImaging lets you reduce or enlarge an image using Resize method of the GcBitmap class. The Resize method takes InterpolationMode as a parameter to generate the transformed image which is stored as a GcBitmap instance. The interpolation parameter can be set using the InterpolationMode enumeration which specifies the algorithm used to scale images.
| Original Image | |
|---|---|
 |
|
| Image with reduced size | Enlarged image |
 |
 |
To resize an image:
| C# |
Copy Code
|
|---|---|
//Get the image path var origSmallImagePath = Path.Combine("Resources", "Images", "puffins-small.jpg"); //Initialize GcBitmap GcBitmap origLargeBmp = new GcBitmap(); GcBitmap origSmallBmp = new GcBitmap(); //Load image from file origLargeBmp.Load(origSmallImagePath); origSmallBmp.Load(origSmallImagePath); //Reduce image int rwidth = origLargeBmp.PixelWidth - 564; int rheight = origLargeBmp.PixelHeight - 376; GcBitmap smallBmp = origLargeBmp.Resize(rwidth, rheight, InterpolationMode.Linear); //Enlarge image int ewidth = origSmallBmp.PixelWidth + 156; int eheight = origSmallBmp.PixelHeight + 54; GcBitmap largeBmp = origSmallBmp.Resize(ewidth, eheight, InterpolationMode.Linear); //Save scaled image to file smallBmp.SaveAsJpeg("puffins-scale-small.jpg"); largeBmp.SaveAsJpeg("puffins-scale-large.jpg"); |
|
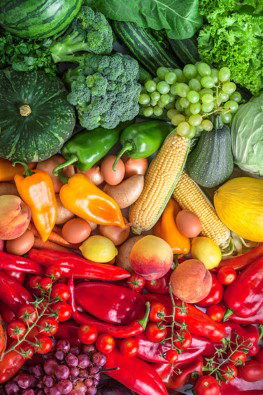
Image cropping is usually done to remove the extraneous part of an image in order to improve its framing, to change the aspect ratio and to isolate a particular object from its background. DsImaging allows you to crop an image using Clip method of the GcBitmap class. This method creates new GcBitmap instance that stores the cropped fragment of the original image.
| Original Image | Cropped Image |
|---|---|
 |
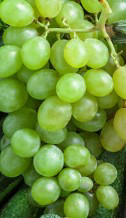 |
To crop an image:
| C# |
Copy Code
|
|---|---|
//Get the image path var origImagePath = Path.Combine("Resources", "Images", "color-vegetables.jpg"); //Initialize GcBitmap GcBitmap origBmp = new GcBitmap(); //Load image from file origBmp.Load(origImagePath); //Crop image Rectangle clipRec = new Rectangle(661, 327, 508, 878); GcBitmap clipbmp = origBmp.Clip(clipRec); //Save cropped image to file clipbmp.SaveAsJpeg("color-vegetables-crop.jpg"); |
|
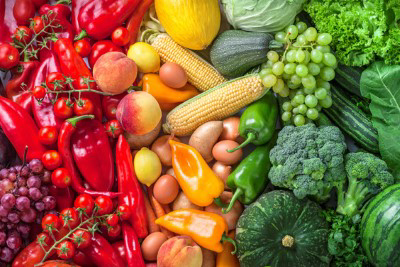
An image can be rotated at different angles and flipped to create its mirror image. DsImaging supports both rotation and flipping of an image through FlipRotate method of the GcBitmap class. This method accepts a parameter of type FlipRotateAction enumeration which specifies flip and rotation transformations. Using FlipRotateAction enumeration, an image can be rotated clockwise at 90, 180, or 270 degrees and flipped horizontally or vertically. The enumeration also provides an option to flip an image horizontally with a clockwise rotation of 90 or 270 degrees.
| Original Image | |
|---|---|
|
|
| Rotated Image | Flipped Image |
 |
 |
To rotate an image clockwise at 90 degree:
| C# |
Copy Code
|
|---|---|
//Get the image path var origImagePath = Path.Combine("Resources", "Images", "color-vegetables.jpg"); //Initialize GcBitmap GcBitmap origBmp = new GcBitmap(); //Load image from file origBmp.Load(origImagePath); //Rotate image by 90 degree GcBitmap rotatebmp = origBmp.FlipRotate(FlipRotateAction.Rotate90); //Save rotated image to file rotatebmp.SaveAsJpeg("color-vegetables-rotate.jpg"); |
|
To flip an image horizontally:
| C# |
Copy Code
|
|---|---|
//Get the image path var origImagePath = Path.Combine("Resources", "Images", "color-vegetables.jpg"); //Initialize GcBitmap GcBitmap origBmp = new GcBitmap(); //Load image from file origBmp.Load(origImagePath); //Flip image horizontally GcBitmap flipbmp = origBmp.FlipRotate(FlipRotateAction.FlipHorizontal); //Save image to file flipbmp.SaveAsJpeg("color-vegetables-flip.jpg"); |
|
In DsImaging, you can remove text and graphics from GcBitmap using Clear method of the GcBitmap class. It leaves a specified color on the surface.
| C# |
Copy Code
|
|---|---|
//Initialize GcBitmap with the expected height/width var origBmp = new GcBitmap(pixelWidth, pixelHeight, true, dpiX, dpiY); //Clear image origBmp.Clear(Color.LightBlue); //Save image to file origBmp.SaveAsJpeg("color-vegetables-clear.jpg"); |
|
Resolution of an image refers to the measurement of its output quality. DsImaging allows you to change the resolution of an image using SetDpi method of the GcBitmap class. The SetDpi method has following two overloads, SetDpi(float dpi) and SetDpi (float dpiX, float dpiY). The SetDpi(float dpi) method allows you to change the physical resolution of an image by accepting a single value for the horizontal and vertical resolution. On the other hand, the SetDpi (float dpiX, float dpiY) method lets you change the physical resolution of an image by accepting separate values for the horizontal and the vertical resolution.
Additionally, GcBitmap class provides two properties, namely DpiX and DpiY, using which you can fetch the horizontal and vertical resolution of the bitmap, respectively.
To change the resolution of an image:
| C# |
Copy Code
|
|---|---|
//Get the image path var origImagePath = Path.Combine("Resources", "Images", "color-vegetables.jpg"); //Initialize GcBitmap GcBitmap origBmp = new GcBitmap(); //Load image from file origBmp.Load(origImagePath); //Change image resolution int newDpiX = 200, newDpiY = 400; origBmp.SetDpi(newDpiX, newDpiY); //Save image to file origBmp.SaveAsJpeg("color-vegetables-resolution.jpg"); |
|
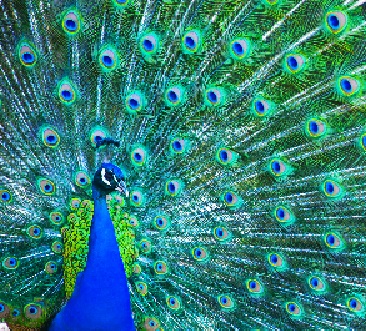
DsImaging supports high quality ARGB images. However, such high quality images take more memory than the indexed images. Hence, you can convert the ARGB images to indexed images to store them compactly. DsImaging provides two methods to convert ARGB images to indexed images, which are ToIndexed4bppBitmap and ToIndexed8bppBitmap of the GcBitmap class. The ToIndexed4bppBitmap method converts an image to 4 bpp (bits per pixel) indexed image which returns an instance of the Indexed4bppBitmap class. Similarly, ToIndexed8bppBitmap method converts an image to 8 bpp indexed image which returns an instance of Indexed8bppBitmap class. The ToIndexed4bppBitmap and ToIndexed8bppBitmap methods can take any custom palette as a parameter while converting an image to the indexed image.
| Original Image | Indexed Image |
|---|---|
 |
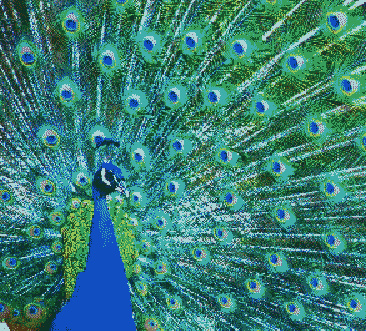 |
To convert an image to a 4bpp indexed image using the octree color palette based on the Octree color quantization algorithm:
| C# |
Copy Code
|
|---|---|
//Load an image to generate a custom palette GcBitmap bmpSrc = new GcBitmap(); bmpSrc.Load("Images/peacock_small.jpg"); //Generate color palette using Octree quantizer and dithering var pal = bmpSrc.GenerateOctreePalette(16); //Use octree palette generated above as a custom palette to create an Indexed image Indexed4bppBitmap ind = bmpSrc.ToIndexed4bppBitmap(pal, DitheringMethod.FloydSteinberg); ind.ToGcBitmap().SaveAsJpeg("Images/IndexedPeacockpal1.jpg"); |
|
DsImaging allows you to combine multiple images with different formats to generate a new image. You can combine multiple images and place them on one GcBitmap using BitBlt method of the GcBitmap class. The BitBlt method performs a bit-block transfer of the color data corresponding to pixels from the specified source bitmap into the current bitmap.
To combine multiple images, say four images, with different formats into a new image:
| C# |
Copy Code
|
|---|---|
//Get the images paths var jpgImagePath = Path.Combine("Resources", "Images", "gray-puffins-small.jpg"); var pngImagePath = Path.Combine("Resources", "Images", "gray-dog-small.png"); var bmpImagePath = Path.Combine("Resources", "Images", "color-goldfish-small.bmp"); var gifImagePath = Path.Combine("Resources", "Images", "peacock-small.gif"); //Initialize GcBitmap instances and load an image in each instance GcBitmap jpgBmp = new GcBitmap(); jpgBmp.Load(jpgImagePath); jpgBmp.Opaque = true; GcBitmap pngBmp = new GcBitmap(); pngBmp.Load(pngImagePath); pngBmp.Opaque = true; GcBitmap bmpBmp = new GcBitmap(); bmpBmp.Load(bmpImagePath); bmpBmp.Opaque = true; GcBitmap gifBmp = new GcBitmap(); gifBmp.Load(gifImagePath); gifBmp.Opaque = true; //Concatenate the images with different formats to //generate a new image int w = jpgBmp.PixelWidth + 1; int h = jpgBmp.PixelHeight + 1; GcBitmap outBmp = new GcBitmap(w * 2, h * 2, true); outBmp.BitBlt(jpgBmp, 0, 0); outBmp.BitBlt(pngBmp, w, 0); outBmp.BitBlt(bmpBmp, 0, h); outBmp.BitBlt(gifBmp, w, h); //Save concatenated image to file outBmp.SaveAsJpeg("color-concatenate.jpg"); |
|
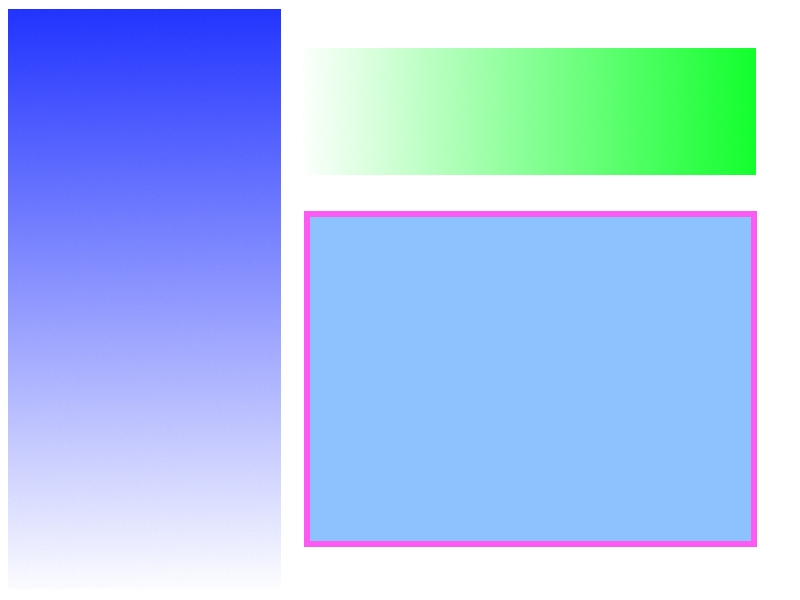
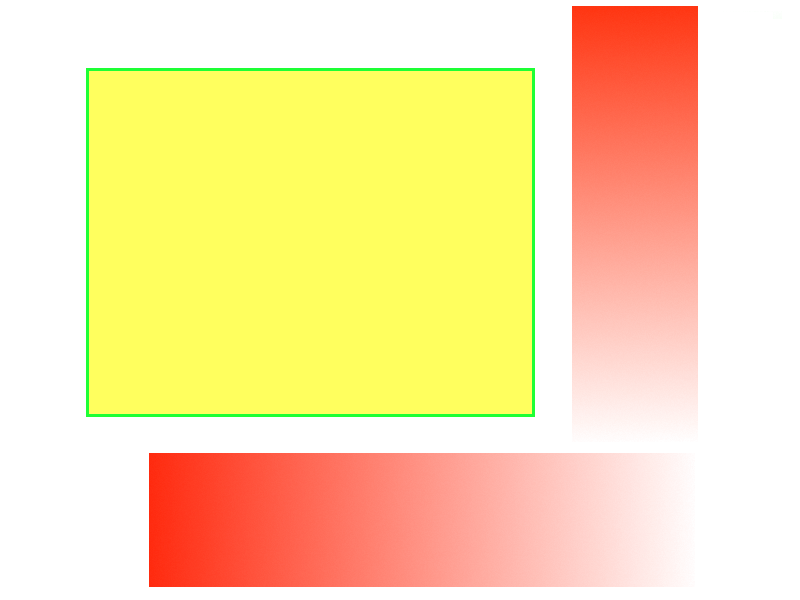
Compositing defines various ways in which two bitmaps can be combined into a single image. DsImaging allows you to composite images using Porter-Duff compositing algorithm by providing CompositeAndBlend method in the GcBitmap class. The method takes values from CompositeMode enumeration as a parameter to generate the resultant image by compositing the source and destination bitmap. There are 13 composite modes which can be implemented through the CompositeMode enumeration as displayed below:
| Source Image | Destination Image |
|---|---|
 |
 |
| Clear | Copy | Destination | Source Over | Destination Over |
|---|---|---|---|---|
 |
 |
 |
 |
 |
| Source In | Destination In | Source Out | Destination Out | Source Atop |
 |
 |
 |
 |
 |
| Destination Atop | XOR | Lighter | ||
 |
 |
 |
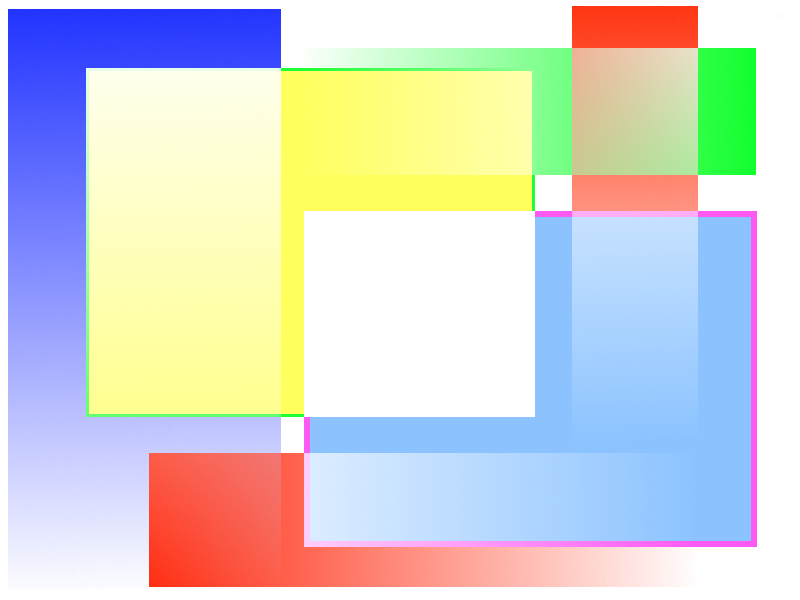
To perform Porter-Duff compositing on two bitmaps using DestinationOver composite mode :
| C# |
Copy Code
|
|---|---|
//Load the two images to be combined using (var dst = new GcBitmap(@"in\dst.png")) using (var src = new GcBitmap(@"in\src.png")) //Combine the two images using various compositing and blending modes { var tmp = dst.Clone(); tmp.CompositeAndBlend(src, 0, 0, CompositeMode.DestinationOver); tmp.SaveAsPng(@"out\res_DestinationOver.png"); } |
|
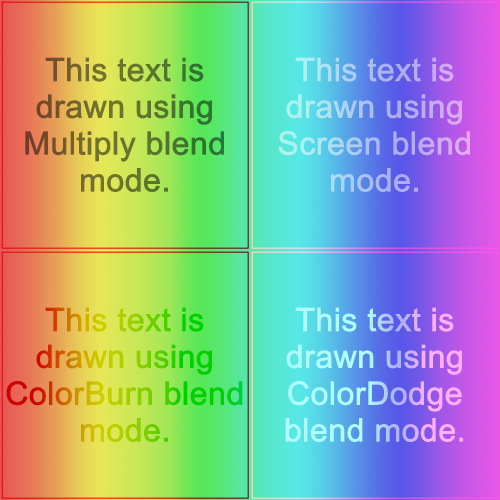
Blend mode determines how the colors of the target image and the colors of graphic primitives or images that are drawn on the target are mixed (blended) with each other. The BlendMode enumeration is used to specify the blend mode. In DsImaging, the blend mode can be specified in two ways:
The following example shows how the BlendMode property can be used to affect all drawing on a GcBitmapGraphics:
| C# |
Copy Code
|
|---|---|
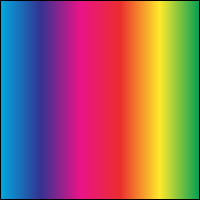
// Use the spectrum image as the background to draw on: using var bmp = new GcBitmap("spectrum-pastel-500x500.png"); using var g = bmp.CreateGraphics(); // Draw text on the spectrum background using a few blend modes: var rc = new RectangleF(0, 0, bmp.PixelWidth / 2, bmp.PixelHeight / 2); var tf = new TextFormat() { FontSize = 24, FontBold = true, ForeColor = Color.Gray }; var modes = new BlendMode[] { BlendMode.Multiply, BlendMode.Screen, BlendMode.ColorBurn, BlendMode.ColorDodge }; var pts = new PointF[] { new PointF(0, 0), new PointF(250, 0), new PointF(-250, 250), new PointF(250, 0) }; int i = 0; foreach (var mode in modes) { g.BlendMode = mode; rc.Offset(pts[i++]); g.DrawString($"This text is drawn using {g.BlendMode} blend mode.", tf, rc, TextAlignment.Center, ParagraphAlignment.Center); var rcb = rc; rcb.Inflate(-2, -2); g.DrawRectangle(rcb, Color.Red); } bmp.SaveAsPng("blend-modes.png"); } |
|
The output of the above code will look like below:
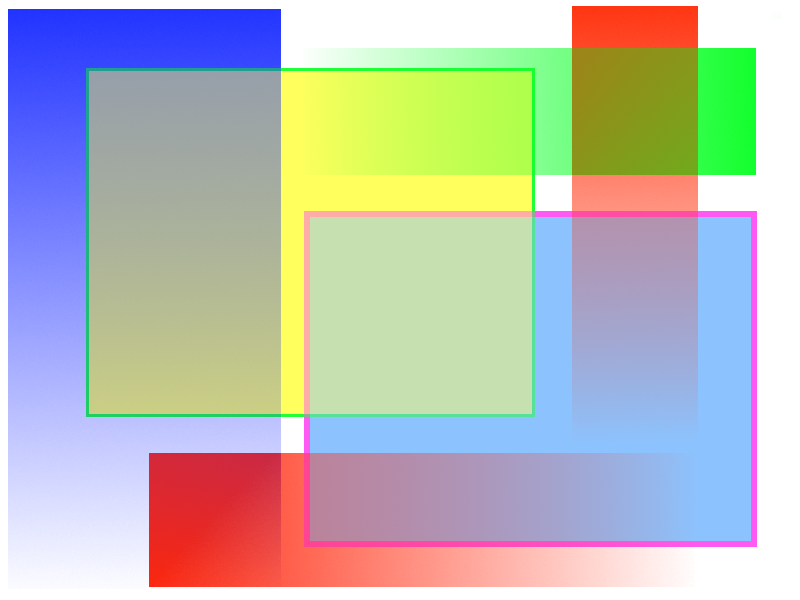
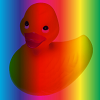
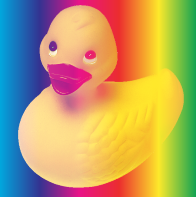
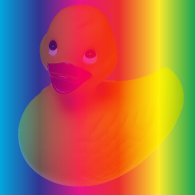
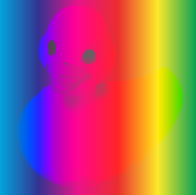
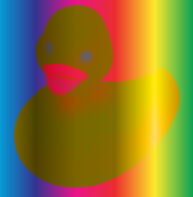
To use the CompositeAndBlend method, you need to create two instances of GcBitmap. One will be the target of the operation containing the backdrop on which to draw. The second bitmap (source) should contain the image that will be blended with the target. You will also need to also specify the CompositeMode and other parameters. The following code shows an example:
| C# |
Copy Code
|
|---|---|
//Load the two images to be combined GcBitmap ducky = new GcBitmap("Images/ducky.png"); GcBitmap spectrum = new GcBitmap("Images/spectrum.png"); //Combine the two images using various compositing and blending modes spectrum.CompositeAndBlend(ducky, 0, 0, CompositeMode.SourceOver, BlendMode.ColorDodge); spectrum.SaveAsPng("BlendDucky.png"); |
|
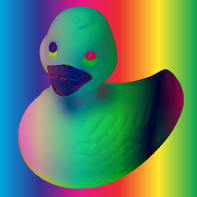
| Source Image | Destination Image |
|---|---|
 |
 |
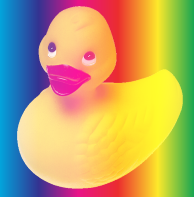
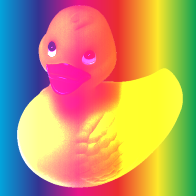
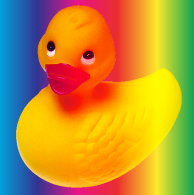
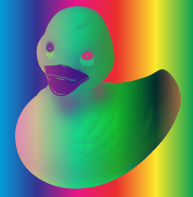
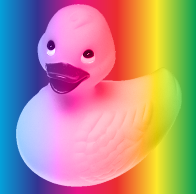
| Normal | Multiply | Screen | Overlay |
|---|---|---|---|
 |
 |
 |
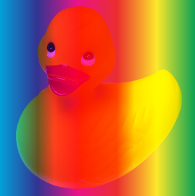 |
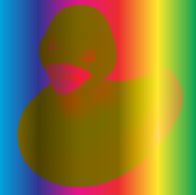
| Darken | Lighten | Color Dodge | ColorBurn |
 |
 |
 |
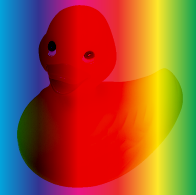 |
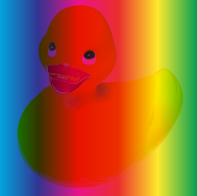
| Hard Light | Soft Light | Difference | Exclusion |
 |
 |
 |
 |
| Hue | Saturation | Color | Luminosity |
 |
 |
 |
 |
ICC profile is a color management standard for specifying the color attributes of imaging devices. It ensures that the colors of an image are correctly displayed over different devices. In DsImaging library, the ICC profile is handled as binary data and can be extracted or embedded using IccProfileData property of GcBitmap class. The ICC profile is supported for various image formats such as, JPEG, PNG, TIFF and GIF.
To extract ICC profile of an image and embed it to another image:
| C# |
Copy Code
|
|---|---|
//Get the ICCProfileData for an image and set it to another image GcBitmap bmp = new GcBitmap(); bmp.Load("Images/peacock-small.jpg"); var peacockICC_Data = bmp.IccProfileData; Console.WriteLine($"ICC Profile of peacock image consists of {bmp.IccProfileData.Length} bytes"); bmp.Load("Images/puffins-small.jpg"); bmp.IccProfileData = peacockICC_Data; Console.WriteLine($"ICC Profile of peacock image copied to puffins image which now consists of {bmp.IccProfileData.Length} bytes"); |
|
For more information about processing images using DsImaging, see DsImaging sample browser.