When connected to a server running DsPdf (using the SupportApi property, see below), DsPdfViewer allows you to edit PDF documents by using the general editing options, annotations and form editor tools. To configure DsPdfViewer for editing PDF documents, you need to download SupportAPI to connect to Document Solutions for PDF (DsPdf) on server, which enables the PDF editing operations and saves PDF documents on client. The DsPdfViewer works with server-side API, that is, DsPdf via SupportApi property to save the modified changes and sends the PDF back to the client. There are two ways to fetch SupportAPI:
The DS.Documents.Pdf.ViewerSupportApi package can be downloaded from NuGet and is also included in nupkg folder of the DsPdf distribution zip along with other packages. You need add the package in your project references while creating ASP .NET Core Web Application and ASP .NET WebForms Application.
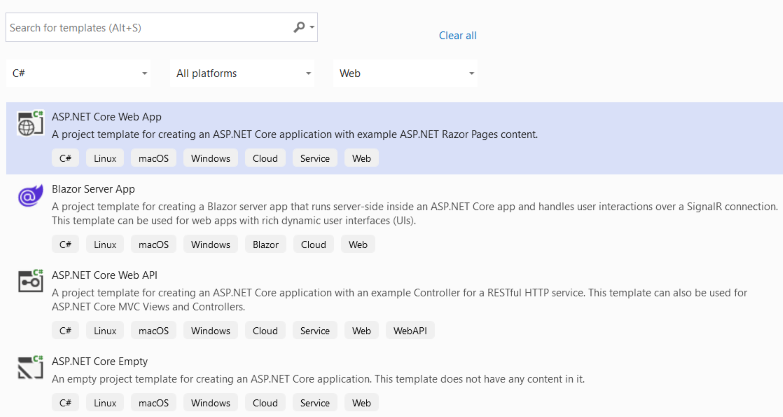
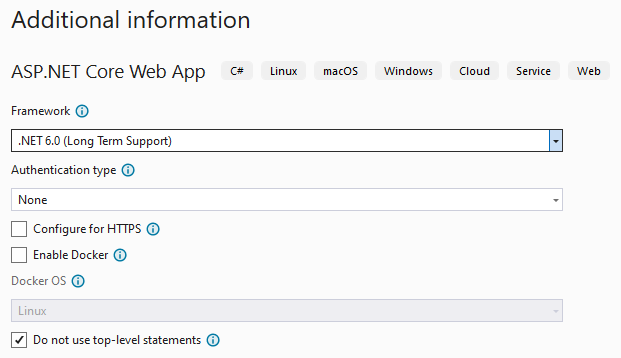
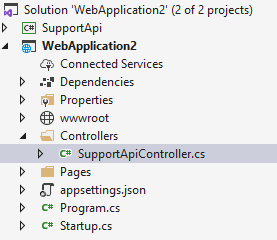
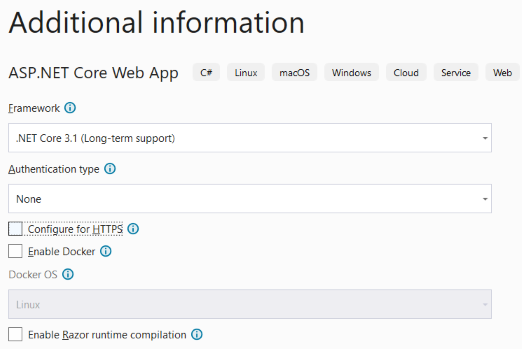
The steps listed below describe how to configure DsPdfViewer in an ASP.NET Core Web Application to view and edit PDF Files.
npm install @mescius/dspdfviewer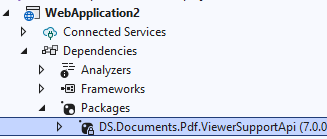
| Index.cshtml |
Copy Code
|
|---|---|
@page
@model IndexModel
@{ ViewData["Title"] = "Home page"; }
<style>
    .container {
        height: calc(100% - 128px);
        max-width: inherit;
    }

    #host, .pb-3 {
        height: 100%;
    }
</style>
<div id="host"></div>
<script src="~/lib/node_modules/@@mescius/dspdfviewer/dspdfviewer.js" asp-append-version="true"></script>
<script>
    var viewer = new DsPdfViewer("#host", { supportApi: 'api/pdf-viewer' });
    viewer.addDefaultPanels();
    viewer.addAnnotationEditorPanel();
    viewer.addFormEditorPanel();
    viewer.beforeUnloadConfirmation = true;
    viewer.newDocument();
</script>
|
|
| C# |
Copy Code
|
|---|---|
using GrapeCity.Documents.Pdf.ViewerSupportApi.Controllers; using Microsoft.AspNetCore.Mvc; namespace WebApplication2 { [Route("api/pdf-viewer")] [ApiController] public class SupportApiController : GcPdfViewerController { } } |
|
| C# |
Copy Code
|
|---|---|
using GrapeCity.Documents.Pdf.ViewerSupportApi.Connection; using GrapeCity.Documents.Pdf.ViewerSupportApi.Controllers; using GrapeCity.Documents.Pdf.ViewerSupportApi.Models; using ProtoBuf.Meta; using System.Reflection; using System.Security.Cryptography.X509Certificates; var builder = WebApplication.CreateBuilder(args); // Add services to the container. builder.Services.AddRazorPages(); builder.Services.AddCors(); GcPdfViewerHub.ConfigureServices(builder.Services); //Server side signing implementation var app = builder.Build(); app.UseCors("WebCorsPolicy"); // Configure the HTTP request pipeline. if (!app.Environment.IsDevelopment()) { app.UseExceptionHandler("/Error"); // The default HSTS value is 30 days. You may want to change this for production scenarios, see https://aka.ms/aspnetcore-hsts. app.UseHsts(); } app.UseHttpsRedirection(); app.UseStaticFiles(); app.UseRouting(); app.UseAuthorization(); // Suggest using top level route registrations IApplicationBuilder applicationBuilder = app.UseEndpoints(endpoints => { endpoints.MapControllers(); }); // Suggest using top level route registrations app.MapRazorPages(); app.Run(); |
|

npm install @mescius/dspdfviewer| Index.cshtml |
Copy Code
|
|---|---|
@page
@model IndexModel
@{ ViewData["Title"] = "Home page"; }
<style>
    .container {
        height: calc(100% - 128px);
        max-width: inherit;
    }

    #host, .pb-3 {
        height: 100%;
    }
</style>
<div id="host"></div>
<script src="~/lib/node_modules/@@mescius/dspdfviewer/dspdfviewer.js" asp-append-version="true"></script>
<script>
    var viewer = new DsPdfViewer("#host", { supportApi: 'api/pdf-viewer' });
    viewer.addDefaultPanels();
    viewer.addAnnotationEditorPanel();
    viewer.addFormEditorPanel();
    viewer.beforeUnloadConfirmation = true;
    viewer.newDocument();
</script>
|
|
| C# |
Copy Code
|
|---|---|
using GrapeCity.Documents.Pdf.ViewerSupportApi.Controllers; using Microsoft.AspNetCore.Mvc; namespace WebApplication2 { [Route("api/pdf-viewer")] [ApiController] public class SupportApiController : GcPdfViewerController { } } |
|
services.AddMvc((opts) => { opts.EnableEndpointRouting = false;});
services.AddRouting();
and following line of code to Configure() method:
app.UseMvcWithDefaultRoute();
The final startup.cs will look like below:
| C# |
Copy Code
|
|---|---|
using System; using System.Collections.Generic; using System.Linq; using System.Threading.Tasks; using Microsoft.AspNetCore.Builder; using Microsoft.AspNetCore.Hosting; using Microsoft.Extensions.Configuration; using Microsoft.Extensions.DependencyInjection; using Microsoft.Extensions.Hosting; namespace WebApplication2 { public class Startup { public Startup(IConfiguration configuration) { Configuration = configuration; } public IConfiguration Configuration { get; } // This method gets called by the runtime. Use this method to add services to the container. public void ConfigureServices(IServiceCollection services) { services.AddRazorPages(); // Enable routing: services.AddMvc((opts) => { opts.EnableEndpointRouting = false; }); services.AddRouting(); } // This method gets called by the runtime. Use this method to configure the HTTP request pipeline. public void Configure(IApplicationBuilder app, IWebHostEnvironment env) { if (env.IsDevelopment()) { app.UseDeveloperExceptionPage(); } else { app.UseExceptionHandler("/Error"); } app.UseStaticFiles(); app.UseRouting(); app.UseAuthorization(); app.UseEndpoints(endpoints => { endpoints.MapRazorPages(); }); // Enable routing: app.UseMvcWithDefaultRoute(); } } } |
|
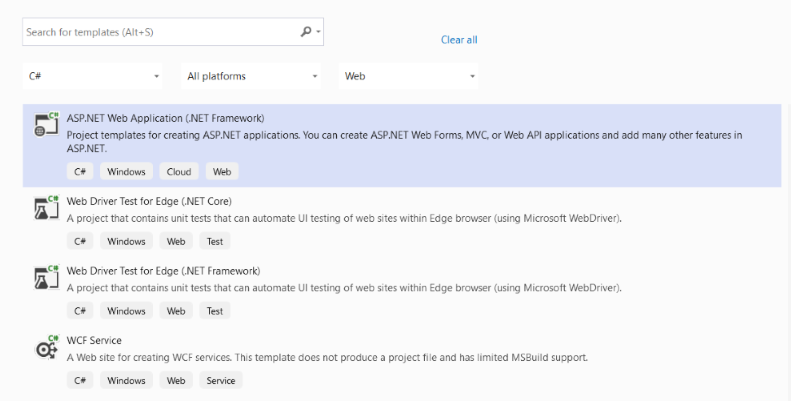
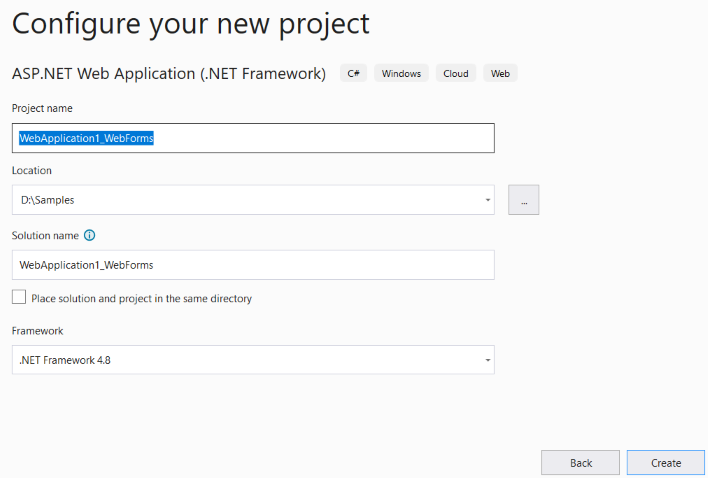
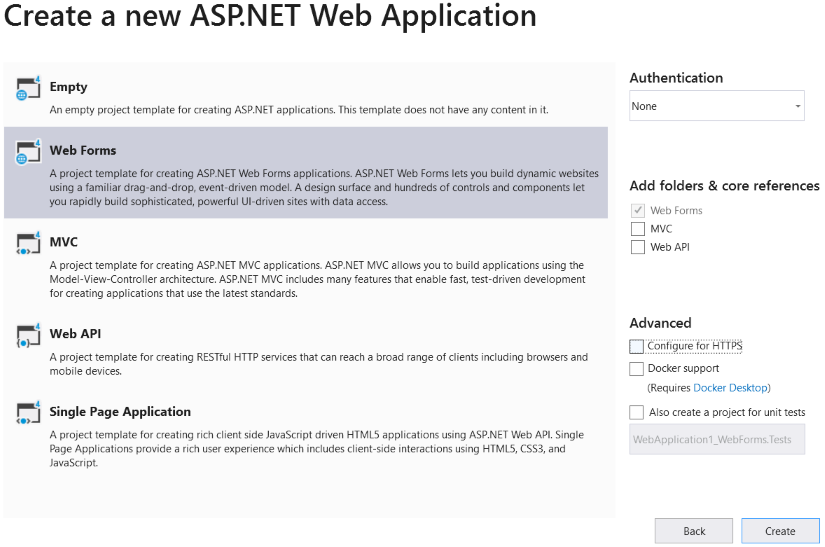
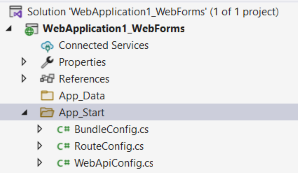
The steps listed below describe how to configure DsPdfViewer in an ASP.NET WebForms Application to view and edit PDF Files.
npm install @mescius/dspdfviewer| Default.aspx |
Copy Code
|
|---|---|
<%@ Page Title="Home Page" Language="C#" MasterPageFile="~/Site.Master" AutoEventWireup="true" CodeBehind="Default.aspx.cs" Inherits="WebApplication1_WebForms._Default" %> <asp:Content ID="BodyContent" ContentPlaceHolderID="MainContent" runat="server"> <style> html, body, body > form, .body-content { height: 100%; width: 100%; } #host { padding: 60px 20px 20px 10px; } </style> <div id="host"></div> <script src="Scripts/node_modules/@mescius/dspdfviewer/dspdfviewer.js"></script> <script> var viewer = new DsPdfViewer("#host", { supportApi: 'SupportApi' }); viewer.addDefaultPanels(); viewer.addAnnotationEditorPanel(); viewer.addFormEditorPanel(); viewer.beforeUnloadConfirmation = true; viewer.newDocument(); </script> </asp:Content> |
|
| WebApiConfig.cs |
Copy Code
|
|---|---|
using System.Web.Http; namespace WebApplication1_WebForms.App_Start { public static class WebApiConfig { public static void Register(HttpConfiguration config) { // Web API configuration and services // Web API routes config.MapHttpAttributeRoutes(); config.Routes.MapHttpRoute( name: "DefaultApi", routeTemplate: "{controller}/{action}/{id}/{id2}/{id3}", defaults: new { id = RouteParameter.Optional, id2 = RouteParameter.Optional, id3 = RouteParameter.Optional } ); } } } |
|
using System.Web.Http;
GlobalConfiguration.Configure(WebApiConfig.Register);
| Global.asax.cs |
Copy Code
|
|---|---|
using System; using System.Web; using System.Web.Http; //added line using System.Web.Optimization; using System.Web.Routing; using WebApplication1_WebForms.App_Start; namespace WebApplication1_WebForms { public class Global : HttpApplication { void Application_Start(object sender, EventArgs e) { // Code that runs on application startup RouteConfig.RegisterRoutes(RouteTable.Routes); BundleConfig.RegisterBundles(BundleTable.Bundles); GlobalConfiguration.Configure(WebApiConfig.Register); //added line } } } |
|
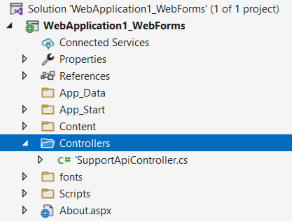
| SupportApiController.cs |
Copy Code
|
|---|---|
using GrapeCity.Documents.Pdf.ViewerSupportApi.Controllers; namespace WebApplication1_WebForms.Controllers { public class SupportApiController : GcPdfViewerController { } } |
|

The SupportApi controller can be used by downloading and unzipping the DsPDF distribution file. It contains a DsPdfViewerWeb folder which further contains:
To use the SupportAPI from sources, instead of including DS.Documents.Pdf.ViewerSupportApi NuGet package as explained in the steps above, you need to copy and include SupportApi project to the application solution and then add its reference to your main project. Note that, name of the SupportApi projects is different for ASP.NET Core and ASP.NET WebForms:
For more information, refer Edit PDF in DsPdfViewer demos.