Using the .NET Core 3.0 Preview with WPF
This article has been updated - Migrating a WPF App in .NET Core 3.0
The first .NET Core 3.0 Preview was released a couple of weeks ago, and there’s been a lot of enthusiasm from Windows desktop developers about using the preview with WinForms and WPF. Since .NET Core 3.0 will soon be the back-end for Windows desktop development, many are curious how difficult it will be to migrate their apps forward to use .NET Core 3.0. While the preview is still in an early state and missing a few key features (such as designer support), you can already start using it to develop new apps or migrate existing ones.
In this article, we’ll look at both creating a new WPF project from scratch using .NET Core 3.0 as well as migrating an existing WPF project.
Creating a new .NET Core 3.0 application
To create a new .NET Core 3.0 application I’d first recommend downloading the VS 2019 Preview and the nightly build of the .NET Core 3.0 SDK. Make sure that you’ve installed the .NET Framework 4.7.2 and .NET Core 2.1 development tools in the Visual Studio Installer. This software will be necessary whether you plan on creating a new project or migrating an existing one to .NET Core 3.0.
Create a new Visual Studio project
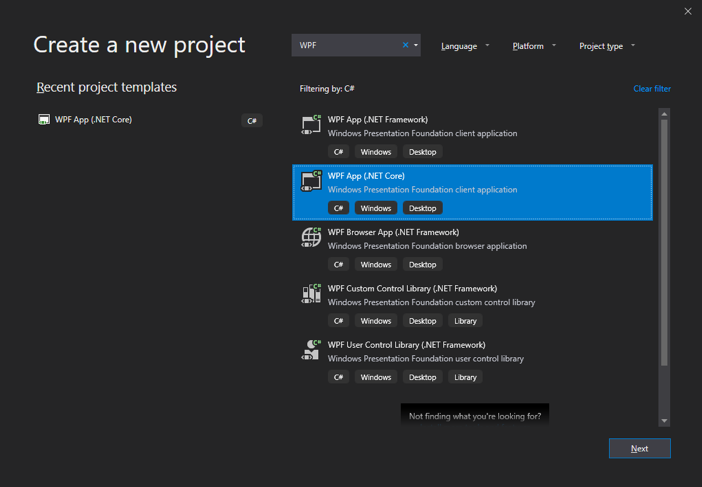
- Goto: File - New -> Project…
- Choose WPF App (.NET Core) then click next
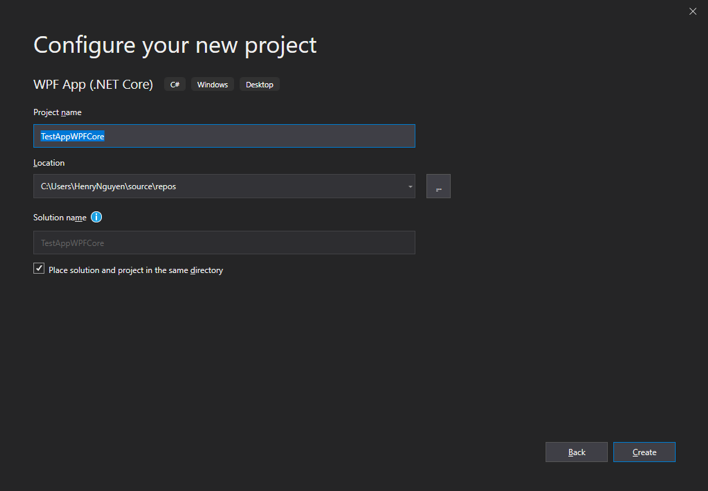
Input the project name then click on Create.
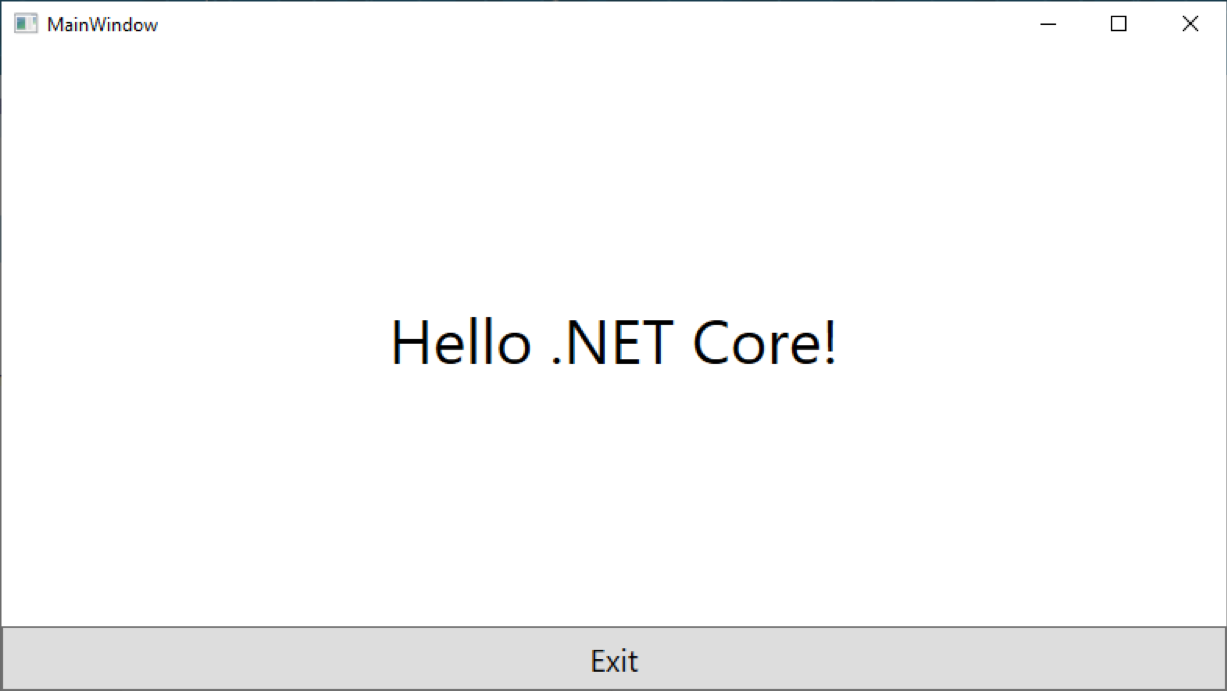
Finally, we can run the project to make sure that it works:dotnet run
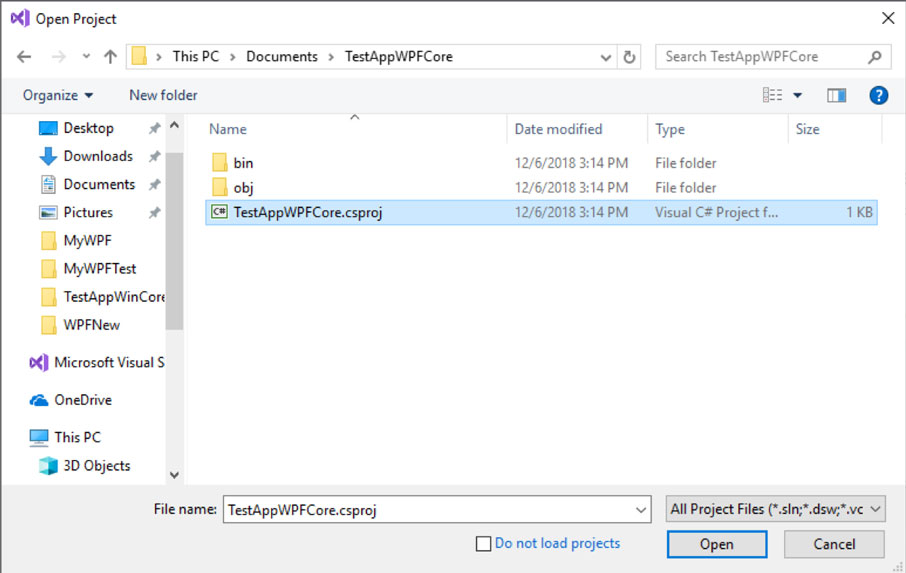
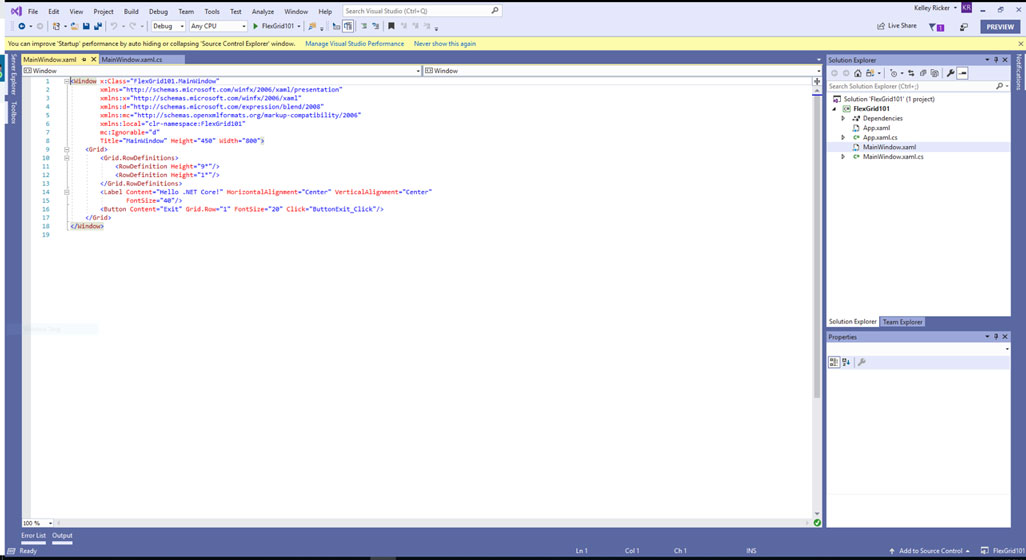
Now that the project has been created, we can use Visual Studio to open it and modify its contents. In the File Explorer, open the csproj file using Visual Studio 2019 for the project that we just created.
An important note: We were unable to get this to work using the present version of Visual Studio 2017 15.9.3. Be sure to use the Visual Studio 2019 preview.
You should see something like this in Visual Studio:
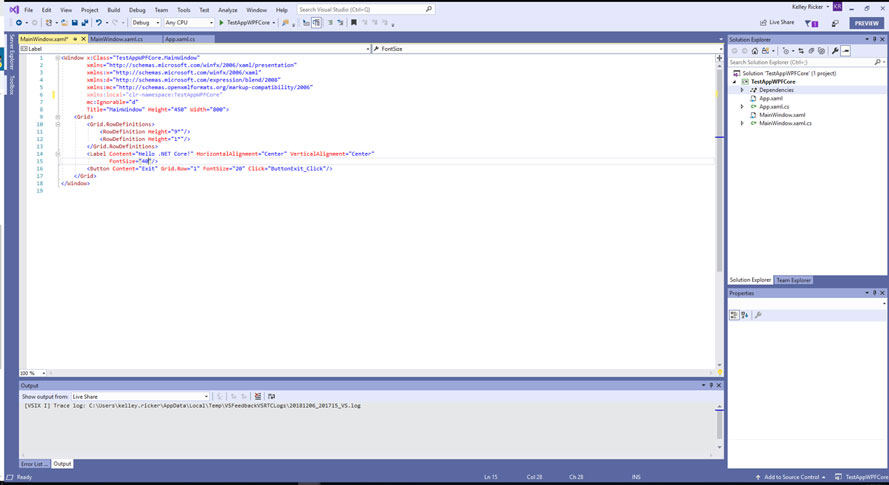
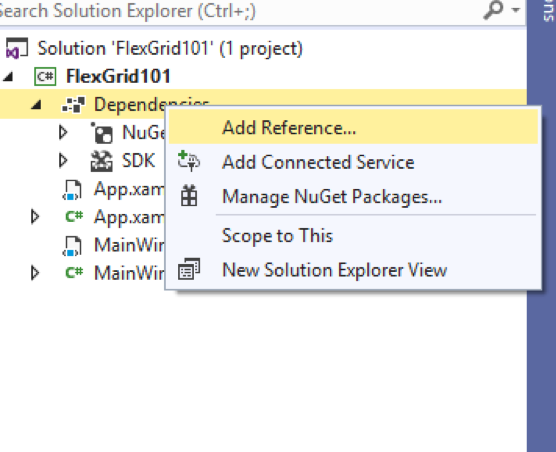
.NET Core 3.0 uses both a new project type and has no design-time support currently, so the process of adding controls will be a little different than what you may be accustomed to. We need to add C1 libraries manually to the project to make use of them, so right click on dependencies and click -- Add Reference.
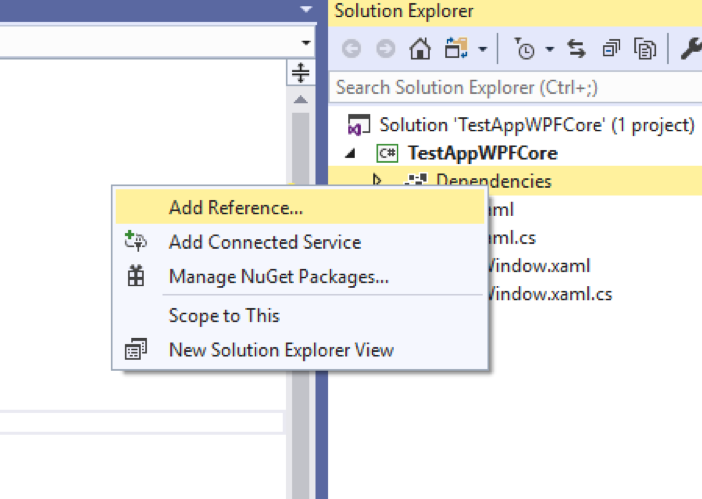
The C1 WPF libraries are installed into:
Program Files (x86)\ComponentOne\WPF Edition\bin\v4\
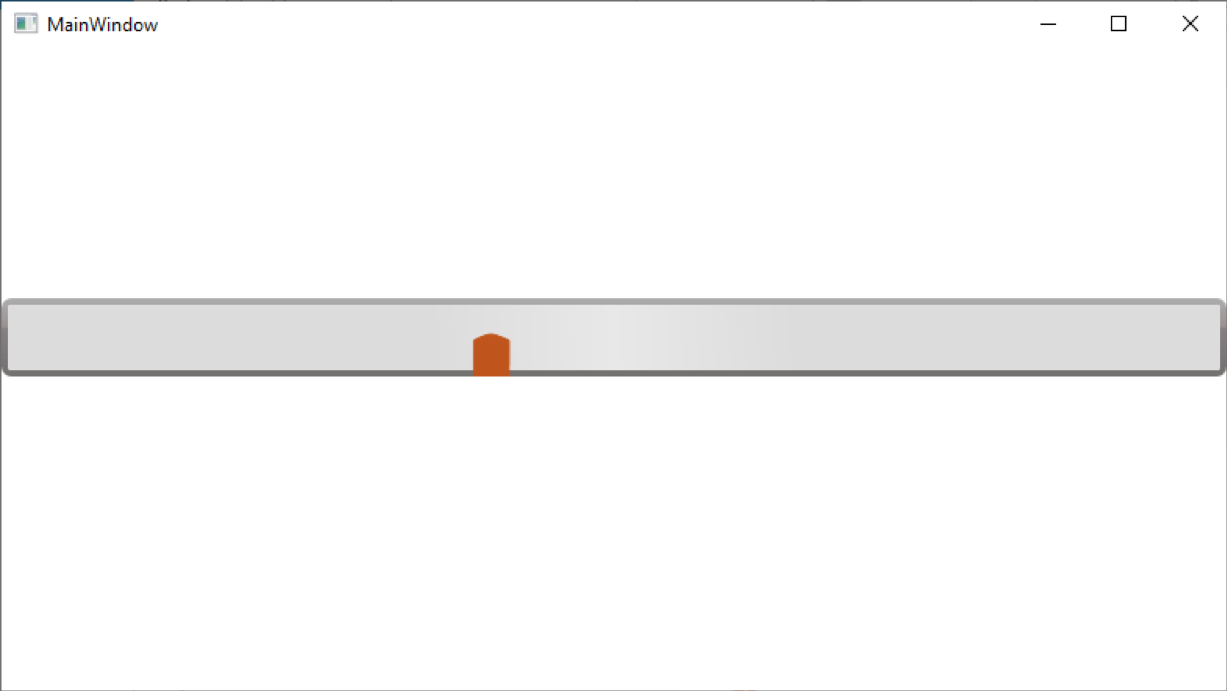
You should be able to add them by browsing to that location. For this example, we’ll add a linear gauge to our page, and we’ll need to add C1.WPF.4.dll and C1.WPF.Gauge.4.dll.
With the libraries added, we’ll need to add the ComponentOne namespace to our MainWindow.xaml file to work with the control:
xmlns:c1="http://schemas.componentone.com/winfx/2006/xaml"
After the namespace is added we can manipulate the control in XAML. To add a linear gauge you can use the following:
<c1:C1LinearGauge Minimum="0" Maximum="50" Value="20"/>
You should be able to run the code at this point, though you’ll notice a ComponentOne nag screen since the project doesn’t contain any licensing information.
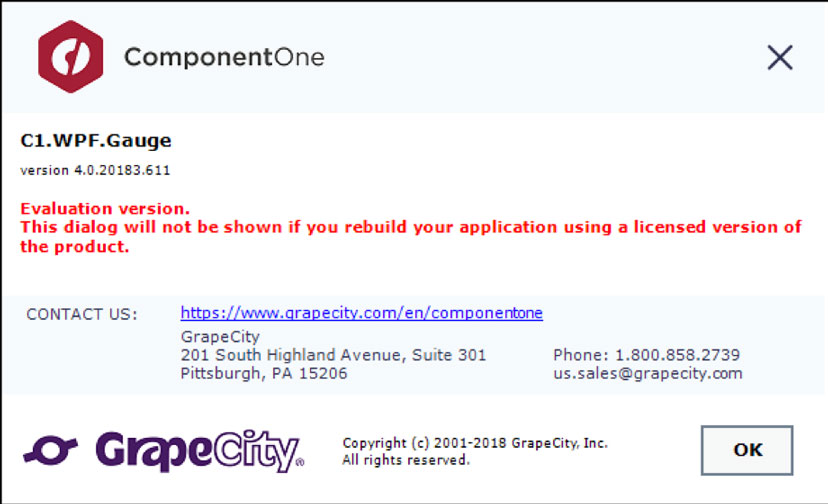
We can correct this by adding a licenses.licx file to the project. To do so, right-click on your project and select Add -> New Items.
From here, you’ll need to create a Text File and name it licenses.licx:
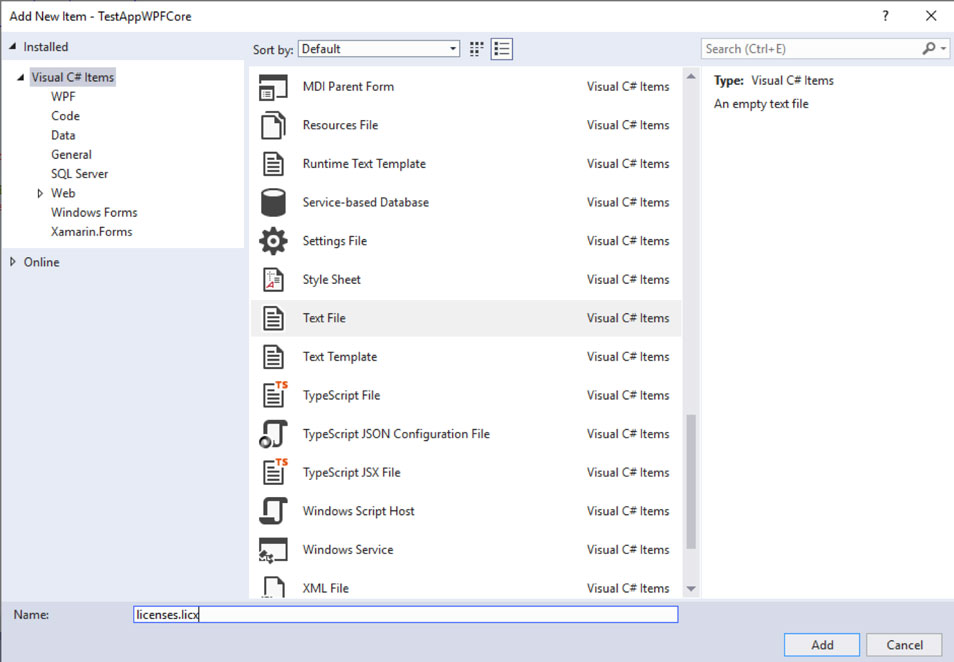
Once you click add, be sure to check the properties for licenses.licx file and make sure the Build Action is set to Embedded resource.
You’ll also need to add a line for each control that needs to be licensed into your licenses.licx file. In this simple linear gauge example, we’d need to add this:
C1.WPF.Gauge.C1LinearGauge, C1.WPF.Gauge.4
It may help to compare with an existing project when you add this information to the licenses.licx since it is very much a manual process right now (when using .NET Core 3.0).
Build and rerun the app and you should no longer see a nag screen.
Migrating an existing project to .NET Core 3.0
It is possible to migrate an existing project to .NET Core 3.0, though the process may require a few more steps than you would expect. Also, before trying to migrate a project, it’s worth running Microsoft’s portability analyzer tool on the project you want to convert.
The tool is able to give you an idea (ahead of time) how compatible your project will be with .NET Core 3.0, and it points out potential problems you may run into (included unsupported APIs).
If you’ve made up your mind to try to migrate a project, it’s easiest to begin the process by creating a project through the Visual Studio Command Prompt with the same name as the project that you want to migrate. For this example, we’ll work with FlexGrid101.
First, we’ll create a new FlexGrid101 project from the command line:
dotnet new wpf -o FlexGrid101
Once this is finished, we’ll navigate into the project directory:
cd FlexGrid101
I’d also recommend adding the Windows Compatibility package:
dotnet add package Microsoft.Windows.Compatibility
Next, open the FlexGrid101.csproj file for the project you’ve created inside of Visual Studio 2019. You’ll see something similar to this:
We need to replicate the structure of the existing FlexGrid101 project, so we’ll need to add similar folders, files, and assemblies to the project.
We’ll start by adding the same assemblies.
FlexGrid101 requires C1.WPF.4, C1.WPF.DateTimeEditors.4, C1.WPF.FlexGrid.4, C1.WPF.FlexGrid.GroupPanel.4, C1.WPF.FlexGridFilter.4, C1.WPF.Gauge.4, and C1.WPF.Zip.4.
You can right-click on Dependencies and then choose Add Reference (to select these libraries and add them to the project).
The C1 WPF libraries are installed into:
Program Files (x86)\ComponentOne\WPF Edition\bin\v4\
Now, we need to add some folders to this project so that it mirrors the structure of the older one.
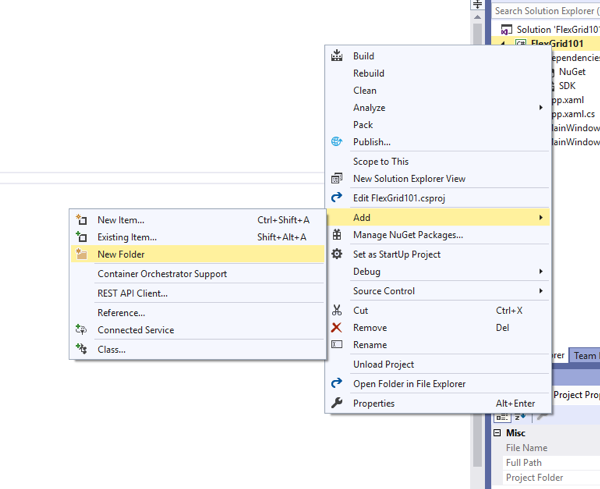
Right-click on the project, then choose Add -> New Folder:
We need to add the following folders: CellFactory, Data, Images, Properties, Resources, Themes, View, and ViewModel.
The next step is to add files into these folders in the new project from the old one.
To do this, you can right-click on a folder and select Add -> Existing Item.
Navigate to the existing FlexGrid101 project (which is typically installed to Documents\ComponentOne Samples\WPF\C1.WPF.FlexGrid\CS\FlexGrid101) and add all of the files for each folder.
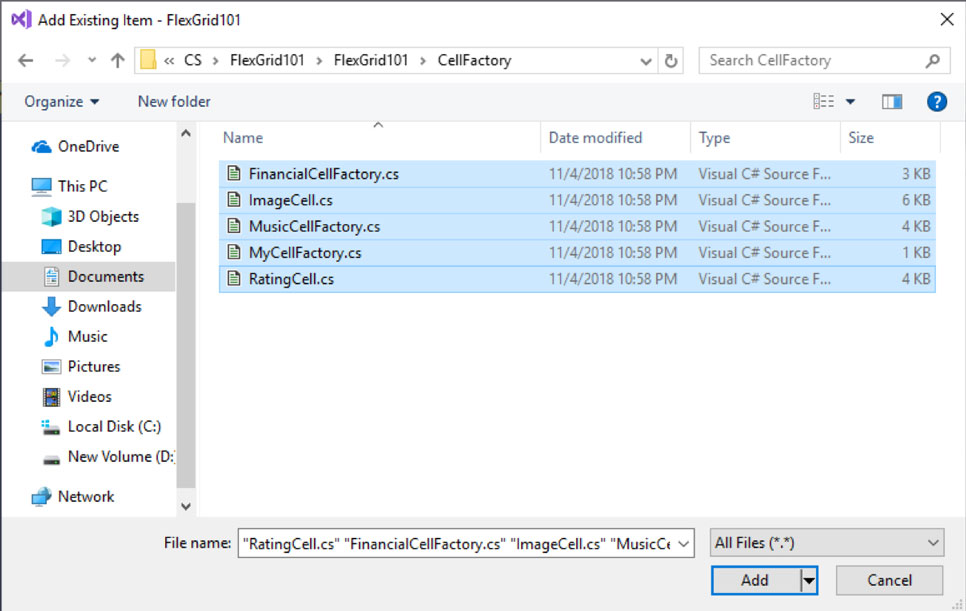
Be careful to select All Files rather than just VS specific files so everything is added correctly (including images, XAML files, etc.).
Also, you’ll need to copy the contents of the MainWindow.xaml and MainWindow.xaml.cs from the older project to the new. You can either delete the generated one in the new project and then add the existing one from the old project to it, or you can copy and paste the contents of both files (either will work fine here).
We’ll also need to a make a small change to the csproj file to use the AssemblyInfo.cs files that we copied from the Properties folder of the old project to the new one. Right-click on your project and choose the Unload Project options. Right-click it again and choose Edit FlexGrid101.csproj.
Within the PropertyGroup node add this line:
<Generateassemblyinfo>False</Generateassemblyinfo>
Save your changes, and right-click the project again and choose Reload Project.
Finally, we need to be sure that certain file types are included into the project correctly by setting the Build Action. For the Licenses.licx file (which is inside the properties folder) make sure the Build Action (set inside the properties panel) is marked as Embedded resource. Inside the Images folder, we’ll also need to change the Build Action to Content for each image as wells as the Copy to Output Directory option to Copy if newer. Finally, in the Resources folder be sure to change the Build Action for data.zip to Embedded resource.
At this point, you should be able to build and run the project.
.NET Core 3.0 Preview Caveats
Using the .NET Core 3.0 Preview for any kind of day-to-day work isn’t recommended at this point, as it’s obviously still work in progress. As the steps above illustrate, much of the project creation and migration processes require a lot of manual configuration from the user, and it’s possible to find some bugs and unfinished implementations presently.
The lack of designer support also makes working with the preview somewhat difficult, though Microsoft has committed to adding this feature in the coming months. Overall, .NET Core 3.0 will be an important change for developers, though this preview is merely the first step.

Kelley Ricker