You can quickly customize the appearance of a sheet by applying a "skin" to it. Some built-in (default) skins are provided with Spread to create common formats. You can create your own custom skin and save it to use again or share it, similar to a template. A skin, whether built-in or custom, can be applied to any number of sheets in a Spread component. Just as a style can be applied to cells, so a skin can be applied to an entire sheet. Because a skin can be saved to a file, you can use it across projects and share it with other developers.
A skin includes the following appearance settings:
You can save several appearance properties of a sheet as a custom skin, which can be used in other projects or shared with other developers. Any custom skins that you create can be saved to a file in the Spread Designer using the Sheet Skin editor.
Use the Custom tab to create your own skin. From here you can create a custom skin by altering the properties in the Property window. When you are ready, click Save. The Skin Repository dialog is displayed and you can enter a name for your skin.
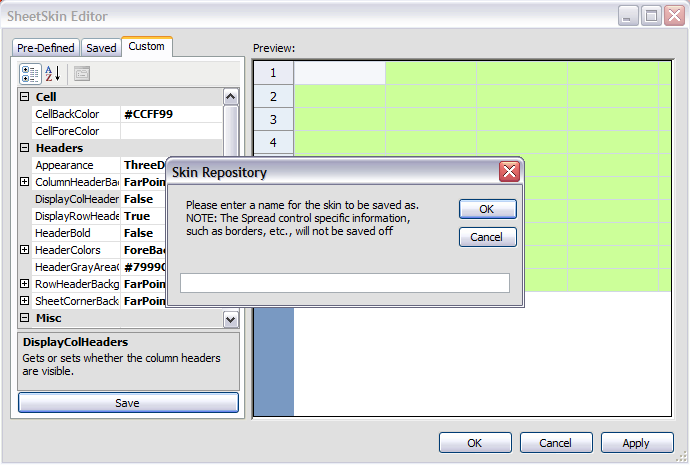
After you select OK, the file name is displayed in the list of saved custom skins in the Saved tab. You can use the custom skin again later by selecting the Saved tab and then applying the appropriate custom skin.
For more information on SheetSkin object, refer to SheetSkin in the API reference documentation.
For information on the SheetSkin editor in the Spread Designer, refer to SheetSkin Editor.
For instructions for applying the built-in sheet skins, see Applying a Skin to a Sheet.
For instructions on creating and applying your own cell-level styles, see Creating and Applying a Custom Style for Cells.
Use the SheetSkin object constructor, and set its parameters to specify the settings for the skin.
This example code sets the sheet to use a custom skin.
| C# |
Copy Code
|
|---|---|
FarPoint.Web.Spread.SheetSkin myskin = new FarPoint.Web.Spread.SheetSkin("MySkin", Color.BlanchedAlmond, Color.Bisque, Color.Navy, 2, Color.Blue, GridLines.Both, Color.Beige, Color.BurlyWood, Color.AntiqueWhite, Color.Brown, Color.Bisque, Color.Bisque, true, true, true, true, false); myskin.Apply(FpSpread1.Sheets[0]); |
|
| VB |
Copy Code
|
|---|---|
Dim myskin As New FarPoint.Web.Spread.SheetSkin("MySkin", Color.BlanchedAlmond, Color.Bisque, Color.Navy, 2, Color.Blue, GridLines.Both, Color.Beige, Color.BurlyWood, Color.AntiqueWhite, Color.Brown, Color.Bisque, Color.Bisque, True, True, True, True, False) myskin.Apply(FpSpread1.Sheets(0)) |
|