You can group cells together to form one large cell. This is called a spanning cells and the large cell that is created is called a cell span. You can add spans in headers or in data cells. Creating a span of cells creates one large cell where there had previously been several. For example, if you create a span of cells from cell B2 to cell D3, cell B2 then appears to occupy the space from cell B2 through cell D3.
The component is divided into four parts: sheet corner, column headers, rows headers, and data area. You can create spans within a part, but you cannot create a span that goes across parts. For example, you cannot span cells in the data area with cells in the row headers and you cannot span cells in the column header with the sheet corner. This topic discusses spanning cells in the data area. For more information on creating a span of header cells, refer to Creating a Span in a Header.
When you create a span of cells, the data in the first cell in the span (called the anchor cell) occupies all the space in the span. When you create a span, the data that was in each of the cells in the span is still in each cell, but not displayed. The data is simply hidden by the span range. If you remove the span from a group of cells, the content of the spanned cells, which previously was hidden, is displayed as appropriate.
The cell types of the cells combined in the span are not changed. The spanned cell takes the type of the left-most cell in the span.
You can return whether a specified cell is in a span of cells by calling the GetSpanCell method.
You can remove a span from a range of cells by calling the RemoveSpanCell method. You can remove a span range by calling this method, specifying the anchor cell of the span range to remove the range. When you remove a span range, the data that was previously in each of the cells in the span is re-displayed in the cell. The data was never removed from the cell, but simply hidden by the span range.
Note: You cannot sort a spreadsheet that has spanned cells.
For more information on allowing automatic merging of cells with identical content, refer to Allowing Cells to Merge Automatically.
For more information about the underlying span model, refer to Understanding the Span Model.
The preview on the left side of the editor shows the cells spanned.
To span cells (or remove spanning) use any of the following methods of the FpSpread component Sheets shortcut:
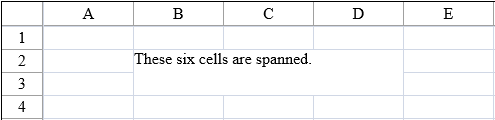
This example code defines some content then spans six adjoining cells.
| C# |
Copy Code
|
|---|---|
// Create some content in two cells. FpSpread1.ActiveSheetView.Cells[1,1].Text = "These six cells are spanned."; FpSpread1.ActiveSheetView.Cells[2,2].Text = "This is text in 2,2."; // Span six cells including the ones with different content. FpSpread1.ActiveSheetView.AddSpanCell(1, 1, 2, 3); |
|
| VB |
Copy Code
|
|---|---|
' Create some content in two cells. FpSpread1.ActiveSheetView.Cells(1,1).Text = "These six cells are spanned." FpSpread1.ActiveSheetView.Cells(2,2).Text = "This is text in 2,2." ' Span six cells including the ones with different content. FpSpread1.ActiveSheetView.AddSpanCell(1, 1, 2, 3) |
|
From the Home menu, select the merge icon.
Another way is to right-click and select Span or in the property list (in the Misc category), select either the RowSpan or ColumnSpan property and set the number to a value greater than one to span cells. To remove a span, set the value back to 1.
The Designer shows the cells spanned.