You can enter a formula into a cell or range of cells using the Formula bar and the Formula Editor in the Spread Designer.
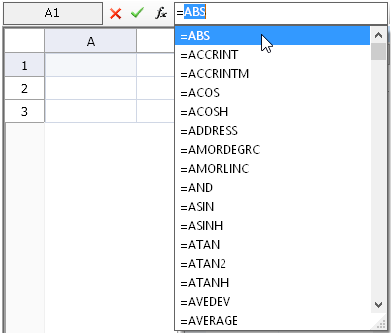
In the Formula bar, when you type an equals sign, (“=”) then the drop-down list displays all the built-in functions for you to choose from. Or if you click on the Choose Formula button on the Formula bar, the Formula Editor is displayed. The Formula Editor allows you to select any of the built-in functions.
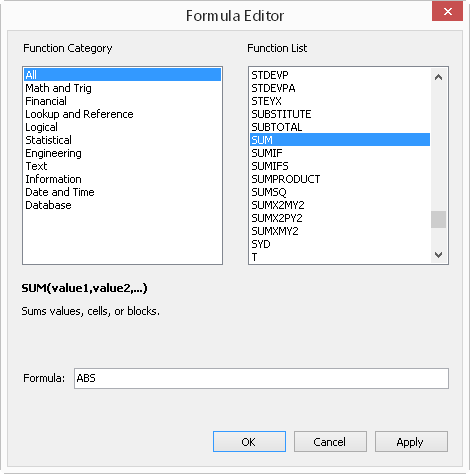
The Formula Editor gives you a list of the built-in functions that you can use and displays a brief description and syntax of the selected function. Functions are organized by category; you can select a category to show only functions of a given category. To choose a function, double-click on the function name and it appears in the Formula field. You may also type operators and constants to construct your formula.
You can enter the formula in the Formula field in the Formula Editor or in the formula box in the Formula bar. When you are done entering the formula with the Formula Editor, click Apply or OK. When you are done typing the formula in the formula box, click Enter (the check mark button). This applies the formula to the selected cell or range of cells. When you click OK or Apply, the Formula Editor evaluates the formula to see if it is a valid formula. For more information on formulas and functions, refer to the Formula Reference.
To display or hide the formula bar, from the View menu, select Formula Bar.
From the File menu choose Apply and Exit to apply your changes to the FpSpread component and exit Spread Designer.
For more tasks within Spread Designer, return to Using the Spread Designer.