The GcCharMask cell uses character boxes for the mask. The user can customize the appearance of the boxes and the input value.
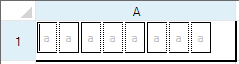
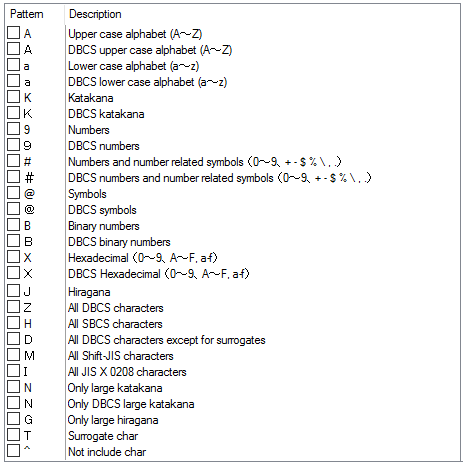
The following image displays the characters you can use for the mask (FormatString property).
You can specify a built-in collection of character boxes with the CharBoxInfoCollection class or you can customize the number and layout of the boxes with the LiteralBoxInfo, InputBoxInfo, and SeparatorBoxInfo classes. Use the AddRange method to add the built-in boxes or the custom boxes in the preferred order.
For a complete list of properties and methods for the GcCharMask cell, refer to the GcCharMaskCellType class.
This example creates a GcCharMask cell.
| C# |
Copy Code
|
|---|---|
GrapeCity.Win.Spread.InputMan.CellType.GcCharMaskCellType gc = new
GrapeCity.Win.Spread.InputMan.CellType.GcCharMaskCellType();
gc.AcceptsArrowKeys = FarPoint.Win.SuperEdit.AcceptsArrowKeys.CtrlArrows;
gc.AcceptsCrLf = GrapeCity.Win.Spread.InputMan.CellType.CrLfMode.Filter;
gc.AllowSpace = GrapeCity.Win.Spread.InputMan.CellType.AllowSpace.Wide;

gc.CharBoxes.AddRange(GrapeCity.Win.Spread.InputMan.CellType.CharBoxInfoCollection.Number1);
gc.CharBoxSpacing = 2;
gc.ClipContent = GrapeCity.Win.Spread.InputMan.CellType.ClipContent.ExcludeLiterals;

gc.ExitOnLastChar = true;
gc.FocusPosition = GrapeCity.Win.Spread.InputMan.CellType.EditorBaseFocusCursorPosition.FirstInputPosition;
gc.FormatString = "a";
gc.PaintByControl = true;
gc.RecommendedValue = "aaaaaaaaaa";
gc.ShowRecommendedValue = true;
gc.UseSpreadDropDownButtonRender = true;
fpSpread1.ActiveSheet.Cells[0, 0].CellType = gc;
fpSpread1.ActiveSheet.Columns[0].Width = 200;
fpSpread1.ActiveSheet.Rows[0].Height = 40;
|
|
| VB |
Copy Code
|
|---|---|
Dim GC As New GrapeCity.Win.Spread.InputMan.CellType.GcCharMaskCellType()
GC.AcceptsArrowKeys = FarPoint.Win.SuperEdit.AcceptsArrowKeys.CtrlArrows
GC.AcceptsCrLf = GrapeCity.Win.Spread.InputMan.CellType.CrLfMode.Filter
GC.AllowSpace = GrapeCity.Win.Spread.InputMan.CellType.AllowSpace.Wide

GC.CharBoxes.AddRange(GrapeCity.Win.Spread.InputMan.CellType.CharBoxInfoCollection.Number1)
GC.CharBoxSpacing = 2
GC.ClipContent = GrapeCity.Win.Spread.InputMan.CellType.ClipContent.ExcludeLiterals

GC.ExitOnLastChar = True
GC.FocusPosition = GrapeCity.Win.Spread.InputMan.CellType.EditorBaseFocusCursorPosition.FirstInputPosition
GC.FormatString = "a"
GC.PaintByControl = True
GC.RecommendedValue = "aaaaaaaaaa"
GC.ShowRecommendedValue = True
GC.UseSpreadDropDownButtonRender = True
fpSpread1.ActiveSheet.Cells(0, 0).CellType = GC
fpSpread1.ActiveSheet.Columns(0).Width = 200
fpSpread1.ActiveSheet.Rows(0).Height = 40
|
|
Or right-click on the cell or cells and select Cell Type. From the list, select GcCharMask. In the CellType editor, set the properties you need. Click Apply.