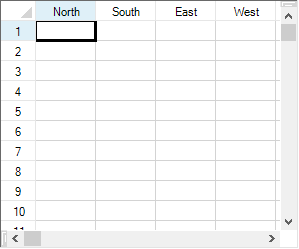
By default the Spread component displays letters in the column headers and numbers in the row headers. Besides this automatic text, you can add labels to any or all of the header cells. You can add customize the header label text, as shown in the following figure where the first four columns have custom labels.
To specify the custom text for a header label, you can use the Label property of the ColumnHeader.Column or RowHeader.Row shortcut objects or you can use the Text property of the Cells shortcut objects. For headers with multiple columns and multiple rows, you use the Text property of the Cells shortcut objects. Refer to the example in Creating a Header with Multiple Rows or Columns. For more information on the individual properties, refer to the Label property in the Column class or the Label property in the Row class.
Cells in the headers are separate from the cells in the data area, so the coordinates for cells in the headers start at 0,0 and count up from upper left to lower right within the header. The sheet corner cell is separate and is not counted when specifying header cell coordinates.
You cannot add or change custom text in cells other than changing the labels displayed when using the Properties window.
If you want to change the label display of the column header, refer to the target column in the Columns property of the ColumnHeader class, and after that, set custom text in Label property of Column class. If you want to change the label display of the row header, refer to the target row in the Rows property of RowHeader class and set custom text to Label property of Row class.
This example code sets custom text for the labels in the first four column headers.
| C# |
Copy Code
|
|---|---|
// Set custom text for columns A through D. fpSpread1.Sheets[0].ColumnHeader.Columns[0].Label = "North"; fpSpread1.Sheets[0].ColumnHeader.Columns[1].Label = "South"; fpSpread1.Sheets[0].ColumnHeader.Columns[2].Label = "East"; fpSpread1.Sheets[0].ColumnHeader.Columns[3].Label = "West"; |
|
| VB |
Copy Code
|
|---|---|
' Set custom text for columns A through D. fpSpread1.Sheets(0).ColumnHeader.Columns(0).Label = "North" fpSpread1.Sheets(0).ColumnHeader.Columns(1).Label = "South" fpSpread1.Sheets(0).ColumnHeader.Columns(2).Label = "East" fpSpread1.Sheets(0).ColumnHeader.Columns(3).Label = "West" |
|
If there is only one header row or column, click the one displayed cell with the text "<Default>".